What Is Exposure? The Three Settings That Control It, and How to Use Exposure Compensation
Exposure is the single decision that most shapes how a photograph looks, and it is the one South African light makes hardest. A camera meter is a reasonable instrument that reaches reasonable conclusions, but under a clear summer sky at altitude it will hand you a sky without colour, a face in shadow, or beach sand rendered a dull grey. None of those are faults. They are the meter doing exactly what it was designed to do, on a scene it was not designed for. This article covers what exposure is, the three settings that determine it, and how exposure compensation lets you overrule the camera when its answer is not the one you wanted.
What is exposure, and how exposure works
Exposure is the total quantity of light the image sensor receives while the shutter is open. Too much and the image is pale and washed out, with white areas holding no detail. Too little and it is dark and muddy, with shadows that contain nothing to recover.
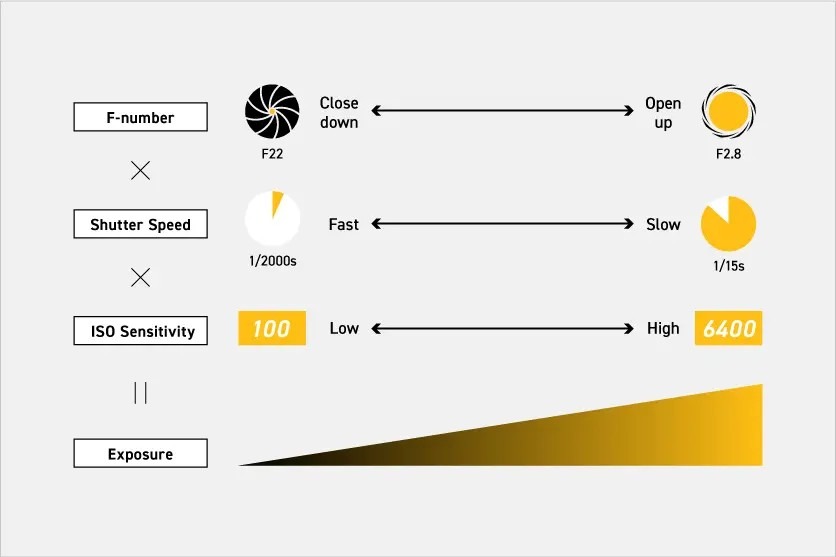
How exposure works in practice is a matter of three controls acting together. Aperture sets how wide the opening in the lens is, shutter speed sets how long the sensor is exposed, and ISO sets how much the resulting signal is amplified. Change any one and you change the brightness of the file. Change one and compensate with another and the brightness stays the same while something else about the image shifts.
That last point is the useful part. Exposure is not only a correctness question. The same scene can be made to read quite differently depending on where you place it: mist over the KwaZulu-Natal Midlands photographed a little bright becomes soft and open, while the same mist held darker becomes heavy and enclosed. Both are legitimate. Neither is what the meter would have chosen.
What is correct exposure? Metered versus chosen
Two ideas get confused here, and separating them makes everything downstream easier.
Metered exposure is what the camera arrives at on its own. Light meters are calibrated against a mid-grey reference reflecting roughly 18% of the light falling on it, which sits about halfway between black and white in perceived brightness. The camera assumes the scene in front of it averages out to that mid-grey and sets aperture, shutter speed and ISO to render it accordingly. For most ordinary scenes that assumption holds well enough.
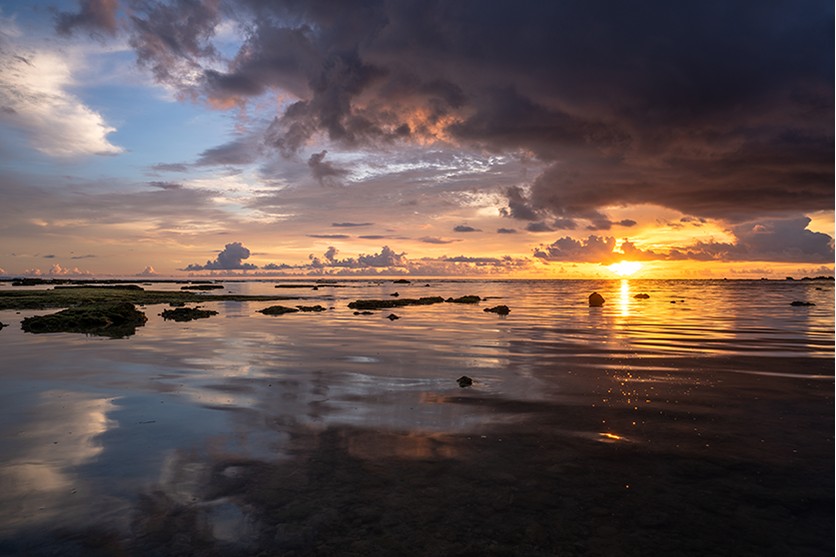
Correct exposure is the brightness you decided on. It is frequently not the metered value. Holding a Cape winelands sunset a stop below the meter's reading deepens the sky and strengthens the silhouettes along the ridge. Lifting a portrait half a stop above the reading brings luminosity into skin tones that a technically neutral exposure leaves flat. In both cases the meter was not wrong. It simply had no way of knowing what you were after.
Underexposure and low-key exposure
A low-key frame, where the darker exposure is the intention rather than a fault
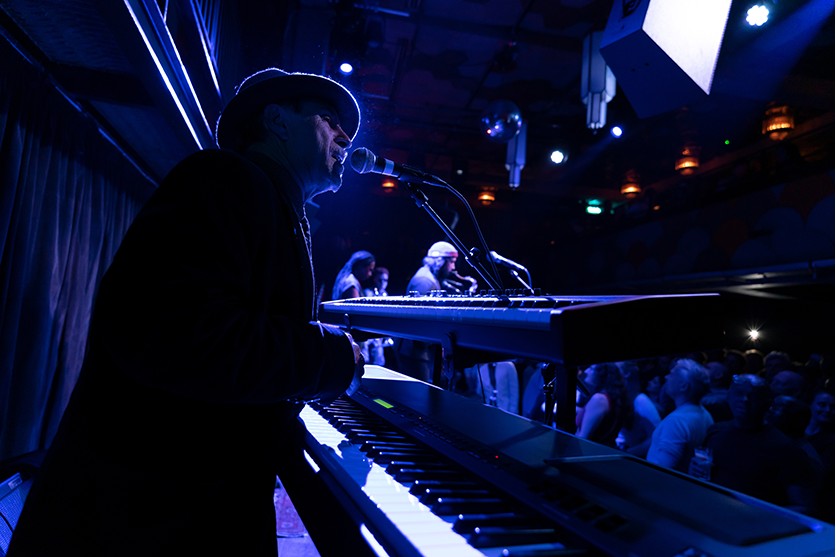
TAMRON 20-40mm F2.8 (Model A062) Focal length: 20mm Exposure: F2.8 Shutter Speed: 1/60sec ISO: 3200
Underexposure is an image that received less light than it needed. The classic case is a person photographed against a bright background, where the meter averages the whole frame, sets exposure for the bright surroundings, and leaves the face several stops too dark. The fix is to add exposure, either by changing a setting directly or by dialling in positive exposure compensation.
Low-key is the same darkness arrived at on purpose. Exposing well below the metered value and letting most of the frame fall into shadow produces a restrained, quiet image where a small lit area carries all the attention. It suits night scenes, portraits lit from one side, and any subject where you want weight rather than airiness.
At 20mm, about 30mm equivalent on an APS-C camera, the frame above takes in enough of the surroundings for the darkness itself to become a compositional element rather than simply an absence of light.
Overexposure and high-key exposure
Overexposure is an image that received more light than the sensor could hold. Midday sun on the Highveld produces it constantly: bright surfaces reach pure white, and once they do there is no colour, no texture and nothing to recover in editing. Reducing exposure or applying negative compensation brings the image back within range.
High-key is deliberate brightness. Exposing above the metered value, keeping shadows light and letting the background run pale produces an open, gentle result. It suits close work on fynbos and proteas, and portraits of children, where a slightly brighter exposure reads as warmth rather than as error. The technique only works when you keep the important highlights just short of clipping, so check the histogram rather than trusting the rear screen.
How to determine exposure: the three settings that control it
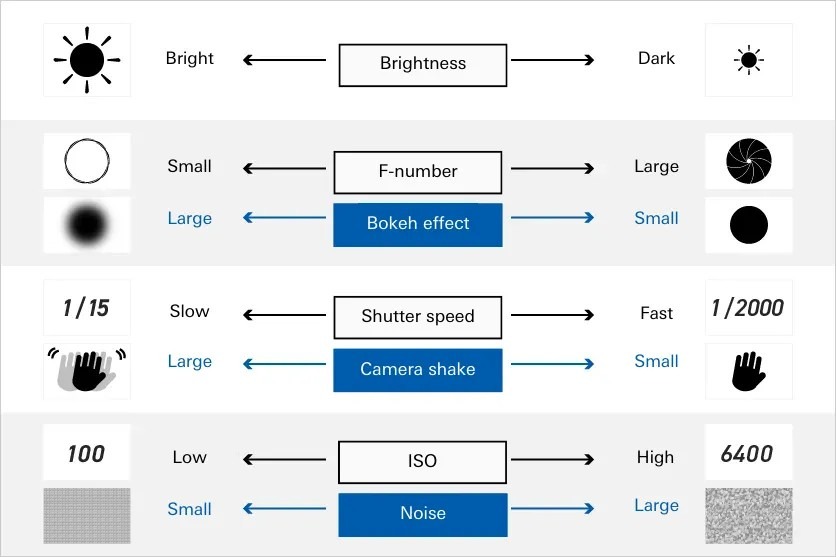
Exposure comes down to balancing aperture, shutter speed and ISO. Each admits or amplifies light, and each has a side effect that has nothing to do with brightness. Knowing the side effects is what turns exposure from arithmetic into a choice.
Aperture and exposure: what the F-number does
The F-number describes the size of the lens opening relative to its focal length. It is calculated by dividing focal length by the effective diameter of the aperture, so F equals f divided by D. Because it is a ratio with the diameter on the bottom, a smaller number means a larger opening. F2.8 lets in considerably more light than F8.
The relationship between aperture and exposure is straightforward: open up and the image brightens, stop down and it darkens. Each full stop, from F2.8 to F4 to F5.6 and so on, halves the light.
The side effect is depth of field. A wide aperture such as F2 or F2.8 gives a shallow band of sharpness, which separates a portrait subject from its background. Stopping down to F8 or F11 extends that band, which is what you want when fynbos in the foreground and a Cape mountain line behind it both need to hold detail.
Sensor format matters here. On an APS-C camera you get roughly one stop more apparent depth of field than full frame at the same aperture and equivalent framing, so F5.6 on APS-C renders approximately as F8 does on full frame. Exposure itself is unaffected — F5.6 admits the same light on any format — but the background separation differs, which is worth knowing if you are trying to reproduce a look.
Shutter speed and exposure time
Shutter speed, also called exposure time, is how long the sensor is exposed to light. A fast shutter admits less light and freezes movement. A slow shutter admits more and allows both subject movement and camera shake to register.
For sport, a shutter speed of 1/500 second handles most cricket and school athletics, while 1/1000 second or faster is more reliable for rugby, where players change direction without warning. Panning with a moving subject at 1/60 to 1/125 second gives a sharp subject against streaked surroundings, which conveys speed better than a frozen frame does.
In low light the range runs the other way, from 1/60 second down through 1/15, 1/4 and on to full seconds. Anything at or below 1/60 second handheld is likely to show shake unless the lens or body is stabilised, and exposure times measured in seconds require a tripod without exception.
ISO and exposure
ISO is widely described as the sensor's sensitivity to light, and that description is wrong. A sensor's response to photons is fixed and does not change. What ISO changes is amplification: the signal read off the sensor is boosted, and the noise already present in it is boosted along with it. That is why high ISO images look grainy and why shadows degrade first.
The practical order of operations is to keep ISO as low as the scene allows, reaching for it only after aperture and shutter speed have run out of room.
South African conditions change the usual guidance. Outdoors on a clear day, particularly on the Highveld, ISO 100 is generally both the floor and the ceiling — the light is intense enough that the more common problem is running out of shutter speed at a wide aperture rather than needing more sensitivity. Indoors, in the last hour before sunset, or under a heavy Cape winter sky, ISO 800 to 3200 is the working range, and modern sensors handle it well enough that a slightly noisy sharp frame beats a clean blurred one every time.
Shooting modes and how each one handles exposure
Every mode on the dial is a different division of labour between you and the camera's exposure system.
Program mode sets both aperture and shutter speed automatically while leaving ISO and exposure compensation to you. It is more useful than its reputation suggests when conditions are changing faster than you can keep up with. Manual mode hands you all three settings, which is what you want when the meter cannot be trusted at all — high-contrast scenes, nightscapes, and the Karoo night sky, where a meter reading a mostly black frame will overexpose wildly. The two semi-automatic modes below sit between these and cover most situations.
Aperture priority mode
You set the aperture, the camera sets the shutter speed to match. This is the most widely used mode among experienced photographers, because aperture is usually the setting with the most consequence for how an image looks.
It is worth being clear about what it is for, since it gets described as the mode for background blur. That is only half of it. Aperture priority is the mode for controlling depth of field in either direction — wide open at F2.8 to isolate a subject, or stopped down to F11 for a landscape where everything from the nearest grass to the far ridge must hold. Both are aperture decisions, and both are reasons to use this mode.
Watch the shutter speed the camera selects. In falling light it will drop without announcement, and the first sign of trouble is often a run of softly blurred frames.
Shutter priority mode
You set the shutter speed, the camera sets the aperture. This is the mode for anything where movement is the point and the exposure must not interfere with freezing or blurring it.
Sport is the obvious application. Set 1/1000 second for rugby, 1/500 for cricket, and let the camera find the aperture. The limitation is that the camera can only open up so far, so on a heavily overcast afternoon your chosen shutter speed may be more than the aperture can support. When that happens the camera either underexposes or warns you, and the answer is to raise ISO rather than to slow the shutter.
Shutter priority also serves deliberate blur: a second or two on a tripod to smooth moving water, or 1/30 second to let a passing subject streak through an otherwise static frame.
What is exposure compensation?
Exposure compensation shifts the camera's metered exposure up or down by an amount you choose, without taking you out of an automatic mode. It is the fastest brightness adjustment available, and on most cameras it sits on a dedicated dial or a button marked with a plus and minus symbol.
The scale is measured in EV, or exposure value, where one EV equals one stop. Setting +1 EV doubles the light and brightens the image by one stop; -1 EV halves it. Most cameras allow adjustment in one-third stop increments, so +2/3 EV is available when a full stop is too much, and the usual working range runs from about -3 to +3 EV.
It works in program, aperture priority and shutter priority mode, where the camera adjusts whichever setting it controls to achieve the shift. In manual mode there is nothing for it to do, since you are already setting all three values yourself. The setting is also sticky on most bodies: dial in +1 EV for a backlit subject, and it stays there for every frame afterwards until you reset it, which has cost more photographers a good sequence than almost any other control on the camera.
Scenes where exposure compensation is needed
The camera's meter fails predictably. Once you can recognise the situations, applying compensation becomes a reflex rather than a matter of reviewing frames and trying again. The two directions below cover most cases.
Positive exposure compensation
Adding exposure to hold a subject that the meter has rendered too dark
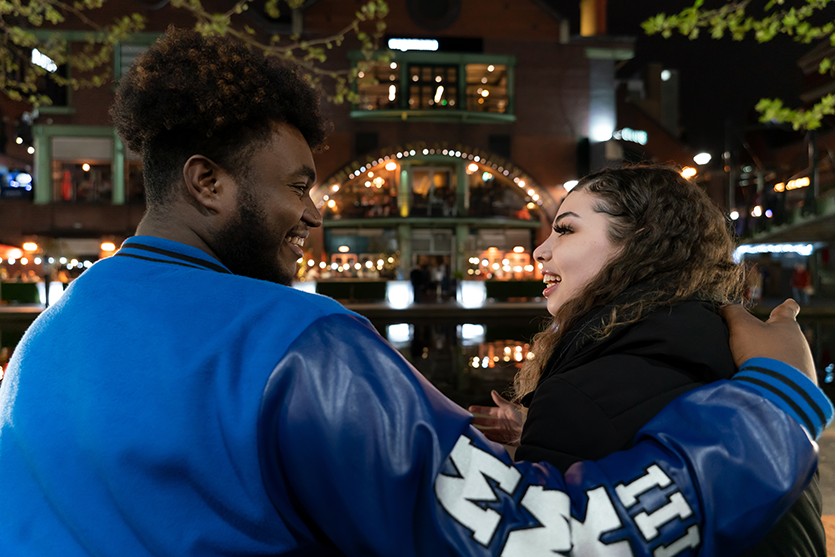
TAMRON 20-40mm F2.8 (Model A062) Focal length: 21mm Exposure: F2.8 Shutter Speed: 1/40sec ISO: 2000
Positive compensation brightens an image the meter has set too dark. The most common case is a subject against a bright background: the meter averages the frame, exposes for the brightness, and leaves the face underexposed. Adding +1 to +2 EV restores natural skin tones, at the cost of a background that runs brighter than it strictly should.
Predominantly white scenes need it just as reliably, and the reason is worth understanding properly. The meter is calibrated to render an average scene as mid-grey. Fill the frame with something white and the meter still tries to make it mid-grey, so it reduces exposure and you get grey sand, grey walls, grey cloud. It is the absence of compensation that causes this, not the presence of it.
In South Africa the white subjects that trigger it are everywhere. Sun-bleached sand on an Atlantic beachfront. Whitewashed Cape gable walls at midday. Towering white cloud building ahead of a Highveld thunderstorm. A salt pan in hard light. Snow, where you find it in the Drakensberg in winter, behaves identically. All of them need +1 to +2 EV to record as the colour they actually are.
The same applies in reverse to the light itself: a scene lit softly and evenly, such as the Midlands under mist, often benefits from a small positive adjustment to keep it feeling open rather than heavy.
Negative exposure compensation
Reducing exposure to protect highlights and hold colour in the sky

TAMRON 28-75mm F2.8 G2 (Model A063) Focal length: 75mm Exposure: F2.8 Shutter Speed: 1/5000sec ISO: 200
Negative compensation darkens an image the meter has set too bright, and its first job is protecting highlights. Clipped highlights cannot be recovered, so where the choice is between losing detail in the bright areas and losing it in the shadows, reduce exposure. Shadows retain recoverable information; blown highlights do not.
It also deepens colour. Bright sun tends to wash a blue sky towards pale, and -1/3 to -1 EV restores saturation. For sunset and sunrise work, holding a stop below the meter strengthens the colour gradient and keeps foreground elements as clean silhouettes rather than muddy half-tones.
Dark subjects need it for the mirror image of the white-subject problem. Photograph a black gate, a dark-painted vehicle or an animal with dark fur and the meter tries to lift it to mid-grey, returning something washed out and flat. Applying -1 to -2 EV keeps the blacks black.
There is a creative use too. At 75mm, about 112mm equivalent on APS-C, a tightly framed subject held a stop below the meter reads as quiet and considered. The same approach suits monochrome architectural work — the Art Deco frontages around central Johannesburg respond well to a darker exposure that pushes the contrast between the stonework and its shadows.
Exposure settings and compensation by scene
The exposure settings below are starting points rather than rules. Shoot one, check the histogram, and adjust from there.
Backlit scenes
Working with the light behind the subject rather than against it
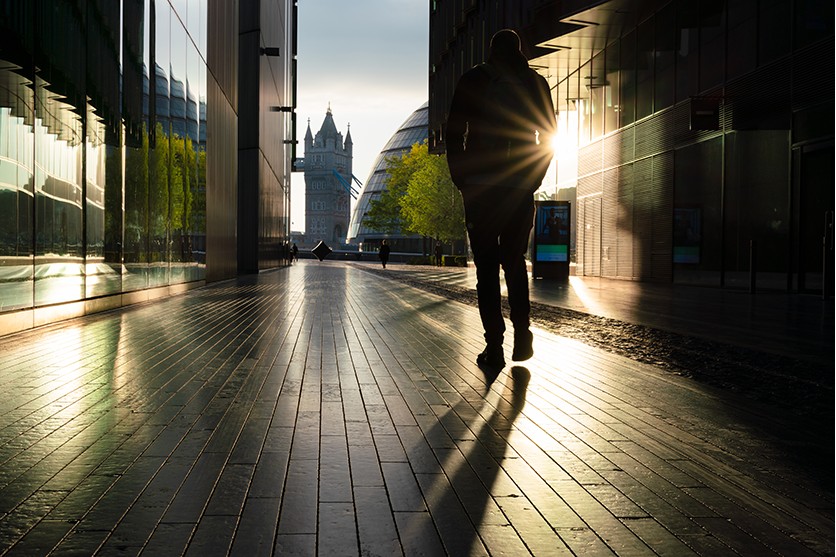
TAMRON 20-40mm F2.8 (Model A062) Focal length: 40mm Exposure: F13 Shutter Speed: 1/100sec ISO: 100
Backlighting forces a decision, because you cannot hold both the light source and the shadowed subject. Decide which one matters.
If the subject matters, apply +1 to +2 EV so that a face or the near surface of an object is properly exposed, and accept a bright background. Spot metering off the subject achieves the same end and is more precise when the background brightness is changing.
If the shape matters, go the other way. Negative compensation of -1 to -2 EV renders the subject as a clean silhouette against a sunrise or sunset sky and keeps the colour gradient intact. At 40mm, about 60mm equivalent on APS-C, there is enough reach to place a single figure or tree against the sky without extraneous detail around it.
Bright light and harsh midday sun
Holding detail in bright surfaces under hard overhead light
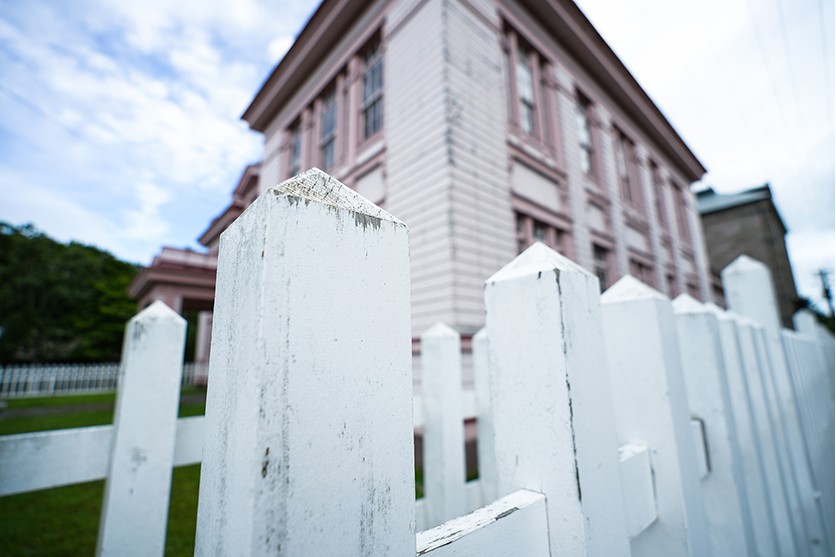
TAMRON 17-50mm F4 (Model A068) Focal length: 17mm Exposure: F4 Shutter Speed: 1/500sec ISO: 100
This is the condition that costs South African photographers more frames than any other. Clear-sky sun at altitude, particularly between about ten and three, produces a brightness range that exceeds what a sensor records in one frame, and the meter's averaging almost always sacrifices the highlights.
Apply -1/3 to -1 EV as a default in these conditions, and more when the sky or a white building occupies much of the frame. Keep ISO at 100 and let shutter speed carry the exposure.
Reflective surfaces need more still. Wet sand on a Durban beachfront, glass frontages, light-coloured paving and pale walls all bounce light back into the meter, which responds by darkening everything else. Compensation of -1 EV preserves detail in those bright areas while leaving the shadows usable. At 17mm, roughly 25mm equivalent on APS-C, a wide frame will almost inevitably include some of these surfaces, which makes the adjustment routine rather than occasional.
Shooting in low light
Balancing the three settings when there is not much light to work with
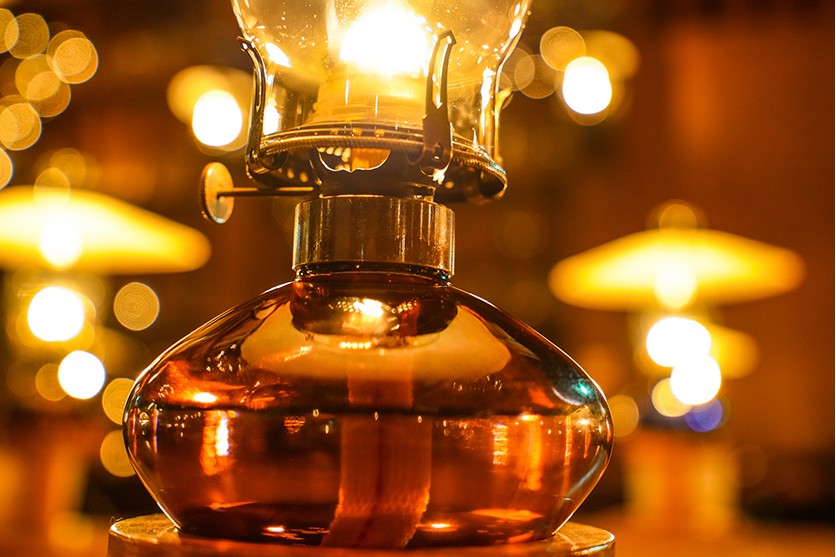
TAMRON 17-50mm F4 (Model A068) Focal length: 50mm Exposure: F4 Shutter Speed: 1/6sec ISO: 3200
Indoors, or in the half hour after sunset, exposure runs short and the three settings have to be traded off against each other. Work in order: open the aperture as far as the depth of field allows, then slow the shutter as far as steadiness allows, then raise ISO to cover what remains. Positive compensation of +1/3 to +1 EV is often needed on top, because dim scenes read as darker than mid-grey to the meter and it will lift them more than you want.
As a guide for handheld work, keep the exposure time no longer than one divided by the focal length — 1/50 second at 50mm. Image stabilisation extends this. Tamron's system is branded VC, or Vibration Compensation, and comparable implementations exist in lenses and camera bodies; with it engaged, two to three stops beyond the usual limit becomes workable, so 1/6 second at 50mm as in the frame above is achievable handheld with care.
Stabilisation corrects camera movement, not subject movement. If your subject is moving, shutter speed is the only answer.
Night photography
A long exposure at night, with the camera on a tripod and ISO held low
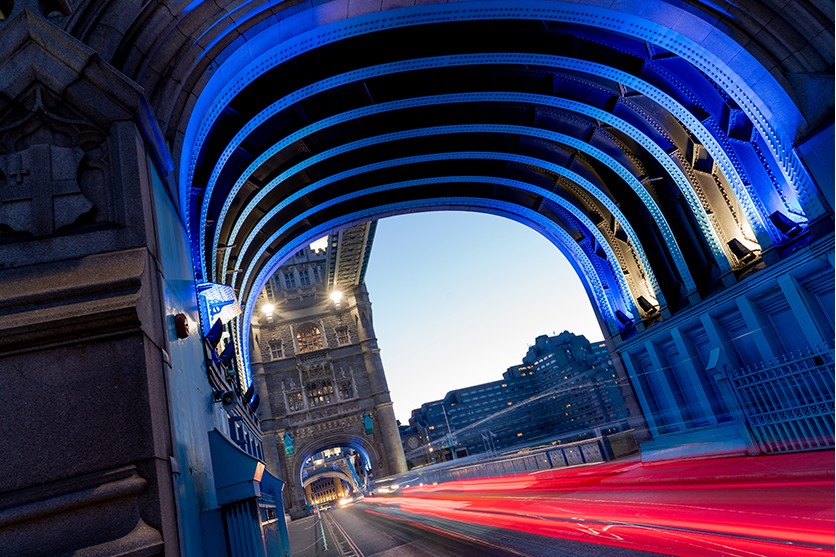
TAMRON 20-40mm F2.8 (Model A062) Focal length: 24mm Exposure: F7.1 Shutter Speed: 2.5sec ISO: 100
Night scenes contain the widest brightness range you will meet: bright point sources against areas with almost no light at all. Put the camera on a tripod, hold ISO at 100 for clean files, and let the exposure time do the work. Two to ten seconds covers most lit urban scenes.
Compensation runs positive here more often than people expect. A frame that is mostly dark reads as underexposed to the meter, which then overexposes to compensate, so check the histogram rather than assuming. Where dim architectural or street lighting is the subject, +1/3 to +1 EV keeps it from going murky.
Light trails from traffic need 10 to 30 seconds. Stop down to F8 or F11 to get there without overexposing the fixed lights in the frame, and choose an elevated position — a pedestrian bridge over a highway, or a rise above a coastal road on the Durban or Cape Town seafront — so the trails read as continuous lines rather than fragments. A remote release or the two-second timer prevents the shake that pressing the shutter introduces at these exposure times.
The Karoo night sky deserves its own mention, since it is among the darkest accessible skies anywhere. Here the meter is useless and manual mode is the only sensible approach: start at F2.8, 20 seconds and ISO 3200, then adjust. Keep exposure times below about 20 seconds at wide focal lengths, or the stars record as short trails rather than points.
Taking control of exposure
Exposure is three settings, one meter and a compensation dial that lets you disagree with it. Aperture controls depth of field, exposure time controls movement, ISO controls amplification and the noise that comes with it, and any of the three will change brightness. Once the side effects are familiar, you choose settings by what you want the image to do rather than by what produces a neutral result.
A practical progression: shoot in aperture priority with exposure compensation to hand, and learn to recognise the scenes where the meter will be wrong — bright sand, white walls, dark subjects, anything backlit. Check the histogram rather than the rear screen, which is misleading in bright light. Move to manual for night and high-contrast work where the meter has nothing useful to contribute. That covers almost everything you will photograph in this country, in light that is more demanding than most.