| September 18, 2026
 South Africa's #1 Mobile Protection Brand
South African light is not gentle. On the Highveld the sun climbs high and hard from a thin atmosphere more than 1,400 metres above sea level, while the Cape can hand you a week of flat winter overcast, and the KwaZulu-Natal coast softens everything through a standing haze of humidity. Portrait photography here is less about finding an interesting face than about learning to read the light falling on it. This guide works through the fundamentals — lens choice, exposure, portrait composition and how to shape light — against the conditions you will actually be shooting in.

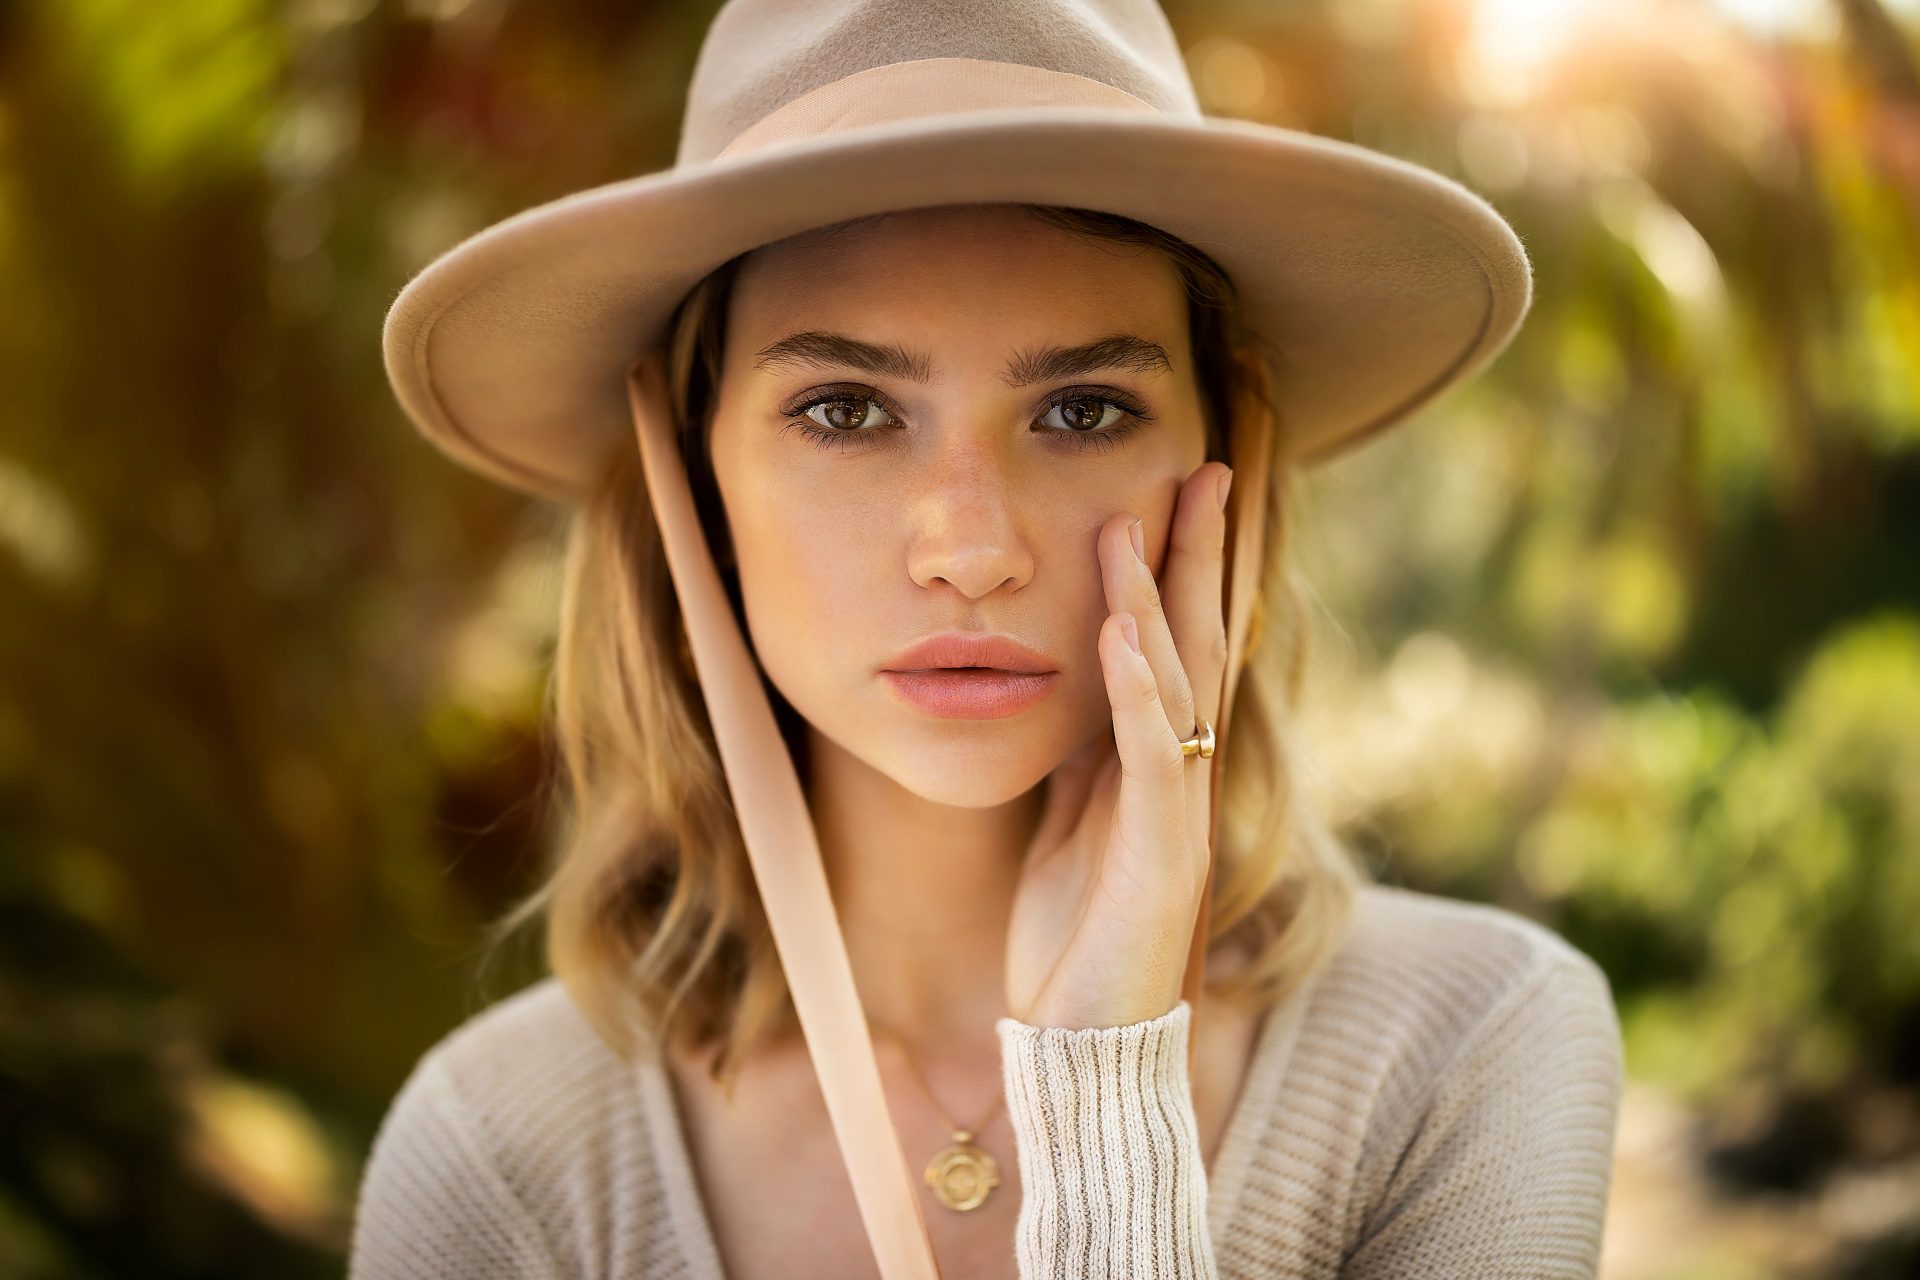
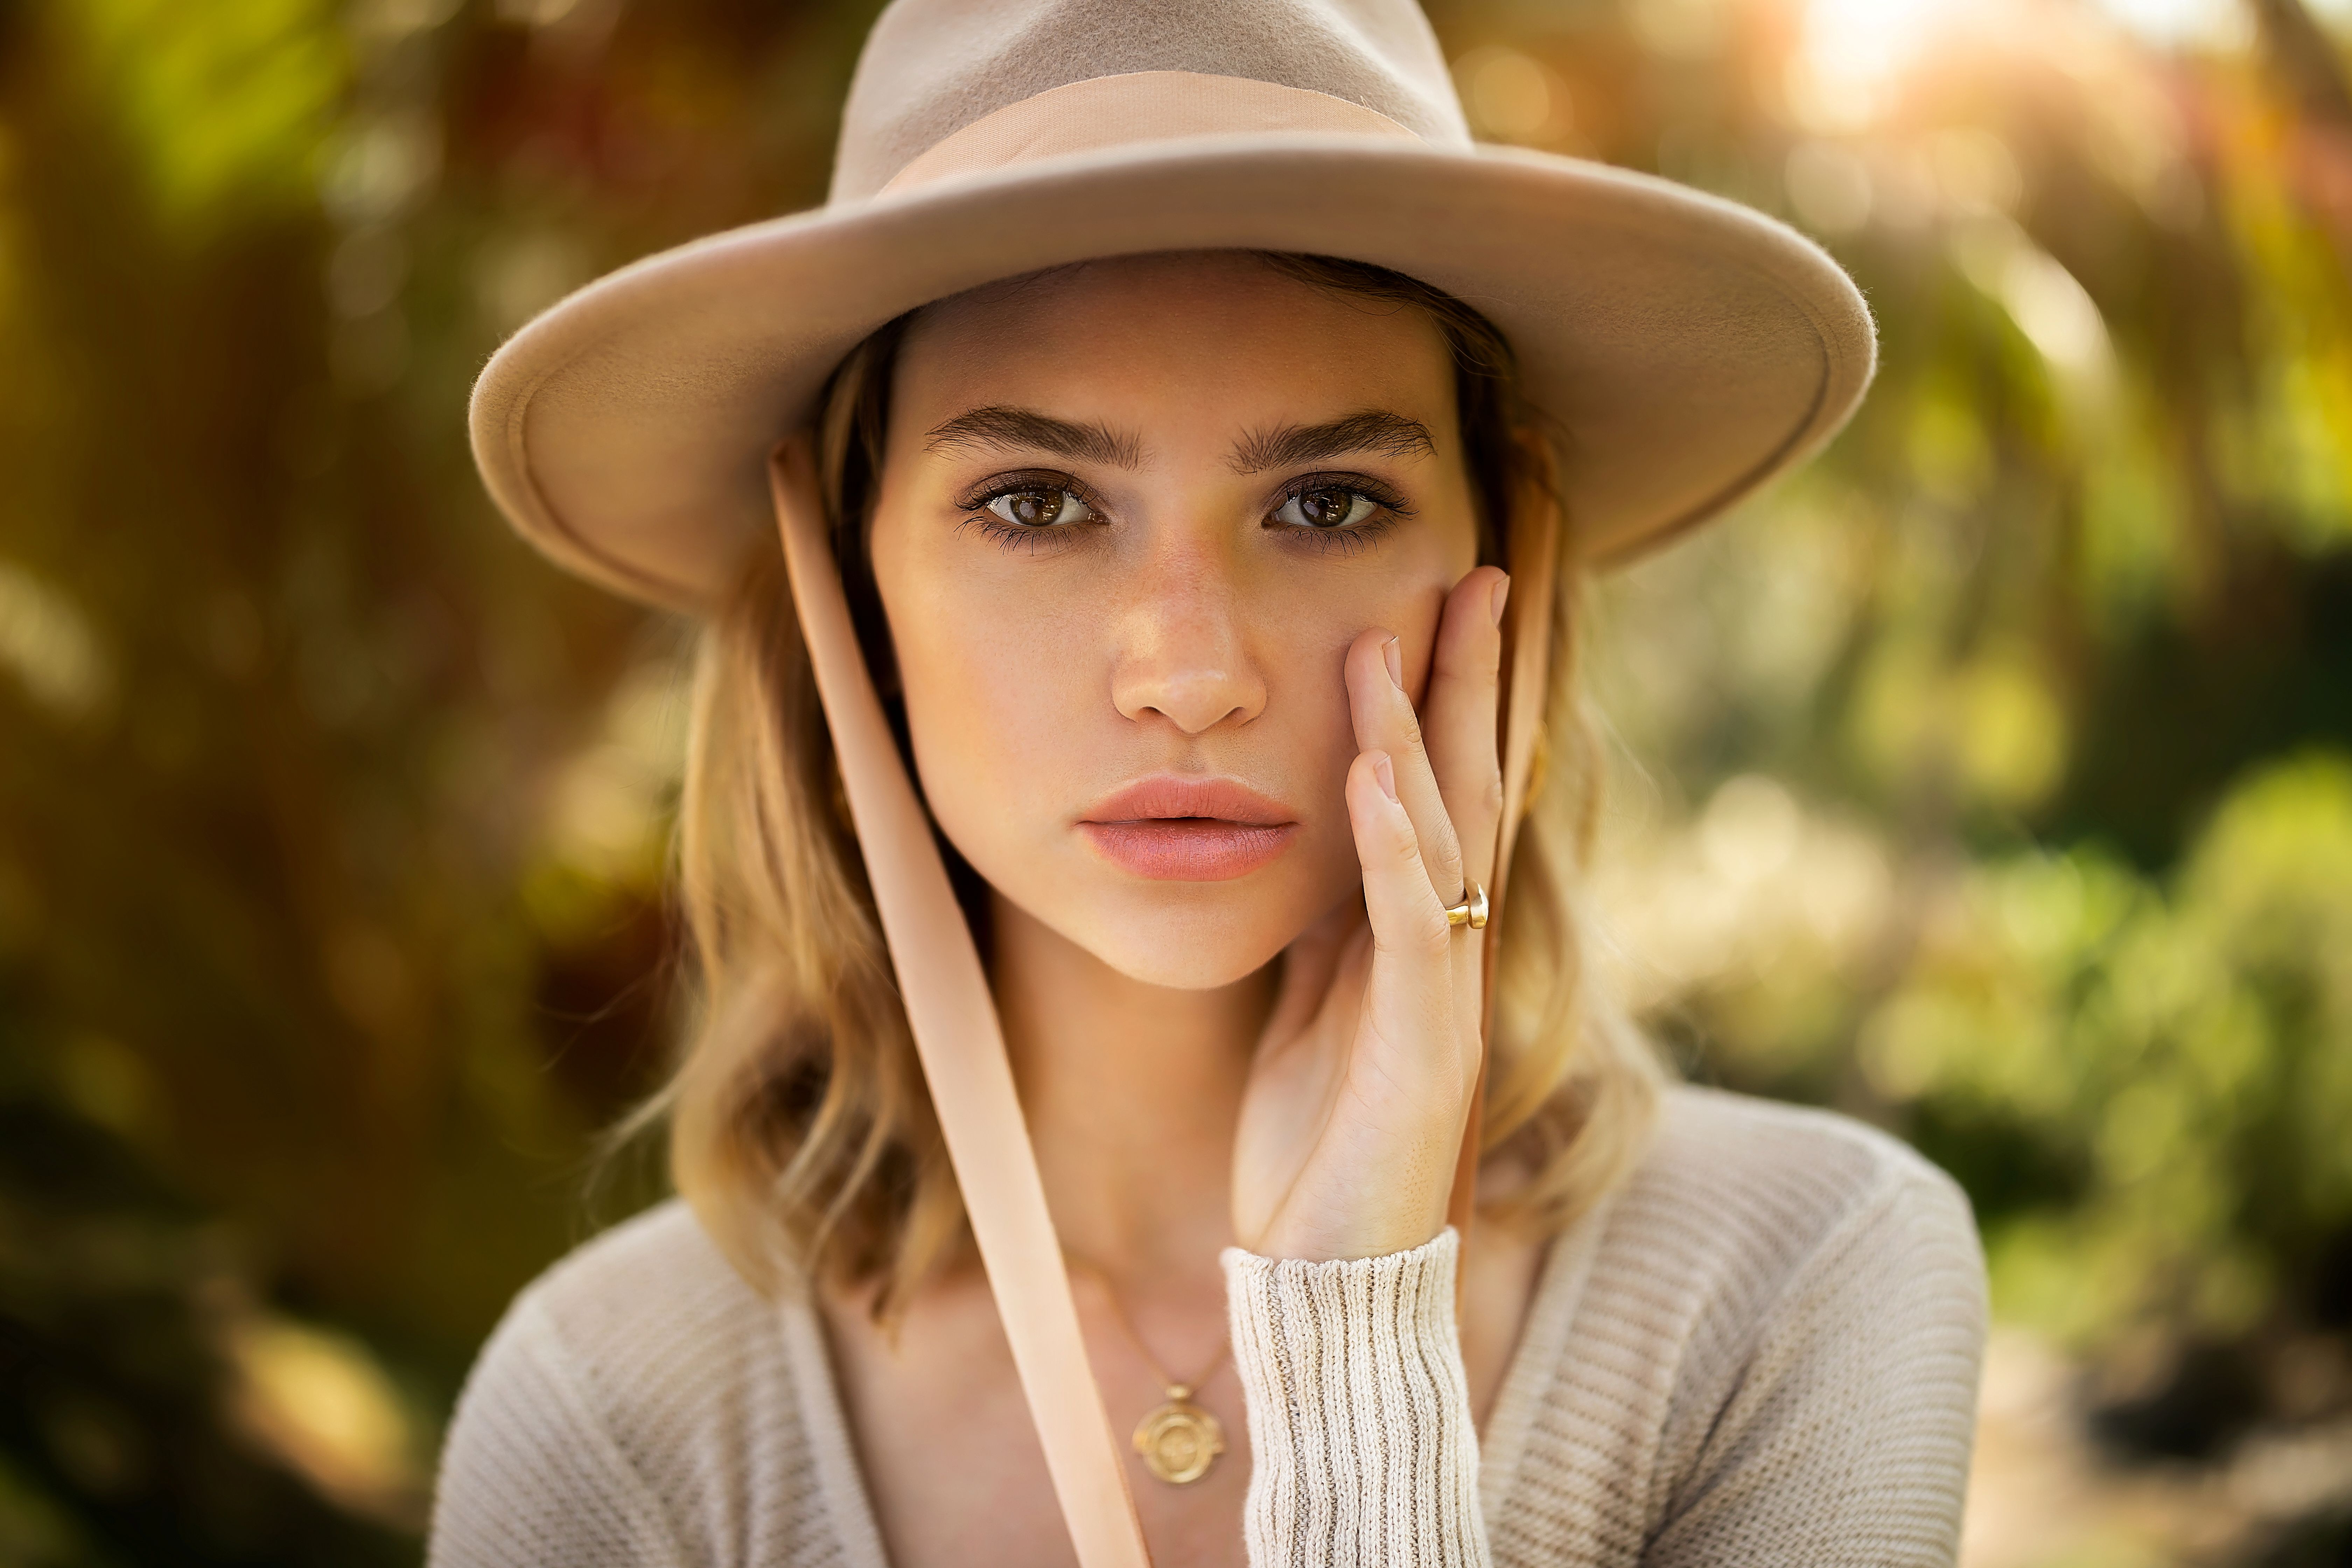
TAMRON 70-180mm F2.8 G2 (Model A065) Focal Length: 180mm Exposure: F2.8 Shutter Speed: 1/30sec ISO: 800
In photographic terms, a portrait is simply an image in which a person is the subject. The word carries a certain formality in English — it suggests a studio, a commissioned sitting, a framed print on a wall — and that formality is misleading. A photograph of your sister on the stoep in late afternoon light is a portrait. So is a picture of a friend at a braai, or a child squinting into the glare at the shoreline. The genre is far broader and far less precious than the word implies, and a great many of the strongest portrait photos ever made were of people the photographer already knew well.
Portraits and snapshots both put a person in front of a lens, so where does one end and the other begin? The difference is intent rather than equipment.
A portrait is planned. The location is chosen, the light is considered, and the pose and framing are worked out between photographer and subject — whether that means an hour of preparation or thirty seconds of "stand here, turn your shoulders, look past me". It functions as a small session, however informal.
A snapshot is the opposite. It is taken on impulse, capturing a moment as it happens, and the subject is not necessarily a person at all. Landscapes, buildings, animals and street scenes all fall within it.
South Africa has a strong culture of the planned sitting well beyond professional studios. The matric dance generates more considered portraiture in a single spring than almost anything else on the calendar. Graduation season does much the same. Family milestone shoots — a new baby, a grandparent's birthday, a reunion that brings relatives in from three provinces — are increasingly booked with a photographer rather than left to whoever happens to be holding a camera.
Put simply, portraits are deliberate and snaps are spontaneous. Neither is the better photograph.
Several things separate a competent portrait from a memorable one, and none of them are complicated. Work through these fundamentals and the improvement is usually immediate.
A portrait communicates distance and relationship. How close the viewer feels to the subject, how much of the surrounding world is admitted into the frame, how compressed or expansive the space appears — all of this is decided largely by focal length before you have touched a single setting.
Broadly: a wide-angle lens of roughly 35mm or shorter pulls the environment into the picture and exaggerates perspective, which is useful when the location is part of the story. A standard range of about 35mm to 50mm sits closest to natural human seeing and is the easiest starting point for anyone new to the genre. A telephoto of 85mm and longer isolates the subject, smooths the background into a wash of tone and compresses distance in a way that tends to flatter faces.
The detailed breakdown of what each range gives you appears further down, under portrait focal length.
There is also the choice between a zoom and a prime. A zoom covers a spread of focal lengths in one barrel, so you can move between a full-length frame and a tight head-and-shoulders without breaking the flow of a session — which matters more than it sounds when you are trying to keep someone relaxed. A prime is fixed, usually faster, and often optically simpler. You move your feet instead of the zoom ring, which is an excellent way to develop an instinct for working distance.
Exposure shapes the mood of a portrait as much as it controls its brightness. These are the settings that matter and how to think about each one.
Aperture priority is the sensible default. You set the f-number, the camera works out a shutter speed to match, and you keep direct control over the one variable that most affects how a portrait looks — how much of the background stays legible.
Once that becomes second nature, manual mode is worth moving to. Setting every exposure factor yourself is slower, but it stops the camera from quietly changing its mind between frames when your subject shifts against a bright or dark background.
An aperture close to wide open — somewhere between F2 and F4 — gives a shallow plane of focus and a soft, unstructured background. The subject separates cleanly and the eye has nowhere else to go.
Stopping down to between F5.6 and F11 does the reverse. Use it when you are photographing more than one person and need everyone sharp, or when the setting itself is worth reading.
One local caveat: on the Highveld in the middle of a summer day, the light is strong enough that F2 at base ISO can run past your camera's fastest shutter speed altogether. If you want a wide aperture in those conditions, use a neutral density filter, move into open shade, or shoot in the first and last hours of daylight instead.
Shutter speed governs both exposure and sharpness. As a general working range, 1/60 sec to 1/250 sec will hold a subject who is breathing, blinking and shifting their weight without introducing blur.
The right figure depends on focal length, how much your subject is moving and how much light you have. The image opening this article was made at 180mm and 1/30 sec — well below what the focal length would normally allow — which was only possible because of in-lens image stabilisation. Tamron's VC system compensates for hand movement at the lens, and the benefit is most obvious exactly here: long focal lengths and low light.
Leave ISO on auto to begin with and adjust once you can see what the light is doing.
Outdoors on a clear day, ISO 100 to ISO 400 is ample. Under Cape winter overcast or indoors away from a window, something in the region of ISO 1600 to ISO 3200 keeps shutter speeds usable. The trade-off is noise, which rises with sensitivity and shows first in the smooth mid-tones of skin.
Exposure compensation is the other half of this. Beyond correcting the meter, it is a creative control: deliberately overexposing produces a bright, airy, high-key result that suits open, cheerful shoots.
It is worth understanding how your meter behaves around faces. Matrix and evaluative metering read the whole scene, so a subject with deeper skin tones photographed against a bright sky is likely to be rendered too dark, and a subject with lighter skin against a dark background too bright. Meter off the face using spot or centre-weighted metering, apply exposure compensation, and check the histogram rather than the rear screen — screen brightness is unreliable outdoors in South African sun. The priority is retaining detail in the brightest parts of the skin, since those cannot be recovered afterwards. Mixed lighting deserves the same attention: a room lit by warm interior bulbs on one side and cool daylight through a window on the other will defeat auto white balance, so set it manually or shoot raw and resolve it later.
Knowing a few reliable arrangements makes portrait composition quicker and steadier. Treat these as starting positions rather than rules, and depart from them once you can see why.
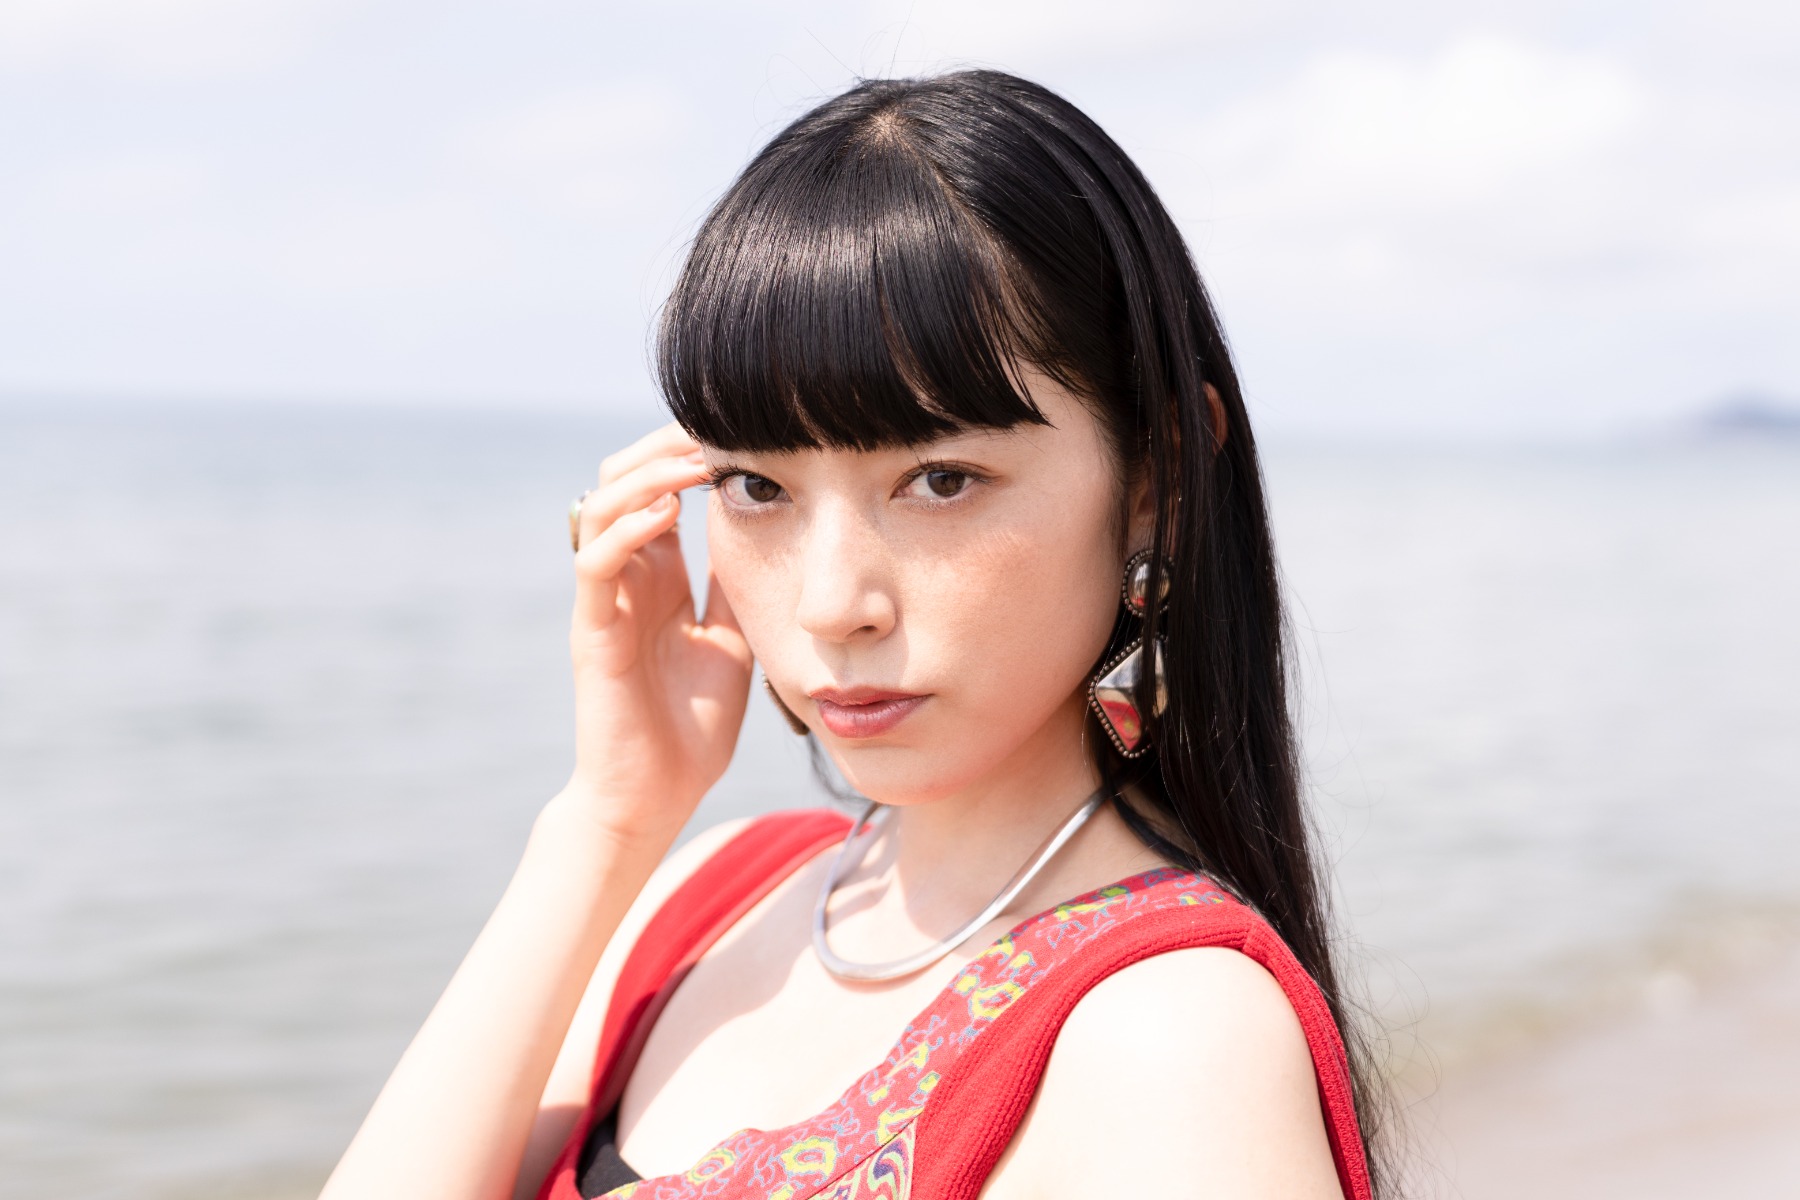
TAMRON 35-150mm F2-2.8 (Model A058) Focal Length: 35mm Exposure: F2 Shutter Speed: 1/3200sec ISO: 100
Placing the subject squarely in the middle of the frame is the most direct arrangement available. It is confident, uncomplicated and difficult to misread.
It is also the easiest to make dull, because a centred subject in a busy frame simply competes with everything around it. Strip the background down — a plain wall, open sky, a wash of out-of-focus tone — and the centred approach becomes powerful rather than plain. In portraiture specifically, it suits any picture that is really about the eyes and the expression.
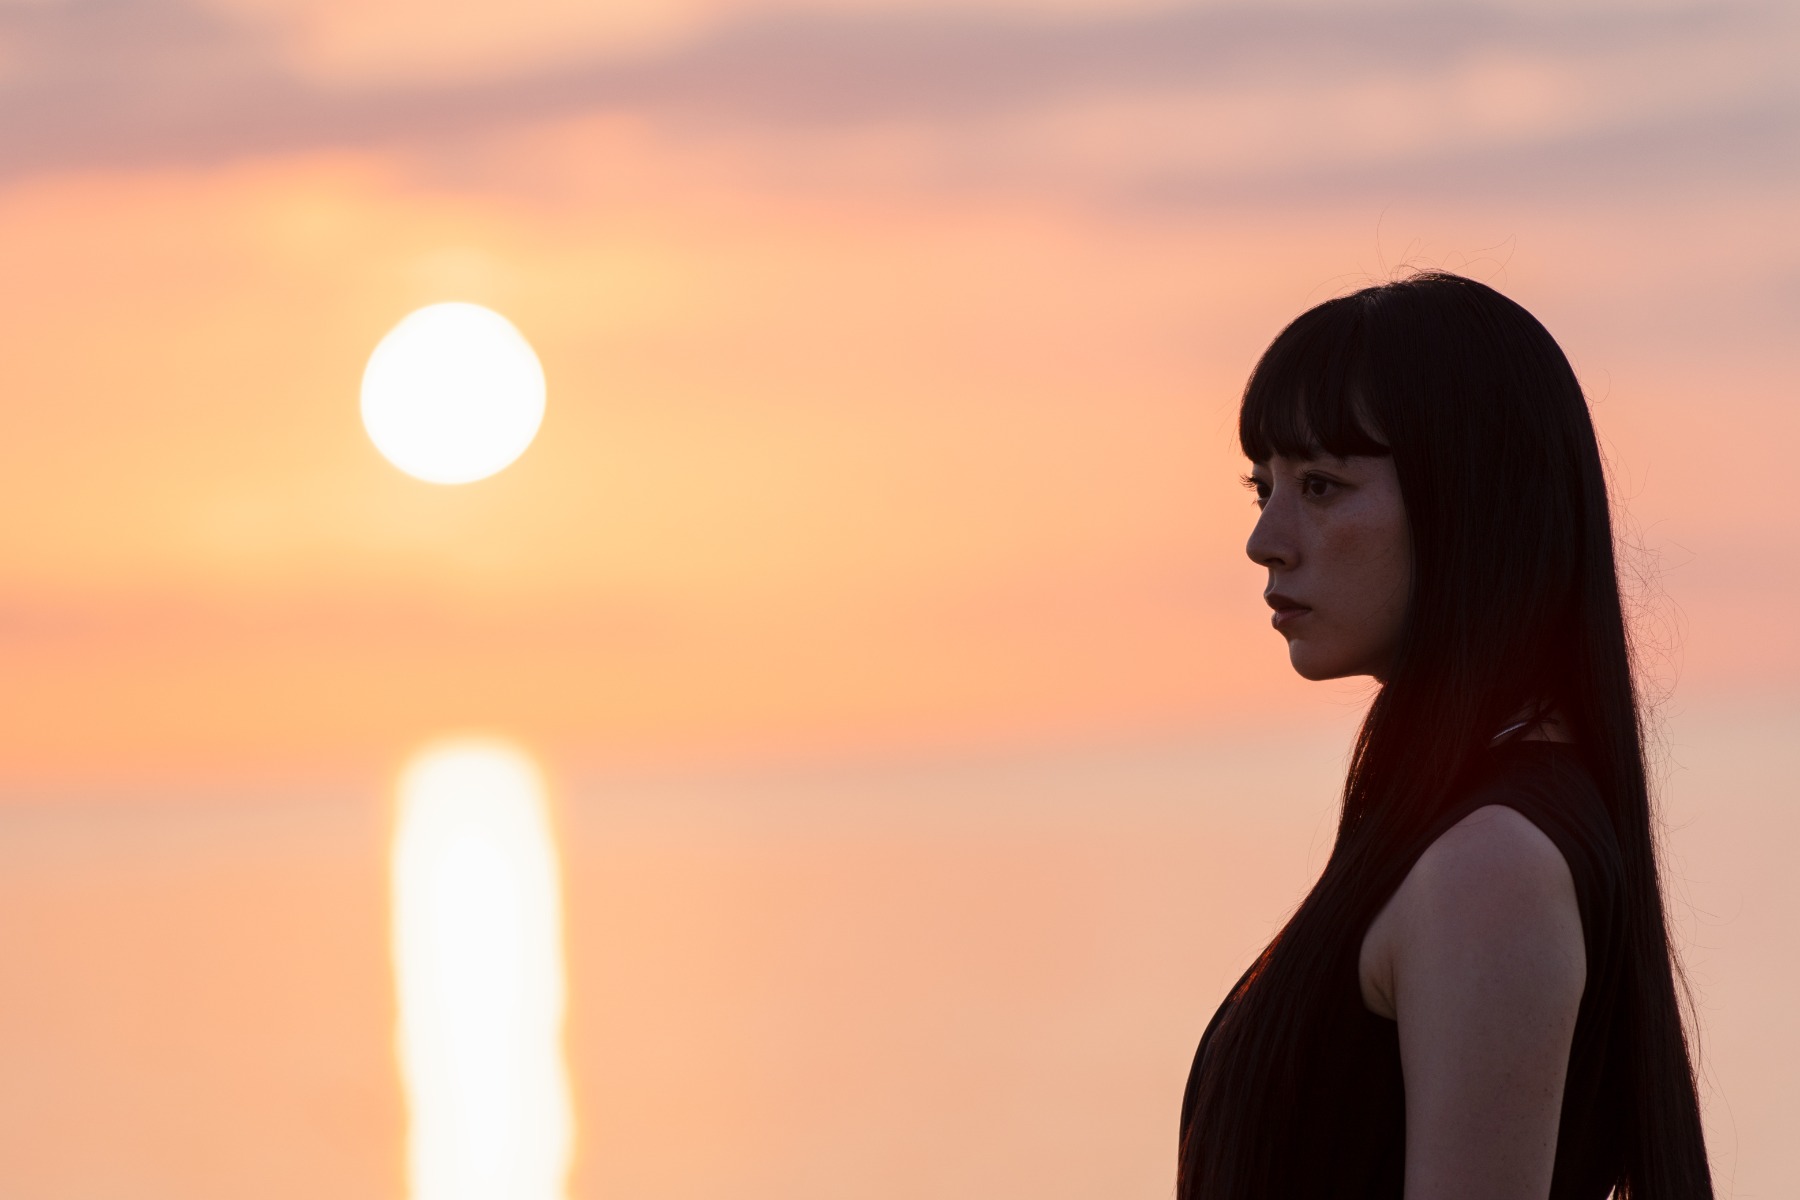
TAMRON 35-150mm F2-2.8 (Model A058) Focal Length: 150mm Exposure: F2.8 Shutter Speed: 1/640sec ISO: 100
Divide the frame into a three-by-three grid and place your subject on or near one of the intersections. The result is balanced without being static, and it leaves room for the setting to contribute.
Placing a person on the left or right third and letting the remaining two-thirds carry the background works particularly well on the coast, where a clean horizon line can sit along one of the horizontal divisions and hold the whole frame together.
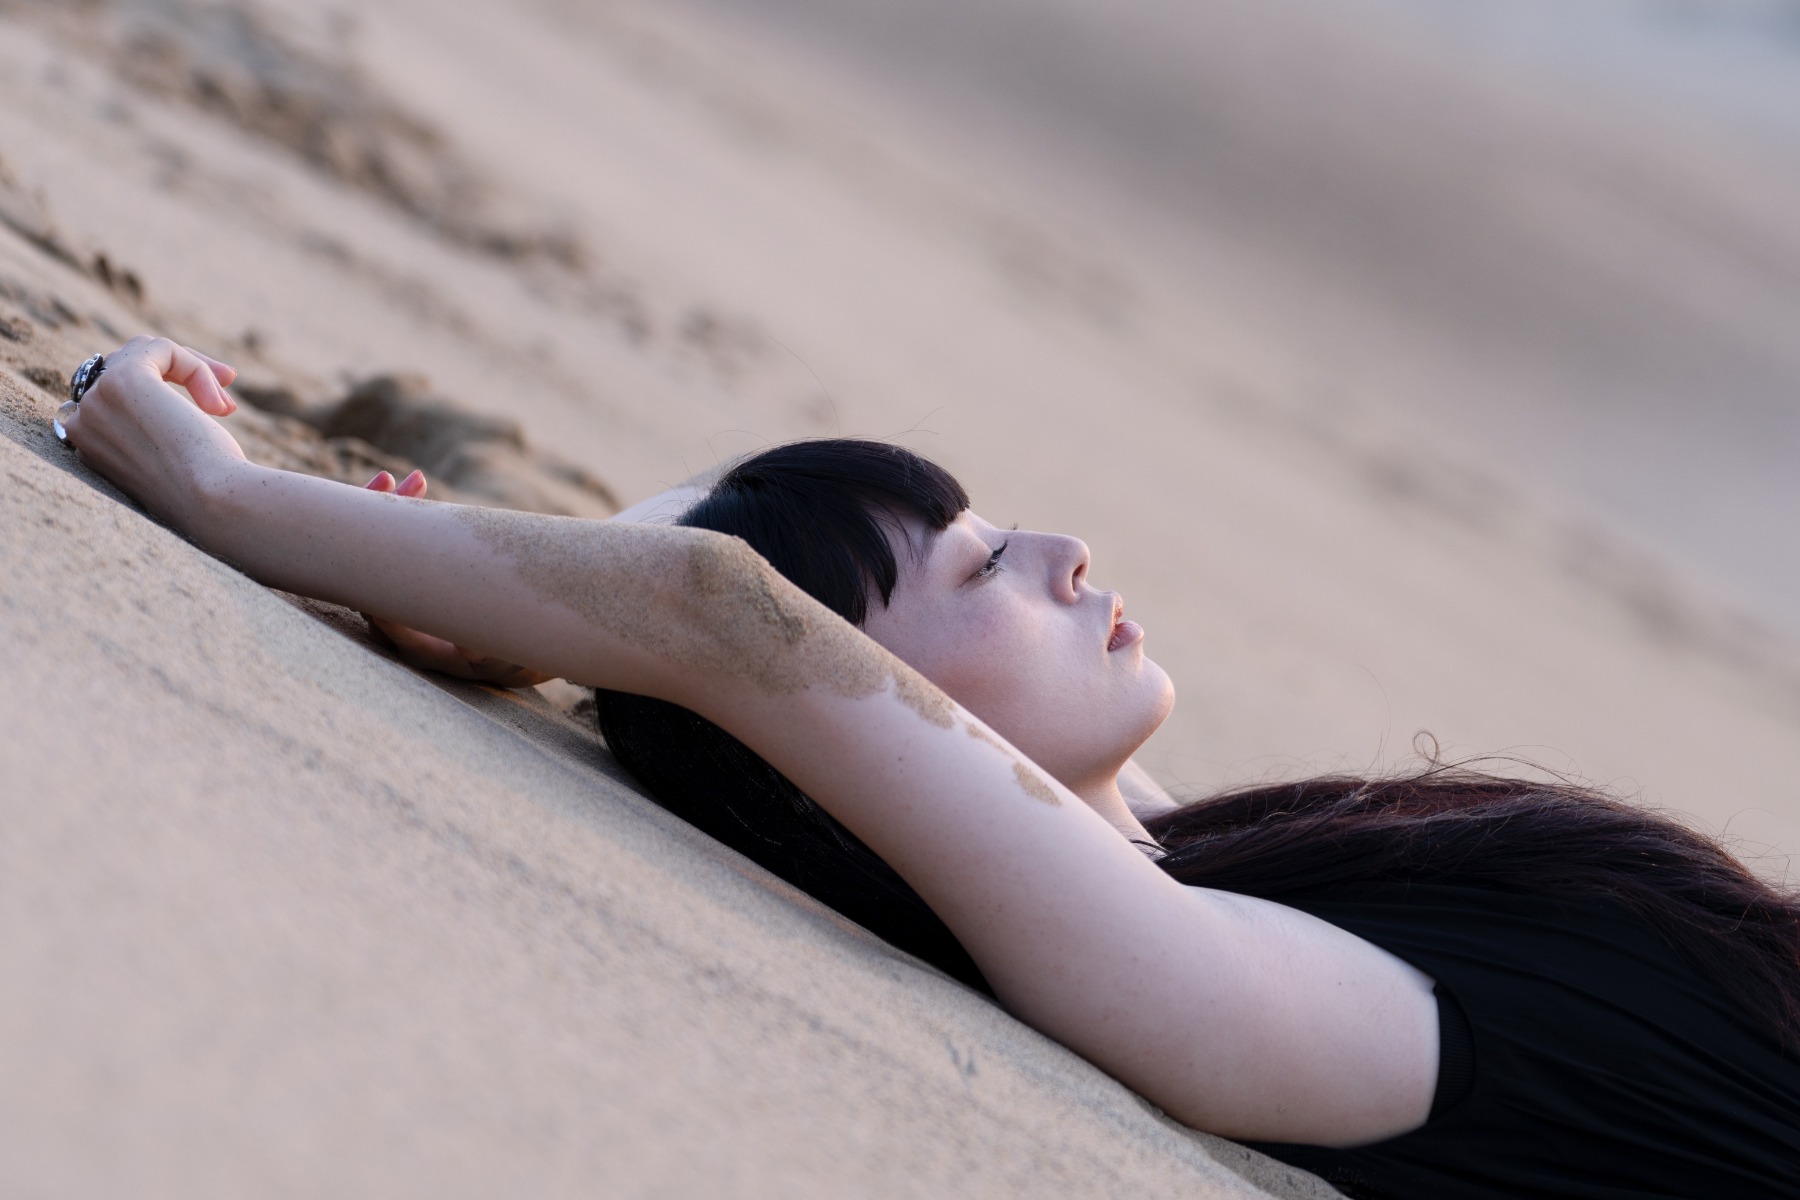
TAMRON 35-150mm F2-2.8 (Model A058) Focal Length: 99mm Exposure: F2.8 Shutter Speed: 1/250sec ISO: 100
Arranging your subject and the lines of the background along a diagonal introduces movement and depth. A pose that runs from the lower left of the frame to the upper right reads as dynamic in a way that a squared-up pose never does.
Inner-city Johannesburg is unusually well suited to this. Pavement edges, fire escapes, painted kerbs and the verticals of older buildings all give you strong diagonals to work with, and tilting slightly to align your subject with them turns an ordinary street into structure.
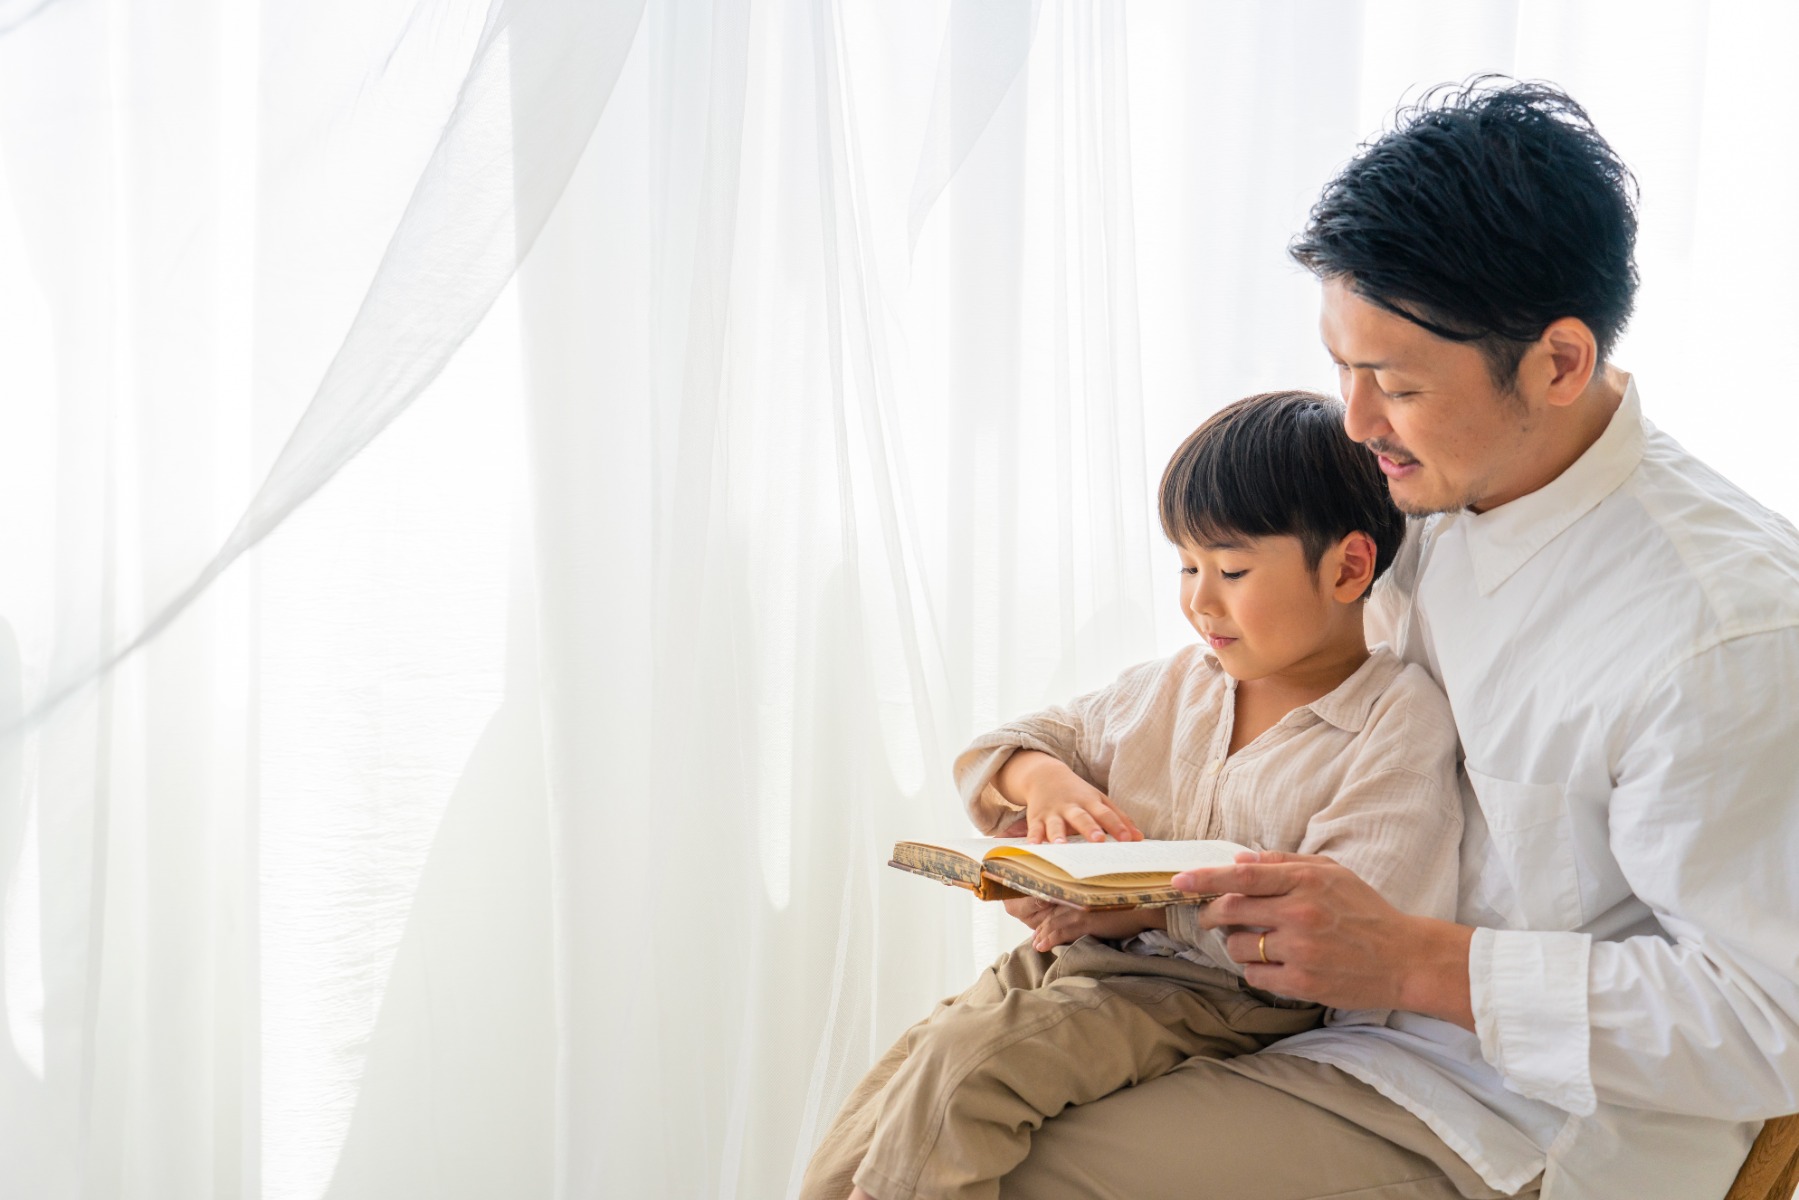
TAMRON 28-75mm F2.8 G2 (Model A063) Focal Length: 40mm Exposure: F4 Shutter Speed: 1/200sec ISO: 400
How a face reads depends on the direction of the light, its quality, and the balance between highlight and shadow. South African conditions push all three to extremes, so this is the area where a little knowledge changes the most.
There are three basic directions to work with: front light, backlight and side light.
Front light falls on the subject from behind the camera. Expressions are clearly rendered and nothing is hidden, but the result can look flat, and in strong sun your subject will squint — which, outside the first and last hours of the day, is close to guaranteed here.
Backlight comes from behind the subject. The face falls into shadow, which sounds like a problem and often isn't: it produces a rim of light through hair and along shoulders, and with a little added exposure it reads as though the subject is wrapped in soft light rather than fighting it.
Side light rakes across the face from one side, emphasising structure and shadow. It gives a crisper, cooler, more sculptural result, and it is the direction most worth practising deliberately.
If you are starting out, work with side light and front light first. Both make it easy to see exactly what you are getting.
Light is either hard or soft, and the difference is the size of the source relative to the subject.
Hard light comes from a small, intense source — direct sun, an undiffused flash — and produces sharply defined shadows with strong contrast. It renders detail vividly but can be unforgiving. Highveld midday sun is about as hard as natural light gets in this country: at altitude there is less atmosphere to scatter the beam, so shadow edges are crisper and shadow cores deeper than they would be at the same hour on the coast.
Soft light comes from a large or diffused source and wraps around the subject, lowering contrast and gentling the transition between light and shade. A Cape Town winter overcast is an enormous softbox. So, in a different way, is the humid coastal haze along the KwaZulu-Natal shoreline, which scatters sunlight and takes the edge off even at midday.
Skin behaves in a specific way under each. Any skin reflects some light specularly, and hard direct sun lifts those specular highlights sharply — they read as pronounced shine on deeper skin tones and as blown-out patches on lighter ones. Diffusion of any kind fixes both: an overcast sky, open shade, a sheer curtain, or the deep shade of a stoep, which is one of the most useful pieces of lighting equipment in South African domestic architecture and costs nothing.
For more controlled work, it helps to think in terms of sources rather than settings.
The main light, sometimes called the key, establishes the overall brightness and the direction of the shadows. A fill light does exactly what its name suggests — it lifts the shadows the key creates so they retain detail instead of going black. The ratio between the two is what produces a sense of volume.
A few standard arrangements are worth knowing:
Three-point lighting. The foundation of studio portraiture. A key light, a fill, and a third light placed behind the subject to separate them from the background and define their outline.
Rembrandt lighting. The key is positioned so that a small triangle of light falls on the cheek furthest from it, below the eye. Dramatic, sculptural, and instantly recognisable.
Butterfly lighting. The key sits high and directly in front of the subject, throwing a small butterfly-shaped shadow beneath the nose. It minimises surface texture and shadow across the face, which is why it is a staple of beauty and fashion work.
Loop lighting. The key is placed roughly 45 degrees to the side and slightly above eye level, producing a short loop of shadow beside the nose. It is the most versatile of the four and the easiest to get right.
All of this applies just as well to natural light. A reflector beside a window becomes your fill. A curtain drawn across the glass becomes your diffusion. Turning your subject relative to the window changes the key direction without moving anything at all.
One detail worth attending to: catchlights. A small reflection of the light source in the subject's eyes makes a face look alive, and its absence makes even a well-lit portrait feel inert. Adjust the position and size of your source until the catchlight looks natural rather than obviously staged.
A softened background adds depth and lifts the subject clear of their surroundings. Handled well, it makes an expression or a silhouette carry the entire frame. Three factors control it.
Aperture. The wider the aperture — the smaller the f-number — the shallower the depth of field and the stronger the blur. Portrait photos commonly sit between F1.4 and F2.8 for this reason.
Focal length. From a fixed position, longer focal lengths blur more and include less. At 35mm the background remains readable and you can see where your subject is standing. At 85mm the blur increases noticeably and the narrower field of view funnels attention onto the subject. At 150mm the background dissolves almost entirely, and telephoto compression enlarges whatever remains, which often makes it more striking rather than less. If you are shooting an APS-C body, remember the crop: roughly 23mm, 56mm and 100mm on APS-C give you the same framing as 35mm, 85mm and 150mm on full frame.
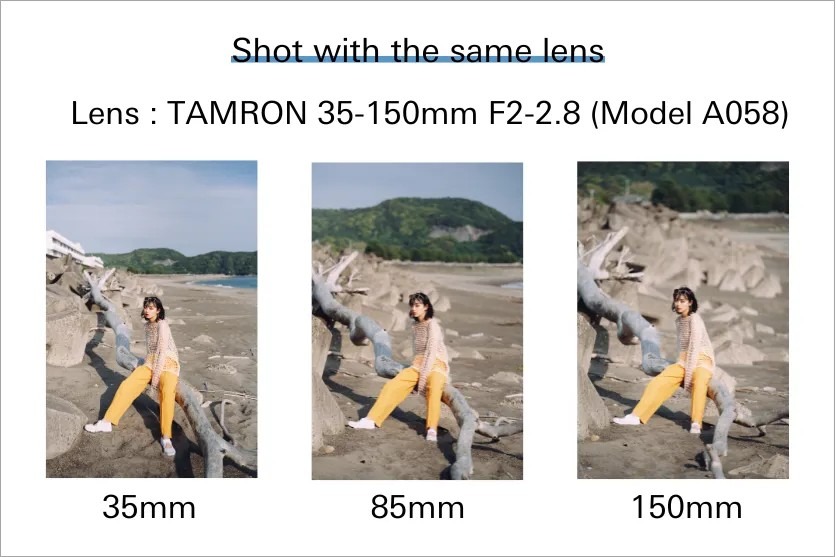
Distance between subject and background. The further your subject stands from whatever is behind them, the more that background will blur, at any given aperture. Choosing where someone stands is often more effective than opening up another stop.
There is a limit worth respecting. Blur the background to nothing and you lose the location entirely — and if you have driven out to the West Coast in flower season, dissolving the flowers into a green smear rather defeats the purpose. Match the amount of blur to what the picture is about.
Natural expressions come from people who are comfortable, and comfort comes from communication rather than technique.
Talk before you start shooting and keep talking while you do. Explain what you are trying to make and why, ask what they like about how they are usually photographed, and listen to what comes back. Most people arrive at a shoot slightly braced, and the tension shows around the mouth and eyes long before it shows anywhere else. Finding poses that genuinely suit someone is a joint exercise, not something imposed on them.
If this is your first attempt at a portrait session, work with a friend or a family member. You will both be more relaxed, and the results will show it.
One practical matter worth settling early. Under the Protection of Personal Information Act, a photograph of an identifiable person is personal information, and processing it requires a lawful basis. Photographs made purely for personal or household use fall outside the Act, but the moment an image is published, submitted to a competition, licensed as stock or used to promote your own services, you need the subject's informed consent. A short written model release, signed before the session, covers this and avoids an awkward conversation later. For work involving anyone under 18, consent must come from a parent or guardian. This is a general overview rather than legal advice — if you are shooting commercially at any scale, get the wording checked.
A background does more than fill space behind someone's head. It sets the mood, carries information about the setting, and can give an image a sense of narrative that the subject alone cannot. Choose somewhere that suits the person rather than somewhere that merely looks impressive.
The range available across the country is unusually wide for the distances involved. A flowering veld in the Free State, the granite and cold water of the Atlantic seaboard, the glass and concrete of the Cape Town Foreshore, the subtropical green of the KwaZulu-Natal coast and the jacaranda streets of Pretoria in late October are all within a day's travel of a major centre, and each produces a completely different photograph of the same person.
Time of day matters at least as much as place. Golden hour — the warm, low, directional light shortly after sunrise and before sunset — is the most reliably flattering light available. Blue hour is the cooler, softer window that precedes it in the morning and follows it in the evening. Be warned that both are short here: at South African latitudes civil twilight runs roughly 20 to 25 minutes, considerably less than photographers working further from the equator are used to. Arrive early, have your framing decided in advance, and expect to work quickly.
Different settings raise different problems. Here is how to approach the ones you are most likely to encounter.
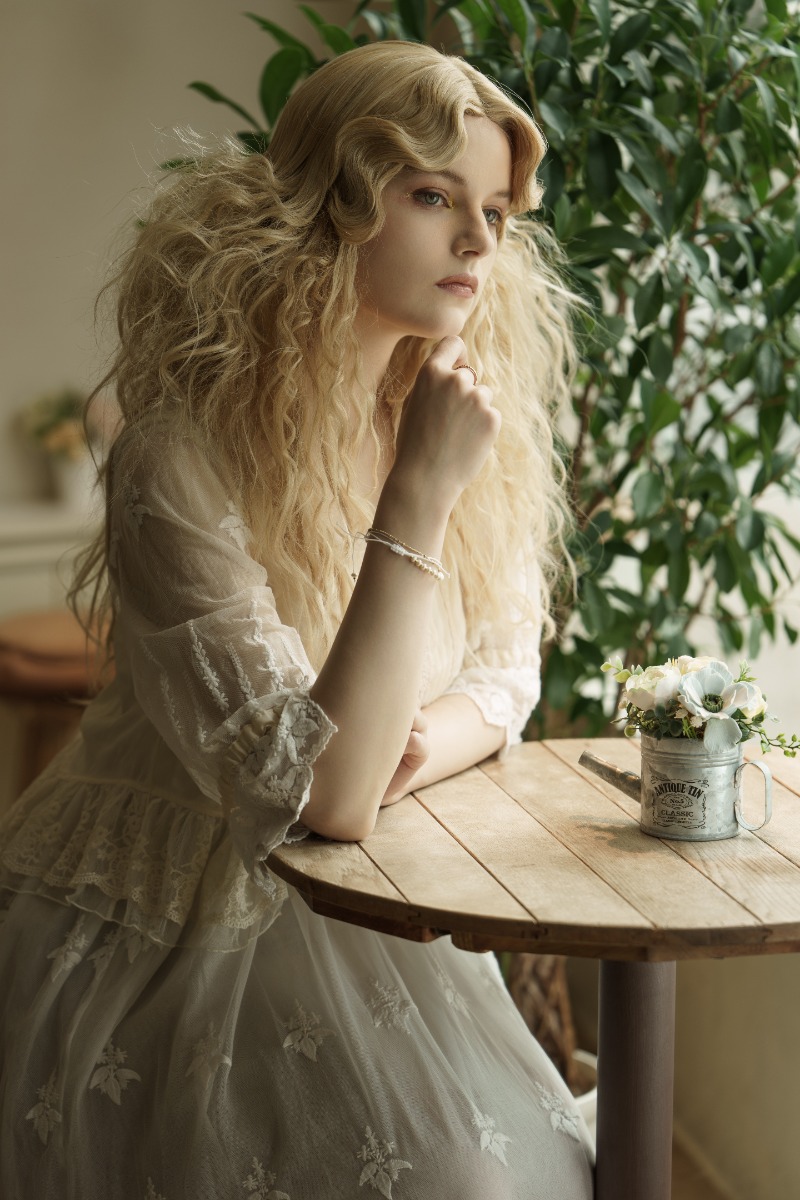
TAMRON 70-180mm F2.8 G2 (Model A065) Focal Length: 92mm Exposure: F2.8 Shutter Speed: 1/80sec ISO: 100
Light indoors is usually in short supply, so the first move is always to find a window. Placing your subject close to one gives you a large, soft, directional source that models the face beautifully, and turning them relative to the glass lets you choose between front, side and backlight without any equipment at all.
South African interiors have a particular quirk: exterior light is so strong that a room with modest windows can be extremely contrasty, with a bright pool near the glass and near-darkness three metres away. Either work within that pool deliberately, or lift the shadows with a reflector — a white sheet or a sheet of polystyrene does the job perfectly well.
If there is still not enough light, raise ISO or add exposure compensation, and consider a continuous LED panel for more controlled work. And when a room is genuinely small, a lens with a short minimum object distance earns its place, because you simply cannot step back far enough. A wider focal length helps too, and has the side effect of making a cramped space look more generous.
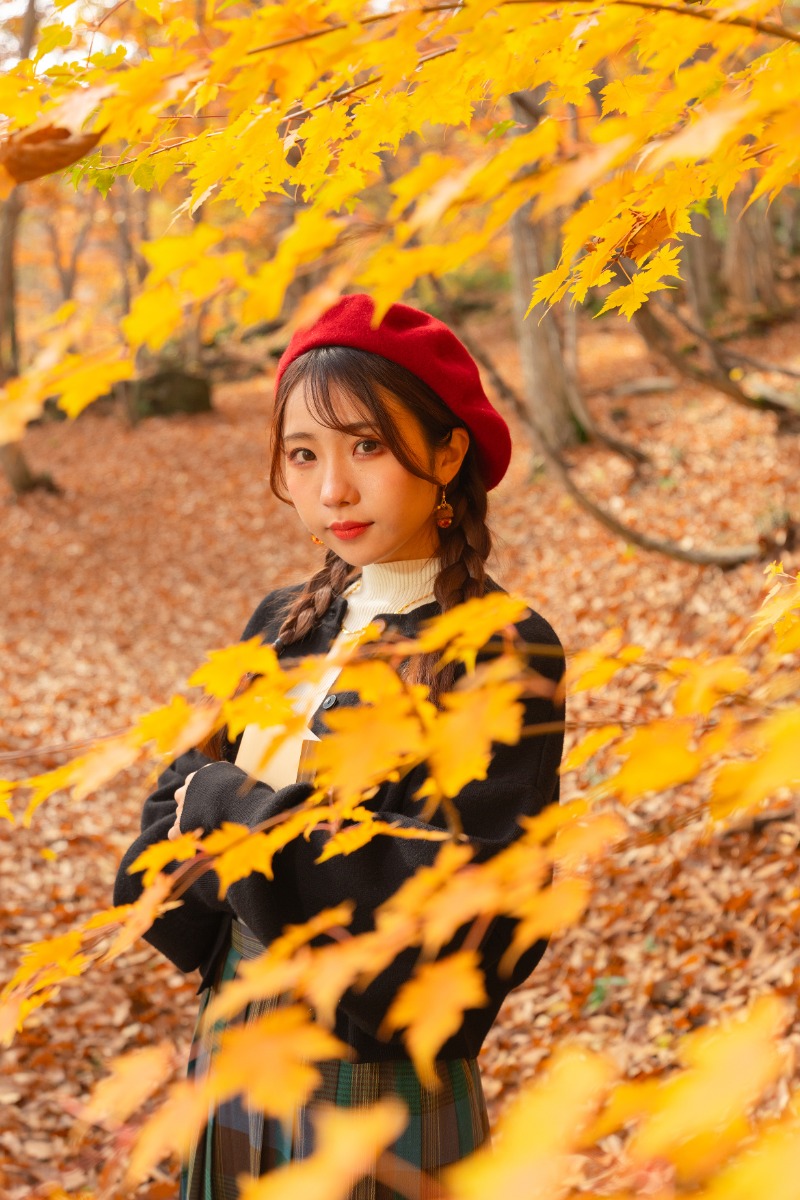
TAMRON 17-50mm F4 (Model A068) Focal Length: 50mm Exposure: F4 Shutter Speed: 1/320sec ISO: 200
Flowers behind a subject produce some of the richest portrait photos you will make, and South Africa offers several distinct windows rather than one national season.
The West Coast and Namaqualand belt carries dense daisy displays through roughly August and September. Cosmos takes over Highveld roadsides and field edges in March and April, throwing up drifts of white and pink at exactly the right height for a standing portrait. Fynbos on the Cape Peninsula gives you texture and muted colour for much of the year. In late October the jacaranda streets of Pretoria produce a purple canopy above and a purple carpet below.
Blooms do not only belong behind the subject. Holding a few stems close to the front of the lens and throwing them completely out of focus creates a soft wash of colour across the edge of the frame, which adds depth and disguises a background that is not cooperating.
Front and side light both work here, but backlight through petals is where flowering scenes become properly beautiful — the colour glows and the whole frame lifts. Shoot early or late for the softest result.
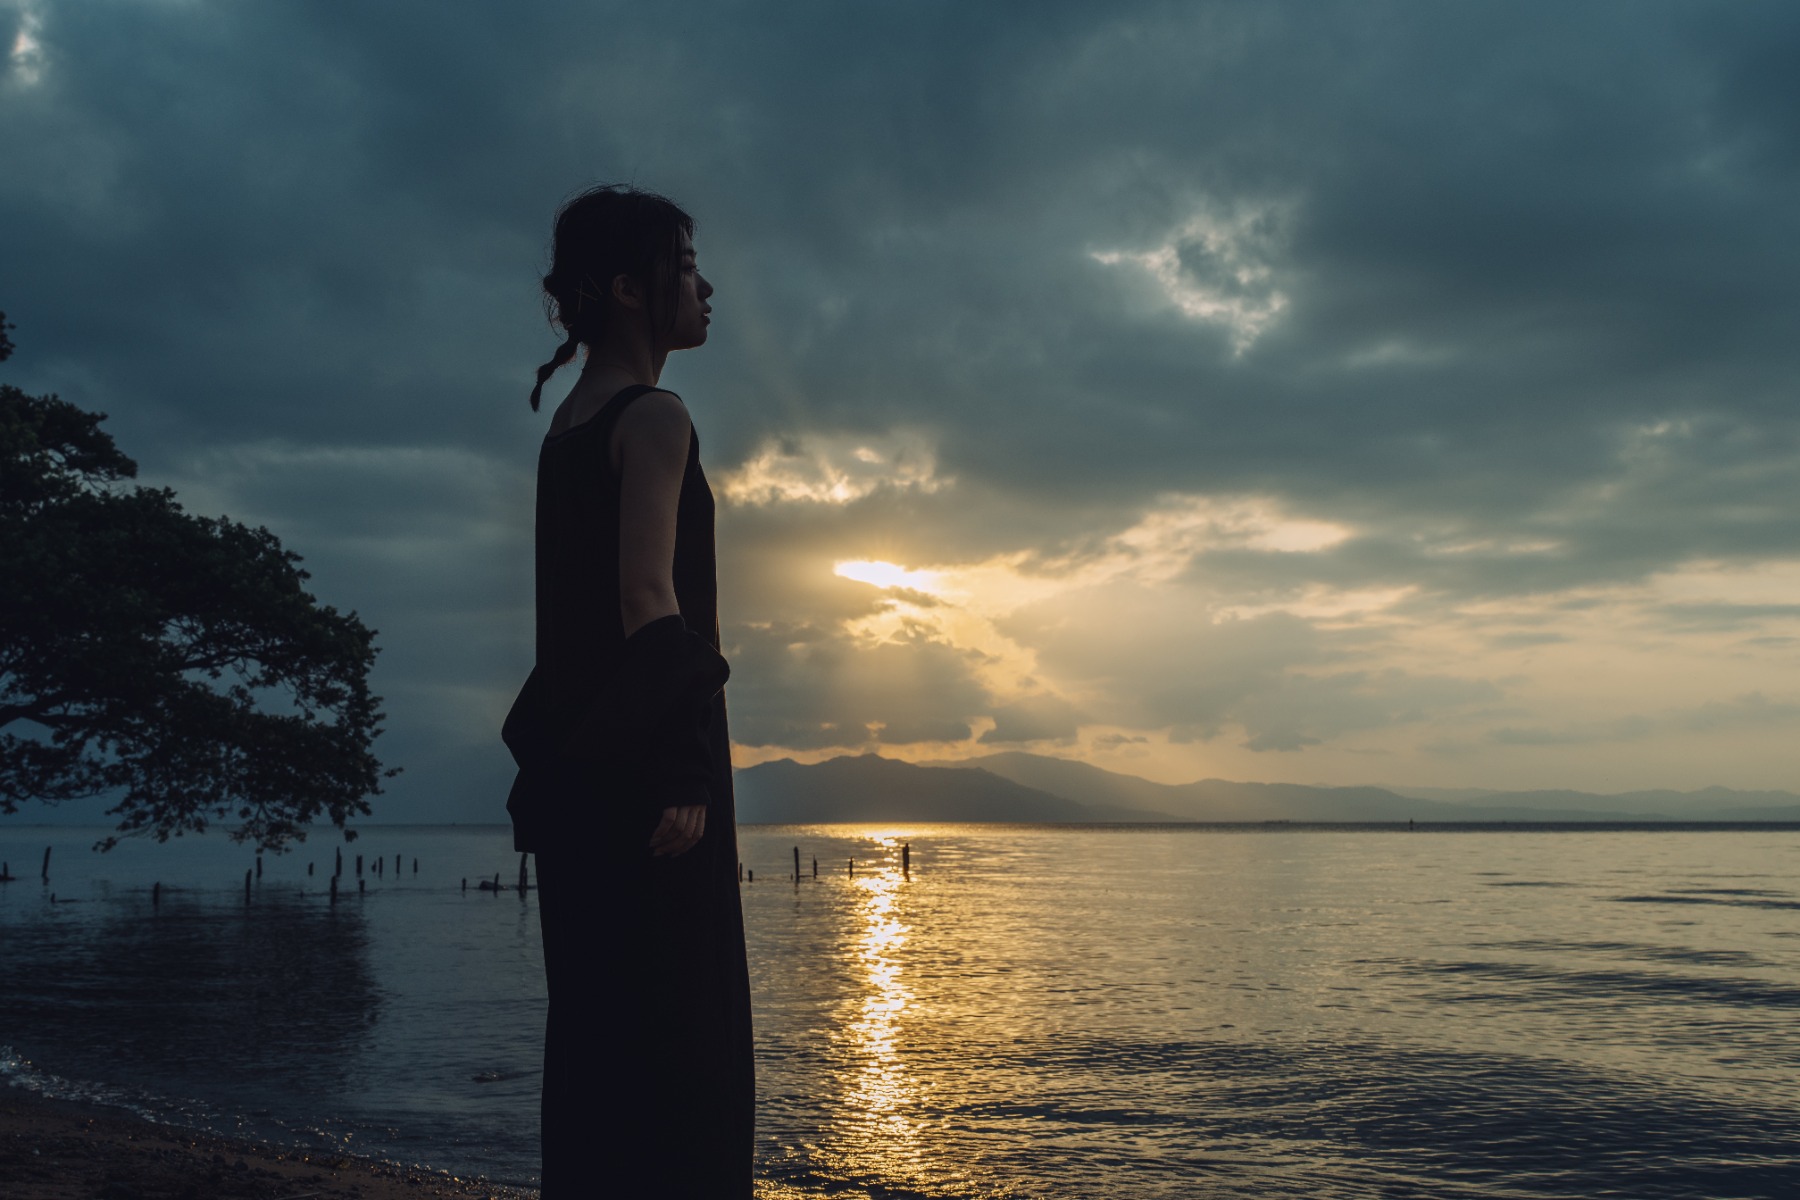
TAMRON 35-150mm F2-2.8 (Model A058) Focal Length: 39mm Exposure: F9 Shutter Speed: 1/200sec ISO: 100
A portrait at the beach reads as clean, open and unforced, but the coastline around South Africa is not one place and the light differs sharply from one stretch to another.
The Atlantic seaboard gives you hard, bright light with a distinctly cool cast off cold water — warm your white balance or your subject's skin will look bloodless. False Bay and the Garden Route run warmer and gentler. The KwaZulu-Natal coast is hazier and more humid, which naturally diffuses the light and is the most forgiving of the three around the middle of the day.
Backgrounds at the coast are simple by definition, so composition carries more weight than usual. Start from a thirds grid: place the horizon on one of the horizontal divisions and your subject on a vertical, and the frame will hold together almost by itself. Sunrise and sunset open up silhouette work, where an unlit figure against a saturated sky can be more expressive than a properly exposed face.
Two further things worth using. Sand and water both bounce light upward, filling shadows under the chin and eyes for free. And dropping to a low angle, shooting slightly upward with the shoreline running away behind, adds depth that a standing eye-level frame will not give you.
Rain is not one condition in South Africa but two, and they call for opposite approaches.
The Western Cape gets frontal winter rain: hours of steady, even, low-contrast overcast. Light levels are poor, so drop the shutter speed, raise ISO and add exposure compensation to keep skin from going grey. The compensation is that the light itself is exquisite — completely soft, completely even, with no shadow problem to solve.
The Highveld gets summer thunderstorms, which behave nothing like this. Cloud builds through the afternoon, breaks violently, and clears again within the hour. The photographic gold is the edge of the storm: a black sky behind a subject lit by a shaft of late sun is about as dramatic as portrait lighting gets, and it lasts a matter of minutes. Watch the sky, be positioned before the break comes, and keep your camera covered until you need it.
Rain also supplies props. An umbrella frames a face and gives the hands something to do. A clear plastic umbrella does the same while still letting light through. Water beading on the front element becomes an accidental foreground blur, and wet tar after a storm turns into a mirror for streetlights and shopfronts, which pairs unusually well with night portraits.
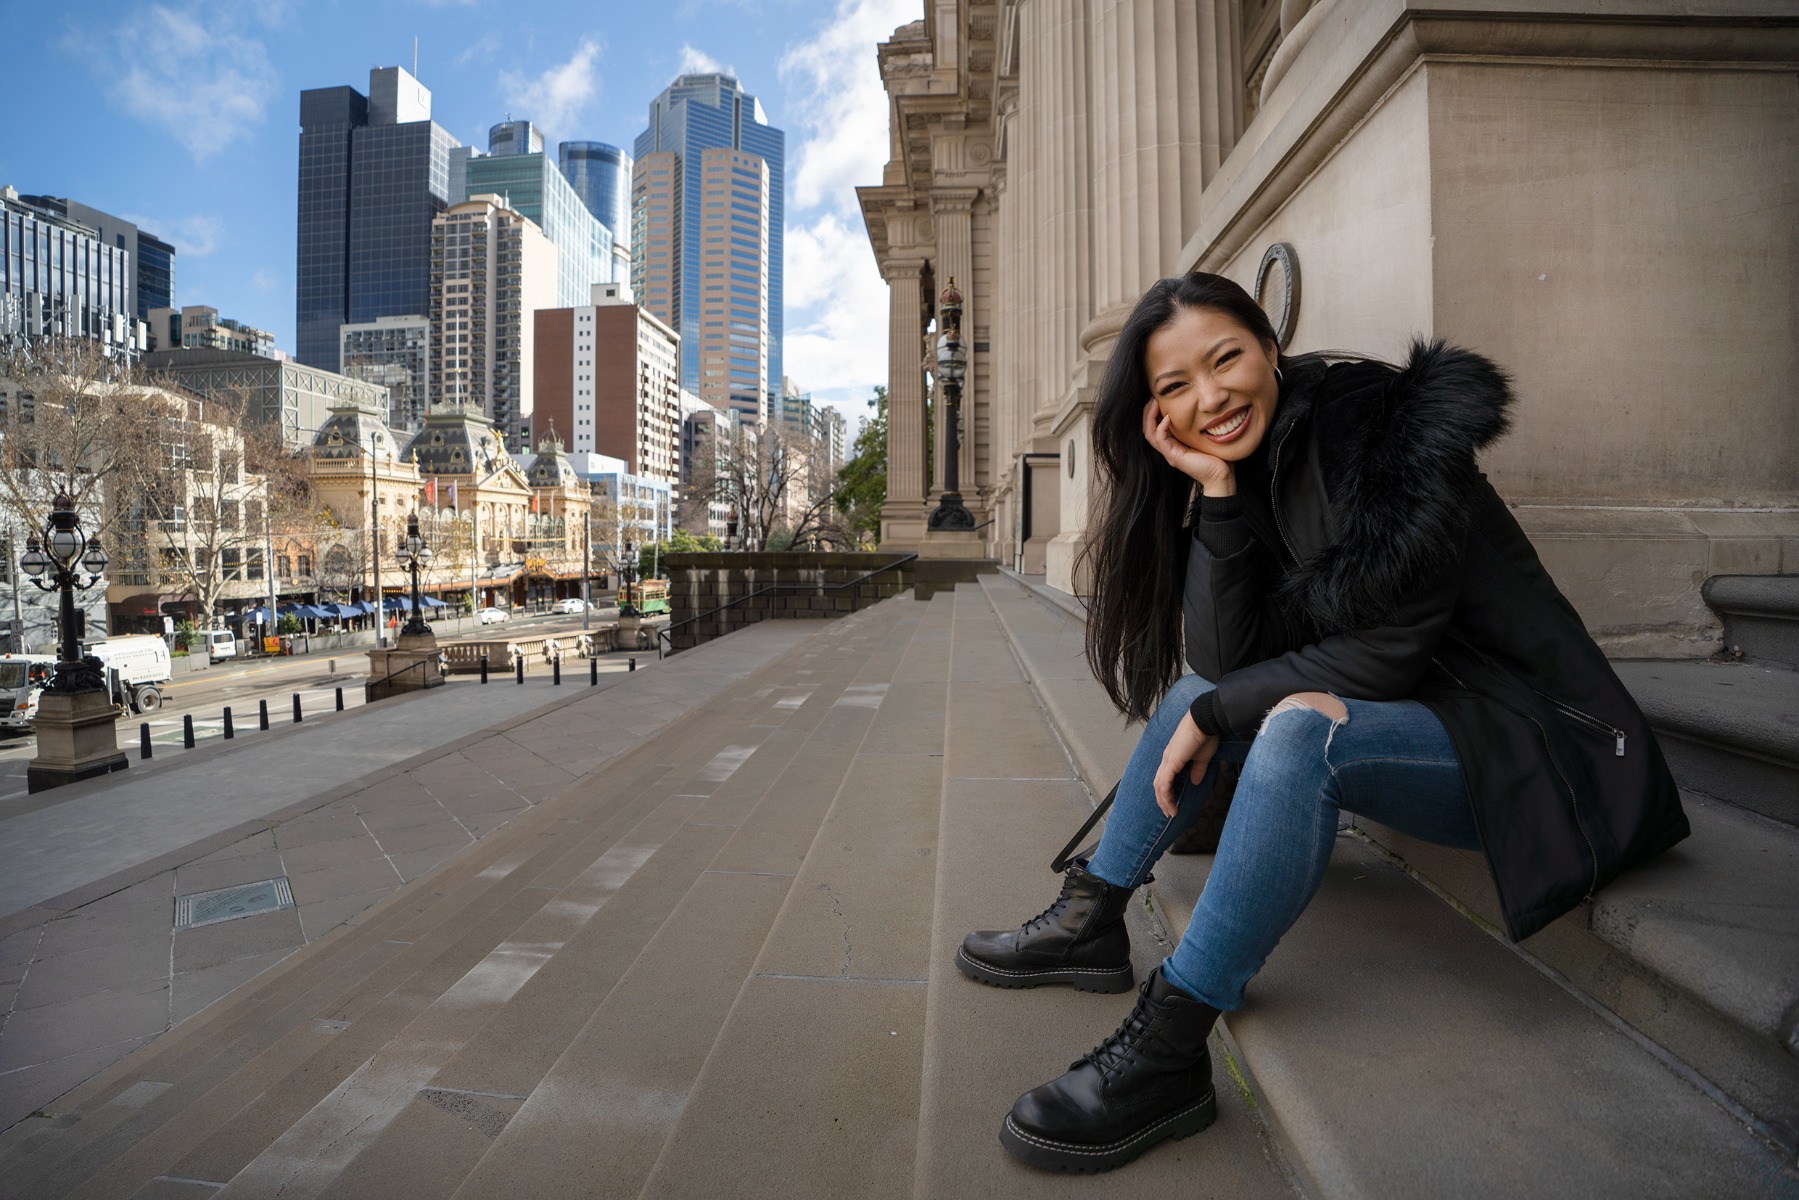
TAMRON 17-50mm F4 (Model A068) Focal Length: 17mm Exposure: F4 Shutter Speed: 1/500sec ISO: 100
Urban settings produce modern, stylish portrait photography, and the architecture itself does much of the compositional work. The Cape Town city bowl and Foreshore give you glass, scale and mountain backdrop in the same frame. Inner-city and northern Johannesburg offer strong verticals, hard geometry and a great deal of texture. The Durban beachfront promenade combines built structure with open sky and sea.
Work with the lines the buildings give you. Run a skyscraper's verticals alongside your subject's silhouette, or set up down a street so that the perspective draws back behind them. A wide-angle lens exaggerates the scale of the structures and makes the setting feel more imposing.
After dark, the same locations become something else entirely. Shopfront signage, illuminated facades and street lamps supply the light, and the colour is part of the appeal. Night portraits need a wide aperture, a raised ISO and a shutter speed that image stabilisation can rescue. Position your subject so that a strong light source falls across their face rather than behind them, and expect mixed colour temperatures — sodium, LED and neon in one frame will not resolve automatically, so shoot raw and correct white balance on the face.
A practical note: some locations require a permit for photography, particularly where equipment is set up on public property or access is controlled. Municipal film permit offices handle applications and the requirements differ between cities, so check in advance. In busy areas, pick your moment, keep your footprint small and be courteous to the people around you.
With the technique covered, here is what actually matters when you are deciding which portrait lens to buy or bring.
A wide maximum aperture — a low f-number — buys you two things. The first is light, which keeps shutter speeds workable indoors, under Cape winter cloud, and after sunset when you would otherwise be forced to unusable ISO settings.
The second is rendering. Lenses that open wide tend to produce a smoother, more gradual transition from sharp to soft, so the background dissolves rather than merely going out of focus, and the subject sits within it naturally.
Portrait focal length is the single most consequential choice you make, because it determines both how much of the world is included and how a face is drawn.
At 35mm you can take in a full-length figure and a substantial amount of background, which suits environmental work where the location matters.
At 85mm you get head-and-shoulders through to three-quarter length with moderate blur, and a slight compression that flatters most faces. This is the classic portrait range and the one most photographers reach for first.
At 135mm you are into tight head-and-shoulders territory, with both foreground and background falling away and a strong sense of isolation.
At 150mm the compression is pronounced and the background is reduced to tone and colour alone.
On an APS-C body, multiply by roughly 1.5 to find the equivalent — so around 23mm, 56mm, 90mm and 100mm respectively give you the same framing as the figures above. A 56mm lens on APS-C is the practical equivalent of the classic 85mm portrait length.
Covering roughly 35mm to 150mm in a single lens means you can move between environmental frames and tight portraits without stopping to change glass, which keeps the session flowing and the subject engaged.
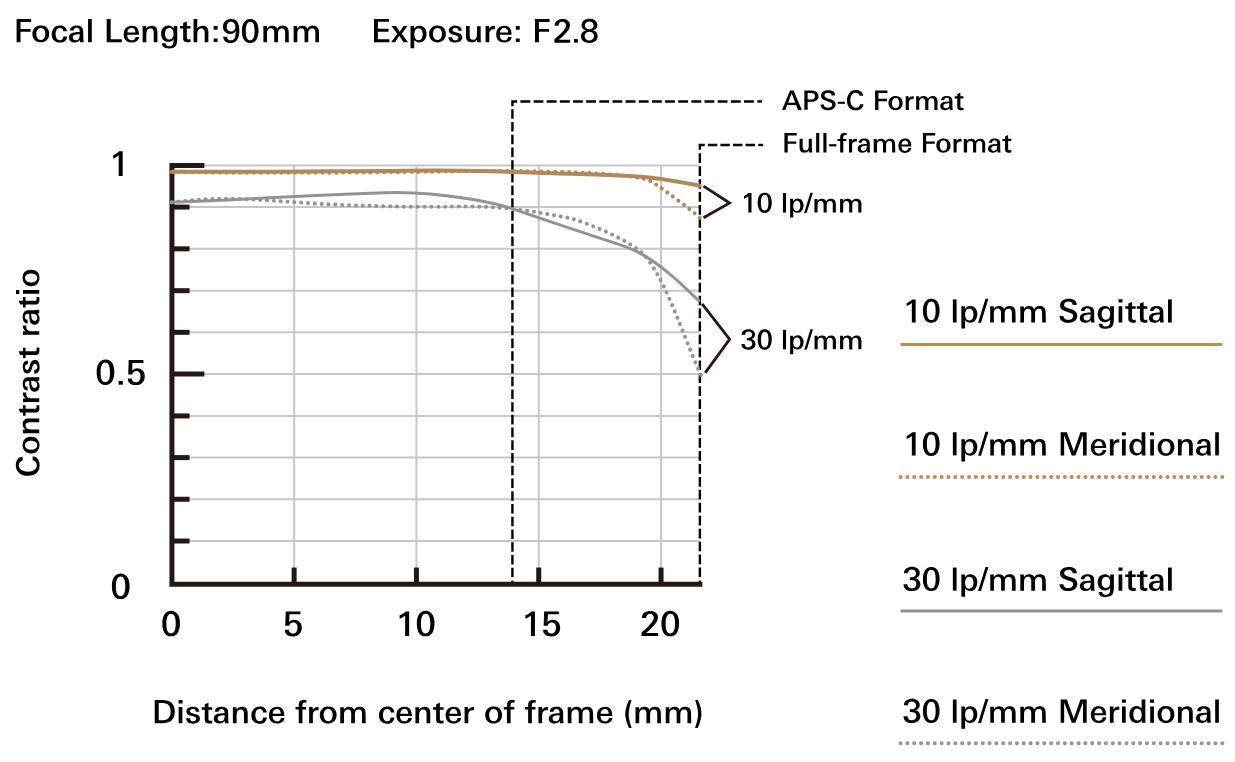
Portraiture rewards fine detail — the texture of skin, individual strands of hair, the catchlight in an eye. A lens that resolves well captures those things cleanly and gives you room to crop.
Sample images and reviews are worth studying before you commit, since two lenses of the same focal length and aperture can render quite differently.
Close-in frames — an expression, hands, a detail of clothing — are among the most rewarding portraits to make. A short minimum object distance lets you get properly close without switching to a macro lens, and it is genuinely useful in a small room where backing up is not an option.
One caution: at close distances you will often find yourself reflected in the subject's eyes. Unless you want that, watch for it and adjust your position.
Portrait work involves moving constantly — crouching, leaning, circling, changing height to find the angle that suits someone. A lighter, more compact lens reduces fatigue over a long session and makes you far more willing to try the position you might otherwise skip. It also tends to put subjects at ease, since a smaller lens is less confronting to stand in front of.
Expressions change in fractions of a second, and if the focus is not on the eye, nothing else about the frame matters. Look for autofocus that acquires quickly, tracks a moving subject reliably and stays quiet enough not to intrude on a conversation.
Stabilisation built into the lens corrects for hand movement, letting you shoot at shutter speeds that would otherwise be unusable. The benefit is greatest in exactly the conditions portraiture keeps producing — dim interiors, the last minutes of golden hour, and any long focal length where a small movement is magnified across the frame.
Good portrait photography draws on a handful of things at once: sound exposure, a focal length matched to the picture you have in mind, light you have chosen rather than accepted, and a subject who trusts you enough to stop performing.
None of it is beyond a beginner, and none of it requires ideal conditions. The Highveld's hard midday sun, the Cape's grey winter weeks and the humid haze of the KwaZulu-Natal coast are each a specific problem with a specific answer, and learning them makes you a better photographer than working in easy light ever would.
Most of all, enjoy it. The technical side is a means to an end, and the end is a photograph that captures something true about the person in front of you. Take what is useful here, get out and shoot, and let the rest follow.