| September 18, 2026
 South Africa's #1 Mobile Protection Brand

Most people who move up from a phone to an interchangeable-lens camera hit the same wall. The gear is capable, the exposure is fine, and the picture still looks flat. The missing piece is almost always photography composition — the decisions about what goes into the frame, what stays out, and where everything sits once it is in there.
Composition is the cheapest upgrade available to a photographer. It costs nothing, it works with whatever lens is already on the camera, and it improves results faster than any accessory you could buy. This guide covers the five elements that underpin photography composition, the classic patterns worth learning, and how angle, position and distance change a picture entirely.
Photography composition is the arrangement of your subject and everything around it inside a rectangle. That is all it is. The rectangle is fixed; what you put in it, and where, is entirely your call.
The same thinking runs through painting, graphic design, film and illustration. Arrange the elements well and the result reads as balanced, rhythmic and deliberate. Arrange them carelessly and even a technically perfect frame feels unresolved. Composition shapes the impression a photograph leaves far more than sharpness or resolution ever will.
Five elements do most of the work: framing, vertical or horizontal format, leading lines, layering, and how much information the background carries. We will take them in that order.
Framing is the act of deciding which part of the scene in front of you becomes the photograph.
Beginners tend to add. Experienced photographers subtract. Stripping out clutter — a stray bin, a blown-out patch of sky, the bonnet of a car at the edge of frame — does more for photography composition than adding anything ever will. Simplifying the background, or throwing it out of focus with a wide aperture, pushes attention onto the subject without you having to do anything else.
The reverse is also useful. Deliberately including foreground and background detail tells the viewer where the subject is and what they are up against. A surfer framed against the full sweep of False Bay reads very differently from the same surfer cropped tight.
So pick your subject first, then ask one question of every edge of the frame: does this help the subject, or compete with it?
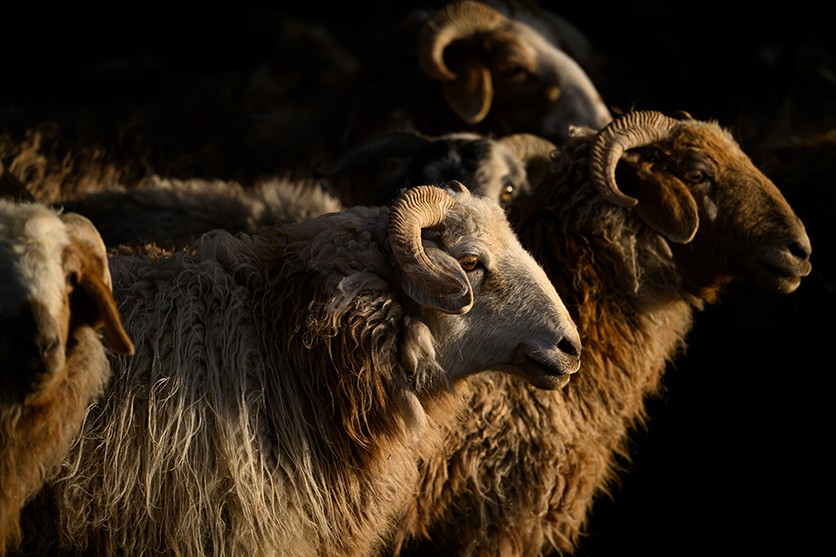
TAMRON 150-500mm F5-6.7 (Model A057) Focal length: 419mm Exposure: F6.3 Shutter Speed: 1/1000sec ISO: 200
There are two basic orientations, and choosing between them is the quickest compositional decision you will make.
Vertical frames pull the eye up and down. They suit tall subjects and they exaggerate height, shape and line — which is why they dominate portraiture, architecture and lifestyle work. A single sandstone buttress on the Drakensberg escarpment, or a row of Victorian shopfronts in central Durban, asks for a vertical frame almost automatically.
Horizontal frames move the eye left to right. They convey width and scale, which makes them the default for landscape, and they handle side-to-side movement well — a batsman driving through the covers, a winger running the touchline. Match the format to the way the subject and the viewer's eye actually travel.
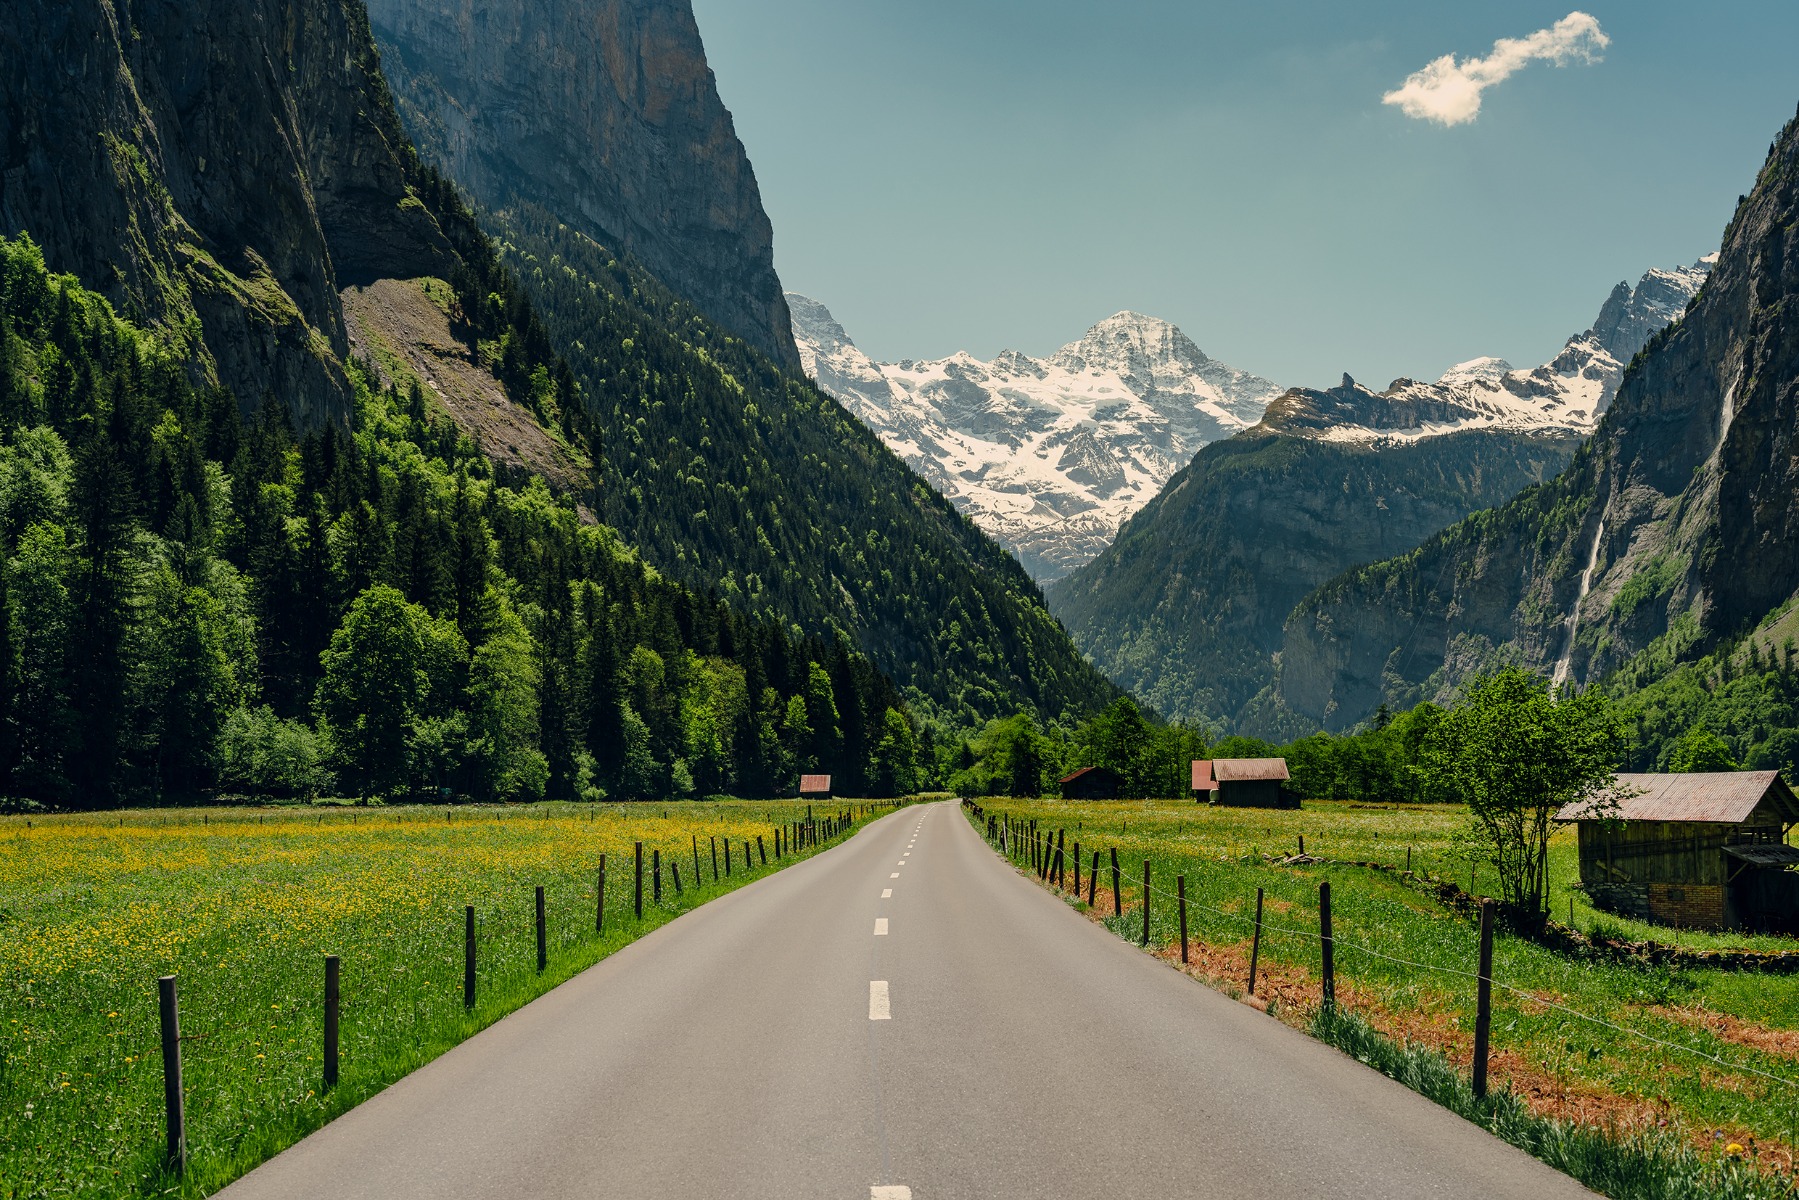
TAMRON 20-40mm F2.8 (Model A062) Focal length: 40mm Exposure: F5 Shutter Speed: 1/800sec ISO: 100
Leading lines are exactly what they sound like: lines that steer the eye. They can be horizontal, vertical, diagonal or curved, and once you start looking for them you will find them everywhere.
Landscapes are full of them — the ridgeline of the Cape Fold mountains, a river cutting across Highveld grassland, fence posts running away from you along a Karoo farm road. Placed with intent, they build depth and make a flat rectangle feel three-dimensional.
Lines work hardest when they arrive somewhere. Point them at your subject, or let them terminate at one of the intersections of a rule-of-thirds grid, and the photograph resolves instead of drifting.
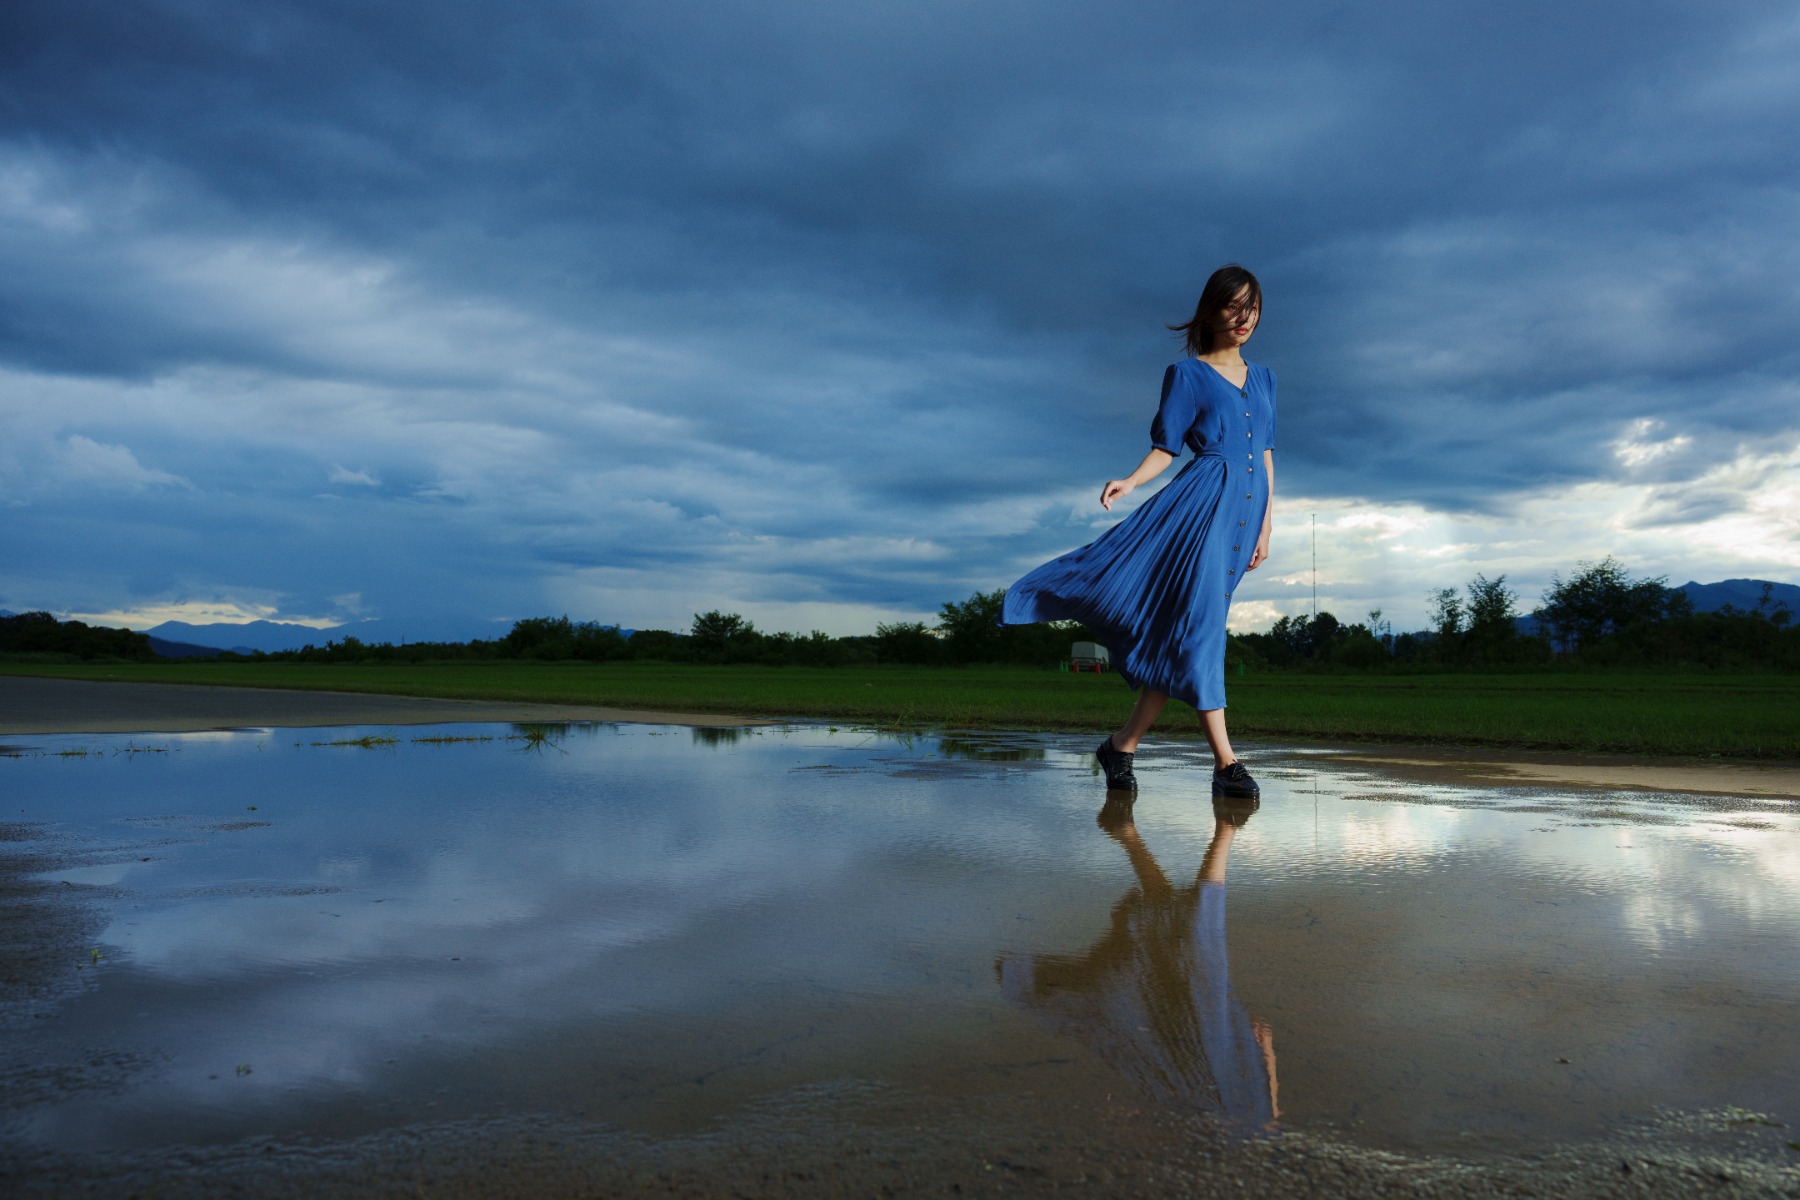
TAMRON 28-75mm F2.8 G2 (Model A063) Focal length: 28mm Exposure: F6.3 Shutter Speed: 1/320sec ISO: 200
Layering means stacking distinct planes of distance: something near, something in the middle, something far.
The foreground is whatever sits closest to the lens. The background is the furthest plane. The midground is everything between. Get all three working and a two-dimensional image gains real depth. Photograph Chapman's Peak Drive with only the road and the sea and it is pleasant; add a rock shelf in the near foreground and it becomes a photograph you look into rather than at.

TAMRON 35-150mm F2-2.8 (Model A058) Focal length: 35mm Exposure: F2 Shutter Speed: 1/1000sec ISO: 100
The technique translates straight to portraiture. Shooting through out-of-focus grass, a doorway or the edge of a jacaranda canopy creates the sense of looking in on a private moment. It also gives the eye somewhere to rest before it reaches the face, which keeps a simple portrait from feeling static.

TAMRON 28-75mm F2.8 G2 (Model A063) Focal length: 75mm Exposure: F2.8 Shutter Speed: 1/640sec ISO: 100
Backgrounds are never neutral. How much detail you allow through changes what the photograph is actually about.
A quiet background — a painted wall, a stretch of open sky, a wash of bokeh — isolates the subject and makes them the entire story. This is why portrait photographers hunt for clean walls and shoot close to wide open.
A busy background does the opposite, and that is not a fault. Keep the Sandton skyline legible behind your subject and the photograph gains context. Let the terraces of a Cape Winelands slope stay sharp and you are telling the viewer where this person belongs.
You control the balance with two things. Aperture governs how much of the background dissolves; focal length governs how much of it you include at all. A 28mm frame at F8 tells the whole story of a place. The same subject at 150mm and F2.8 tells you almost nothing except who they are. Neither is wrong — they are different photographs.
A handful of arrangements come up again and again, because they work. Treat them as starting points rather than rules, and remember that they stack with leading lines and layering rather than replacing them.
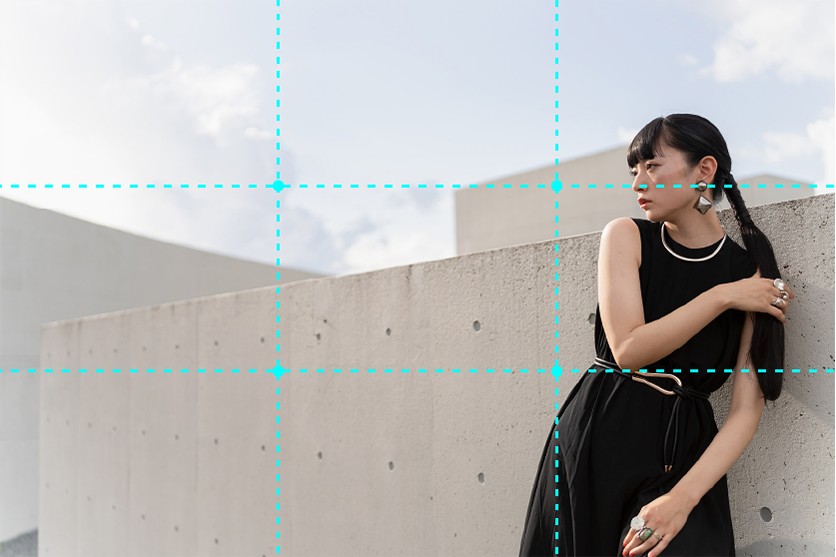
Divide the frame into a three-by-three grid and place your subject, along with any secondary point of interest, near the intersections.
The result is a frame with breathing room and a clear hierarchy: something to look at, and somewhere for the eye to go next. It is the most transferable pattern in photography composition — it holds up for portraits, landscapes and wildlife equally well — so learn this one first. Most cameras will overlay the grid on the live view if you ask them to.
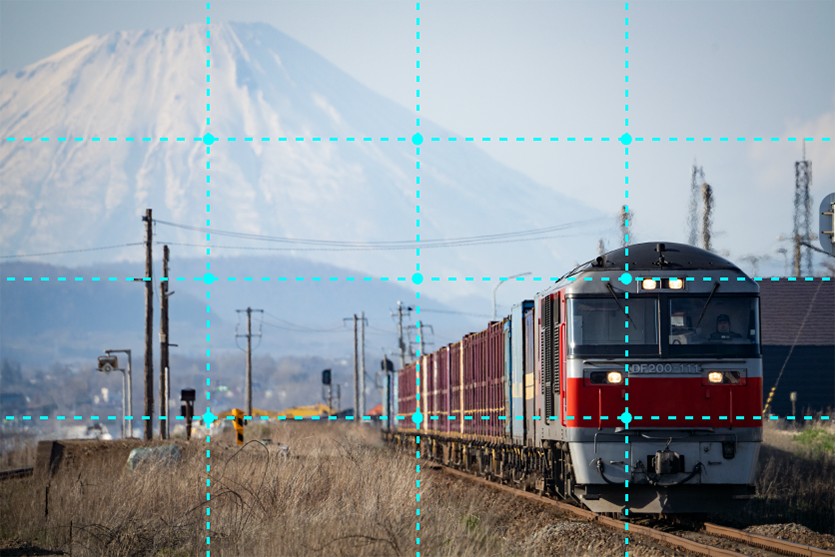
The four-section approach divides the frame four ways in each direction and uses those intersections to place the subject, the foreground and the horizon or scene boundary.
It behaves much like the three-section composition above, but the extra divisions give you finer control over margins. That matters in very open scenes — the Karoo, the West Coast, the flats below the Drakensberg escarpment — where there is little detail to anchor the frame and you want to emphasise distance and emptiness rather than fill the space.
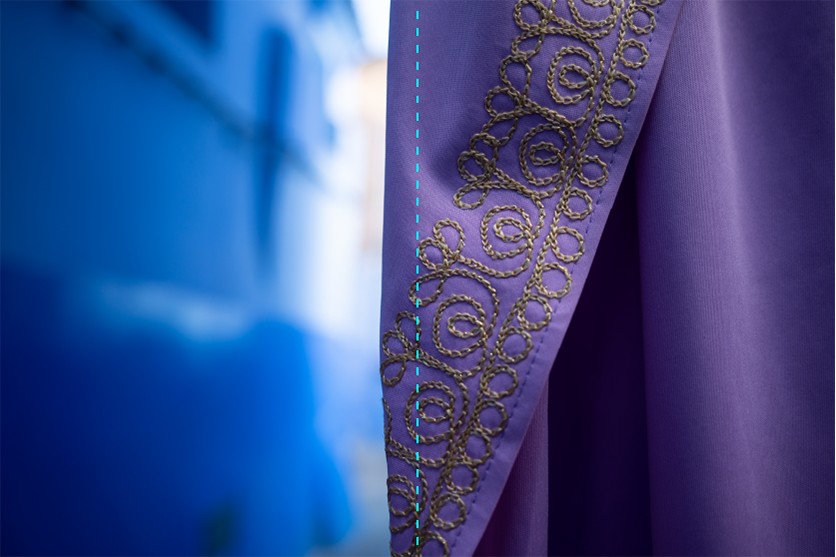
A split composition divides the frame into two equal halves, either along a horizontal or a vertical line.
It is a natural fit for coastlines, mountain silhouettes, rivers and city skylines, where a strong boundary already exists in the scene. Placing that boundary dead centre reads as confident rather than lazy, provided the line is genuinely level. Nothing undermines a sea horizon faster than a two-degree tilt.
It also works for contrast across a boundary — inside against outside, light against shadow, wet sand against dry.
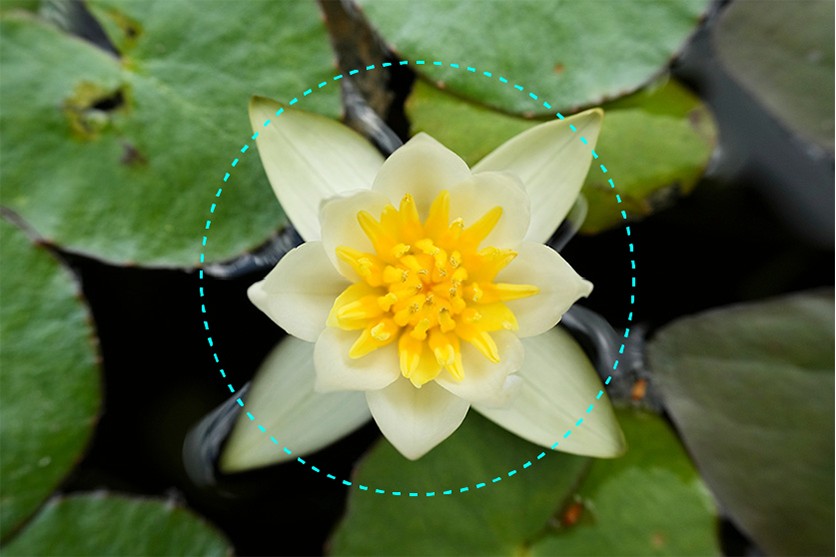
Centred composition places a single subject squarely in the middle of the frame.
It suits one clear subject and very little else: a portrait, a bird on a fence post, a single protea, an insect on a leaf. Because there is nowhere else for the eye to go, the background needs to be quiet — a clean wall, open sky, or enough blur that nothing competes. Done properly it is direct and confrontational in the best sense.

Running your subject or its main lines along a diagonal introduces movement and depth.
Bridges, staircases, mountain passes and road markings all offer ready-made diagonals — the switchbacks of a pass, the cable stays of the Nelson Mandela Bridge in Johannesburg, the painted lanes of an athletics track. The same idea works at close range: arranging plates and boards on the diagonal across a table lifts a flat overhead shot of a braai spread into something with rhythm.
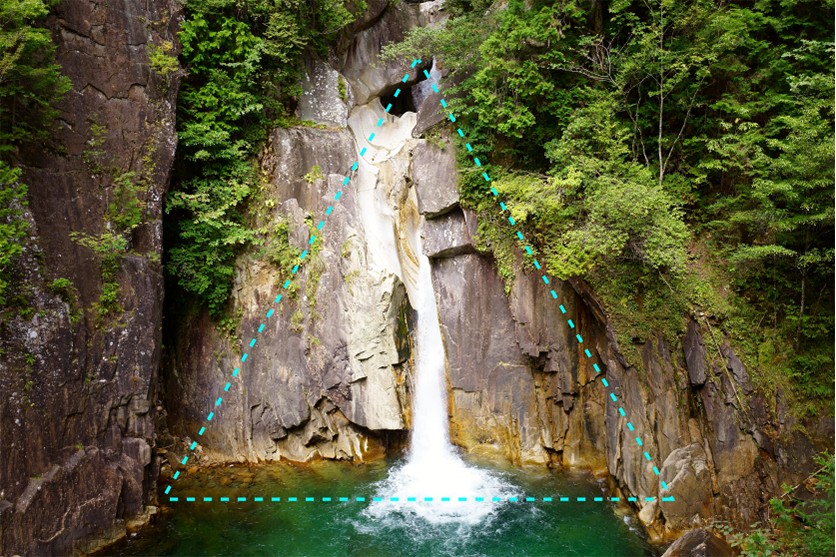
Triangular composition places subjects at the points or along the edges of an implied triangle.
Triangles read as stable and grounded, which makes them useful whenever you want a frame to feel settled rather than tense. They suit mountains almost by definition, and they are the quickest way to arrange a group of three people so the picture does not look like a line-up.
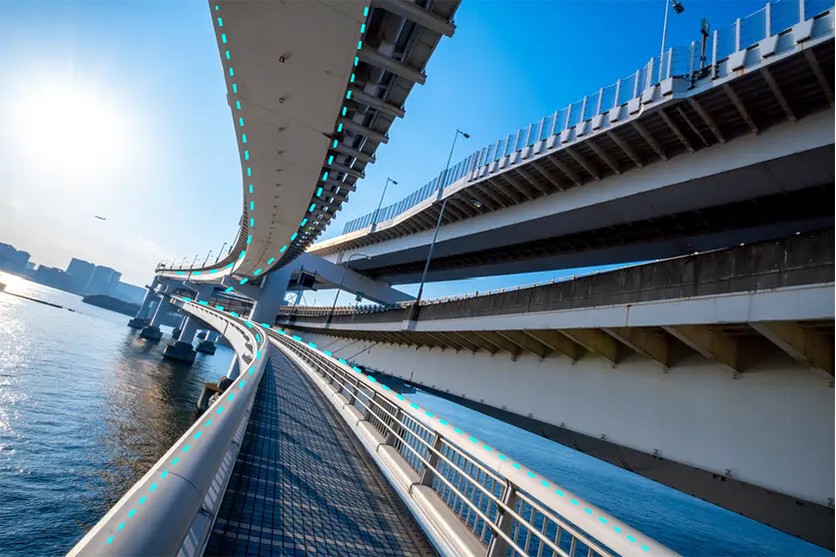
Curved composition builds the frame around an arc — either the shape of the subject itself, or a curve the subject happens to sit on.
Coastal roads, river bends, the sweep of Durban's beachfront promenade, an arched colonnade: all of them carry the eye through the frame more gently than a straight line does, and they suggest movement without anything actually having to move.

Plenty of other arrangements are worth keeping in reserve. When one catches your attention in someone else's work, name it and then go looking for it in your own.
A tunnel composition surrounds the subject with framing elements: an archway, overhanging branches, a doorway, a gap between buildings. The surrounding material acts as a leading line pointing inward, and the viewer gets the sense of peering into the scene rather than standing in it.
Symmetrical composition mirrors the frame across a vertical or horizontal axis. Reflections in still water, formal architecture and repeated structures all lend themselves to it, and the appeal is geometric — the viewer registers the order before they register the subject.
Contrast composition sets two things against each other: large against small, bright against dark, warm against cool, smooth against rough. Putting both inside one frame makes each read more strongly than it would alone. A single figure against a vast rock face is a contrast composition; so is a warm-lit window in a cold blue dusk.
Spiral composition arranges elements along a spiral derived from the golden ratio, tightening toward a point of interest. The curve itself functions as a leading line, drawing the eye inward to where the spiral closes. Most photographers find it more useful as a way of checking a frame afterwards than as something to plan around in the moment.
Composition is not only what you choose to include — it is where you stand. Moving two metres to the left, dropping to your knees or simply stepping closer will change a frame more than any setting on the camera will.
Three variables are worth working deliberately: the angle the camera points, the height you hold it at, and the distance between you and your subject.
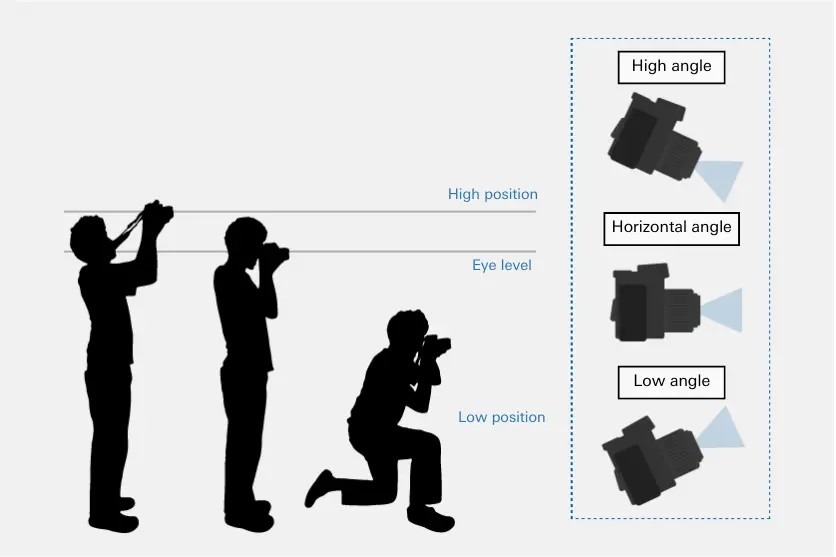
Angle refers to the direction the camera is pointed. There are three broad choices: tilted up, tilted down, and level.
Pointing up from below opens a scene out and lends the subject scale and energy. Pointing down from above does the opposite — it produces stability, containment and a sense of overview. Keeping the camera level reads as neutral and calm, which is exactly what you want when the subject is doing the work on its own.

TAMRON 28-75mm F2.8 G2 (Model A063) Focal length: 28mm Exposure: F4 Shutter Speed: 1/500sec ISO: 320
Position is the height at which you hold the camera, and it is a separate decision from angle.
A high position looks down on the subject. A low position, with the camera near the ground, introduces space, weight and presence — it is the reason photographers end up lying on wet sand. Eye level, matched to the subject's own eye height, feels honest and immediate.
Photographing children or dogs, this means getting down to their height rather than shooting from standing. It is the single most common composition mistake in family photographs, and the easiest one to fix.

Distance is the last variable, and the zoom ring is not a substitute for it.
Moving in close enlarges the subject, emphasises texture and detail, and creates a sense of intimacy. Pulling back gives you scale and context — the subject becomes part of a place rather than the whole of the picture.
Shoot both. The difference between a photographer's first frame of a scene and their best frame of it is usually just the walking they did in between.
Getting the composition you pictured depends on having the right angle of view and enough control over depth of field. These TAMRON lenses are practical starting points for photographers building that control.
17-28mm F/2.8 Di III RXD (Model A046)
A large-aperture ultra wide-angle zoom for full-frame mirrorless that takes a ø67mm filter, which is unusually compact for the class. It is light, sits well balanced on the camera and is easy to carry all day — a practical choice for layered landscape work where you want a strong near foreground.
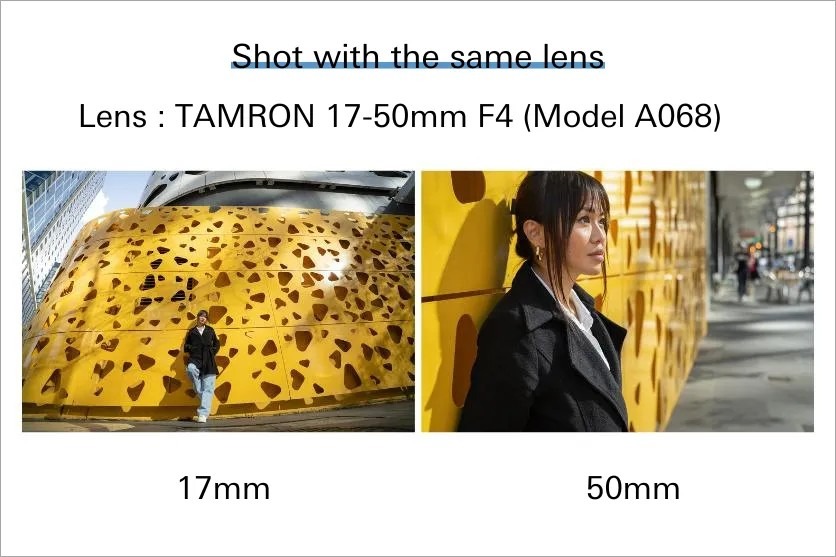
17-50mm F/4 Di III VXD (Model A068)
The world's first zoom to cover ultra-wide 17mm through to standard 50mm in a single barrel. For full-frame mirrorless it is a genuinely versatile one-lens option: wide enough for interiors and coastline, long enough for everyday subjects, with no lens change in between.
11-20mm F/2.8 Di III-A RXD (Model B060)
The world's first compact, lightweight F2.8 ultra wide-angle zoom for APS-C mirrorless, giving roughly a 17-31mm equivalent angle of view. Useful for tight interiors and dramatic foreground-led composition, and well suited to video.
20-40mm F/2.8 Di III VXD (Model A062)
A large-aperture standard zoom built around portability, running from ultra-wide 20mm to standard 40mm and among the smallest and lightest in its class. Image quality holds across the range, and the quiet, agile VXD focus motor makes it as suitable for video and vlogging as for stills.
28-75mm F/2.8 Di III VXD G2 (Model A063)
The second-generation version of TAMRON's fast standard zoom for full-frame mirrorless, with improved optics, faster autofocus and expanded function customisation. This is arguably the most useful focal range for learning composition — wide enough for context at 28mm, long enough to compress and isolate at 75mm.
17-70mm F/2.8 Di III-A VC RXD (Model B070)
A constant F2.8 standard zoom for APS-C mirrorless covering 17-70mm, roughly 25.5-105mm equivalent, for a 4.1x zoom range. Resolution and contrast hold up from the centre to the corners, the AF drive is quiet, and the VC image stabilisation makes handheld shooting practical in low light. Focus breathing is well controlled, which matters if you shoot video.
35-150mm F/2-2.8 Di III VXD (Model A058)
A high-resolution travel zoom running from 35mm wide-angle to 150mm telephoto, and the first zoom lens to reach F2 at the wide end. The VXD linear motor focus system is fast and precise, and the focal range covers environmental context and tight portrait compression without a lens change.
70-180mm F/2.8 Di III VC VXD G2 (Model A065)
The world's smallest and lightest fast-aperture telephoto zoom in its class, now evolved to G2 level. Telephoto compression is the most underused compositional tool there is: it stacks layers, simplifies backgrounds and flattens distance in a way no wide-angle lens can imitate.
70-300mm F/4.5-6.3 Di III RXD (Model A047)
A telephoto zoom for full-frame mirrorless designed to be approachable at any skill level, and notably small and light for the range it covers. Special elements correct the chromatic aberration that telephoto designs are prone to, and the RXD focus system is quick and very quiet. Versatile across landscape detail, sport, pets and wildlife.
28-200mm F/2.8-5.6 Di III RXD (Model A071)
Nearly three decades of TAMRON all-in-one zoom development distilled into one lens, with an F2.8 maximum aperture at the 28mm wide end — a world's first for the category — and consistent performance right through to 200mm.
18-300mm F/3.5-6.3 Di III-A VC VXD (Model B061)
A 16.6x zoom for APS-C mirrorless, roughly 27-450mm equivalent, driven by the quiet and agile VXD motor. Four LD elements and three hybrid aspherical elements keep images clean from centre to corner, and VC stabilisation plus close-up capability makes it an unusually broad single-lens option.
Photography composition is the technique that decides how a photograph reads. Start with the five elements — framing, format, leading lines, layering and background information — then work through the classic patterns until you recognise them without having to think about it.
After that, the improvement comes from your feet. Change the angle, change the height, step closer, step back, and keep releasing the shutter. Every photographer whose work you admire took a great many ordinary frames to find the good ones.