| September 18, 2026
 South Africa's #1 Mobile Protection Brand
South Africa is one of the finest destinations in the world for moon photography. From the vast, ink-dark skies above the Karoo to the dramatic silhouette of Table Mountain framed against a rising full moon, the country offers photographers a spectacular natural canvas that few places on earth can match. Whether you are a seasoned outdoor photographer or someone who has just picked up an interchangeable lens camera for the first time, learning how to take beautiful photos of the moon is one of the most rewarding challenges you can take on.
Yet moon photography has a way of humbling even enthusiastic beginners. You step outside on a clear Highveld night, point your camera at that brilliant full moon hanging above the Magaliesberg, press the shutter — and the result is a small, washed-out white blob against a featureless black sky. The good news is that with the right lens, a basic understanding of camera settings, and a little preparation, capturing stunning moon images is well within reach for any photographer in South Africa.
In this guide, we walk you through everything you need to know — from equipment and exposure settings to location scouting and composition techniques — so you can go out and shoot the moon with confidence.
It is a question almost every beginner asks: do I really need a dedicated camera for moon photography, or can I use my smartphone? Given the rapid improvement in mobile camera technology, it is a fair question. Flagship devices like the Samsung Galaxy S24 and iPhone 15 Pro, both hugely popular in South Africa, now feature impressive night mode capabilities and multi-lens optical zoom systems.
The honest answer is that while smartphones can produce acceptable moon snapshots in ideal conditions, they fall short when it comes to capturing the level of detail that makes moon photos truly impressive. The sensor on even the best smartphone camera is significantly smaller than that of a mirrorless or DSLR camera, which limits the amount of light it can gather and restricts its ability to resolve fine surface detail. Telephoto capability is also constrained — digital zoom quickly introduces noise and softness, especially in low-light conditions.
To photograph the craters, ridges, and textures on the lunar surface with real clarity, you need an interchangeable lens camera paired with a suitable telephoto lens. Moon photos with a smartphone can be a fun starting point, but once you experience the detail and control that a dedicated camera provides, there is no going back.
Before you head out to your chosen shooting location — whether that is the open plains of the Karoo, the shores of the Knysna Lagoon, or a hillside in the Magaliesberg — it pays to make sure you have the right equipment with you. Here is what you will need for successful moon photography.
The single most important piece of equipment for moon photography is a telephoto lens with sufficient reach. A DSLR lens for moon photography should ideally offer a focal length of at least 200mm to 300mm — this range allows you to capture the lunar surface patterns and begin to resolve individual craters. Moon photography with a 300mm lens is a great entry point and is very achievable since 300mm telephoto lenses are widely available from South African camera retailers at accessible price points.
If you want the moon to fill the entire frame without relying heavily on cropping in post-production, you will need an ultra-telephoto lens with a focal length of around 2000mm equivalent. While such focal lengths are uncommon in standard zoom lenses, the combination of a longer telephoto lens and a teleconverter can help you get there — more on that below. For most photographers starting out, a quality 150–500mm or 50–400mm zoom lens represents an excellent and versatile choice for moon photography.
A teleconverter is an optical accessory that mounts between your camera body and lens to multiply the focal length — typically by 1.4x or 2x. This is particularly useful for moon photography, where extreme telephoto reach is desirable but dedicated ultra-telephoto lenses can be very costly to purchase or import into South Africa. By attaching a compatible teleconverter to a mid-range telephoto lens, you can significantly extend your reach without the expense of buying an entirely new, longer lens.
There are a few trade-offs worth knowing about. Not all camera and lens combinations are compatible with teleconverters, so always check compatibility before purchasing. Using a teleconverter also reduces the maximum aperture of the lens — for example, a lens with a maximum aperture of f/5.6 becomes f/8 with a 1.4x converter — and may slow down autofocus performance. Check the specifications of your specific camera and lens combination in advance and adjust your exposure settings accordingly when shooting.
Keeping your camera perfectly stable is critical in moon photography, particularly when shooting with long focal lengths or slower shutter speeds. A sturdy tripod is strongly recommended. South African photographers shooting in the field — on uneven bushveld terrain, on rocky Drakensberg foothills, or along windy Cape coastal locations — will appreciate having a reliable tripod that can handle varied ground conditions and gusty conditions.
A wireless or cable remote release is also well worth having, as it eliminates the vibration caused by physically pressing the shutter button. If you do not own a remote release, the camera's built-in self-timer function (set to a 2-second or 10-second delay) works just as well and costs nothing.
Getting your DSLR moon settings right is where many beginners struggle — but it does not have to be complicated. The moon is far brighter than most people expect, which means the standard rules for night photography do not always apply. Here is a breakdown of the key moon photography settings you need to know.
Switch your camera to full Manual (M) mode for moon photography. Automatic modes such as Aperture Priority (Av) or Shutter Priority (Tv) will attempt to expose for the dark sky surrounding the moon, which causes the moon itself to be severely overexposed and bleached out — losing all surface detail. Manual mode puts you in full control of the exposure triangle.
If Manual mode feels daunting, take heart — moon photography settings are actually quite predictable once you know the baseline values. The recommended starting points below give you a solid foundation, and from there it is simply a matter of fine-tuning based on what you see on your camera's LCD screen.
Unlike most nighttime photography where you would open the aperture as wide as possible to gather light, the moon is a brightly lit subject — it is, after all, reflecting direct sunlight. Setting your aperture to around f/8 to f/11 will produce sharper images with better-defined lunar surface detail than shooting wide open. Think of it like photographing a sunlit landscape — a mid-range aperture gives you the sharpest results from your lens.
Avoid stopping down too far to very small apertures like f/16 or f/22 — this forces a slower shutter speed to compensate, increasing the risk of motion blur from the moon's movement across the sky.
One of the most important moon photography settings to get right is shutter speed. The moon moves across the sky continuously relative to the earth — even though it appears stationary to the naked eye — and a shutter speed that is too slow will result in a blurred image. A good starting point for a full moon is 1/200 to 1/400 of a second. If you are shooting handheld, lean toward the faster end of that range or even 1/800 of a second to compensate for camera shake.
South African photographers shooting in summer on the Highveld or in the Lowveld may also encounter atmospheric heat shimmer, particularly in the hours just after sunset when the ground is still radiating heat. If you notice the moon's edges appear to "dance" or shimmer in your viewfinder, a faster shutter speed can help freeze this atmospheric distortion and produce a sharper image.
ISO measures how sensitive your camera sensor is to light. For full moon photography, start at the lowest native ISO your camera offers — typically ISO 100 or ISO 200. A low ISO setting produces clean, noise-free images with smooth tonal gradations across the lunar surface. Since the full moon is bright enough to allow a fast shutter speed even at low ISO, there is rarely any need to push the sensitivity higher.
During South Africa's dry winter months (May through August), crescent and half-moon phases are particularly beautiful — clear, cold skies create exceptional transparency and contrast. However, these thinner moon phases emit far less light than a full moon, so you may need to increase ISO to 400 or 800 to maintain a workable shutter speed. Adjust ISO only as much as necessary, and use your camera's noise reduction features in post-processing if needed.
Beyond the technical settings, a little preparation and creative thinking can make all the difference between a technically correct image and a truly memorable moon photograph. Here are five practical tips to elevate your moon photography in South Africa.
1. Plan Around the Moon's Phase, Direction, and Rise Time
Not all nights are equal for moon photography. The phase of the moon — whether it is a crescent, half, gibbous, or full — determines the amount of light available and the dramatic character of the image. Use dedicated apps like PhotoPills or The Photographer's Ephemeris to track the moon's phase, direction, altitude, and exact rise and set times relative to your location anywhere in South Africa.
Remember that South Africa's seasons are the reverse of the Northern Hemisphere — winter full moons (June–August) rise earlier, climb higher in the sky, and are often especially vivid against cold, clear skies. Plan your shoots around these seasonal windows for the best results.
2. Scout Your Shooting Location in Advance
South Africa offers a remarkable range of moon photography locations — from Sutherland in the Northern Cape (home to the SALT telescope and some of the darkest skies on earth) to the wide horizons of the Tankwa Karoo, the escarpment views of the Drakensberg foothills, and the iconic waterfront skyline of Cape Town. When combining the moon with a specific landscape or structure, always scout your location beforehand.
Use Google Maps or Google Earth to identify your shooting angle, then cross-reference with PhotoPills or The Photographer's Ephemeris to confirm exactly where and when the moon will rise or set relative to your chosen landmark. Light pollution maps — available at darksitefinder.com — are also invaluable for finding the clearest possible skies near your location.
3. Don't Worry if the Moon Looks Small — You Can Make the Moon Look Big in Photos
Many beginner photographers are disappointed when they review their first moon shots and find the moon appearing much smaller in the frame than it looked to the naked eye. This is entirely normal — our brains exaggerate the apparent size of the moon, especially near the horizon. The good news is that you can make the moon look big in photos by using two straightforward approaches.
First, shoot with the longest focal length available to you. Second, crop your image in post-processing software such as Adobe Lightroom — a popular choice among South African photographers — to bring the moon closer to the viewer. Shooting in RAW format rather than JPEG gives you significantly more flexibility when cropping and editing, as RAW files retain far more image data and allow you to recover detail in both highlights and shadows.
4. Use White Balance to Set the Mood
The colour of the moon varies considerably depending on atmospheric conditions, altitude, and ambient light — and South Africa's diverse environments produce some striking and distinctive moon tones. A moon rising through the dust haze of a dry Highveld summer evening takes on a deep, warm amber glow, while the same moon photographed from the Cape Peninsula in a clear winter sky can appear brilliantly white with blue-silver undertones.
To emphasise warm tones, set your white balance to Cloudy or Shade. For a cooler, more ethereal look, try Daylight or a custom Kelvin setting in the cooler range. If you are shooting in RAW, you can always set white balance to Auto at capture time and fine-tune it later in post-processing without any quality loss.
5. Think About Background and Composition
A tightly framed moon filling the frame is undeniably powerful, but some of the most striking moon images come from combining the moon with a compelling foreground or background element. South Africa's landscapes offer extraordinary compositional opportunities that are difficult to match anywhere else in the world.
Consider the full moon rising alongside the craggy silhouette of Table Mountain, reflected in the glassy surface of the Knysna Lagoon or Vaal Dam, or framed between the Jacaranda-lined streets of Pretoria in October. The Johannesburg and Cape Town city skylines offer dramatic urban backdrops, while the Drakensberg and Cederberg ranges provide majestic natural settings. Experiment with different angles and positions to find compositions that feel uniquely South African and uniquely yours.
The approach to moon photography shifts depending on the lunar phase, the weather, and the environment you are shooting in. Here is how to handle the most common and compelling moon photography scenarios you will encounter in South Africa.
A clear, full moon night is the classic starting point for anyone learning how to shoot the full moon. When the moon is fully illuminated and riding high in a cloudless sky — as is common on crisp winter nights across the South African interior — the conditions are almost ideal. Begin with an aperture of f/8 to f/10, a shutter speed of 1/100 to 1/400 of a second, and ISO 100 to 200. These DSLR moon settings give you a solid foundation for a bright, detailed full moon image.
Review each shot on your camera's LCD and use the histogram to check exposure. If the moon appears overly white or blown out, increase your shutter speed to reduce exposure. If it appears too dark and grey, slow the shutter speed slightly. The trial-and-error approach is both normal and enjoyable — do not be afraid to experiment and take many frames.
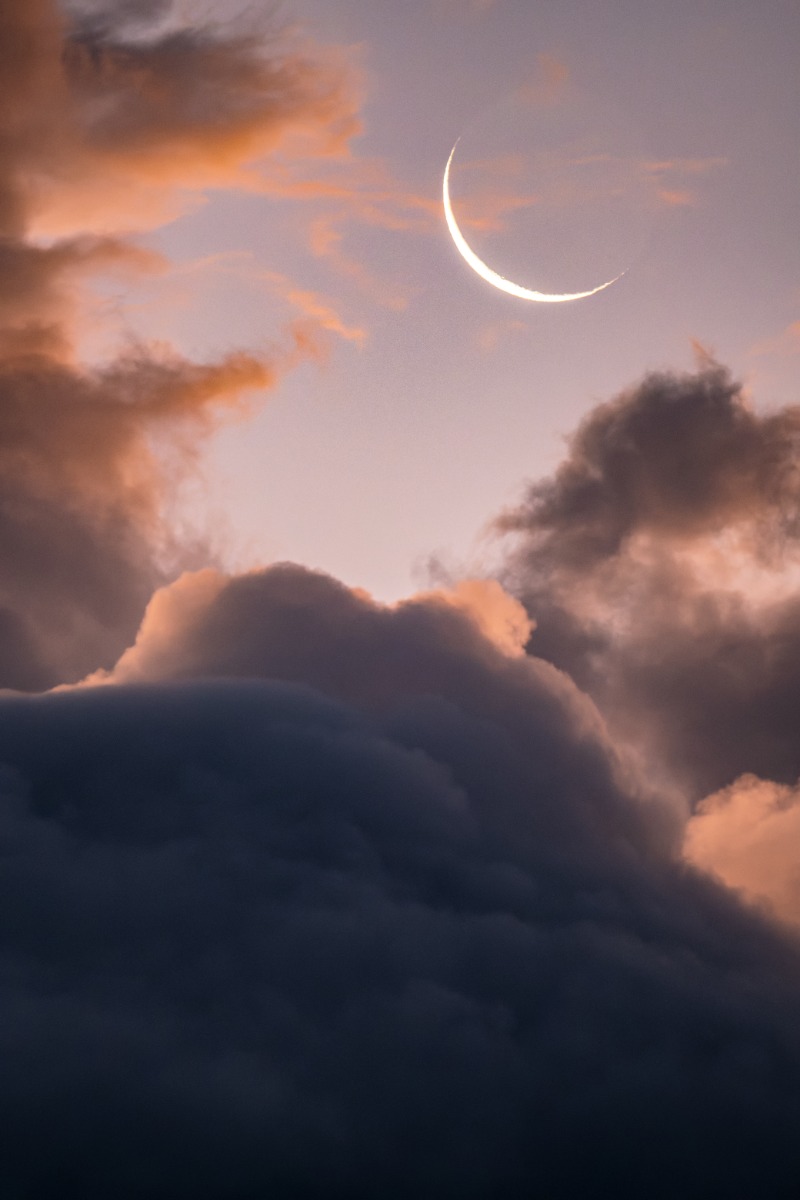
Crescent and half-moons emit significantly less light than a full moon, which requires some adjustments to your camera settings. Start with a shutter speed in the 1/100 to 1/400 second range, then slow it down gradually until you achieve a well-exposed image. A slightly wider aperture in the f/4 to f/6 range can help capture additional light while still retaining enough sharpness to render the moon's edge cleanly. If the image is still too dark, increase ISO to 400 or 800.
South Africa's dry winter months — particularly May through August — are ideal for crescent and half-moon photography. The skies are reliably clear, humidity is low, and the atmosphere is crisp, producing excellent transparency and contrast. This is also the best time to shoot during the magic hour or blue hour: as the sun sets over the Winelands or the Highveld horizon fades from orange to deep blue, a slender crescent moon hangs in the western sky, creating a scene of extraordinary beauty.
The transition from golden hour to full darkness gives you a brief but spectacular window to capture the crescent moon set against a richly graduated sky — far more evocative than a moon against pure black.
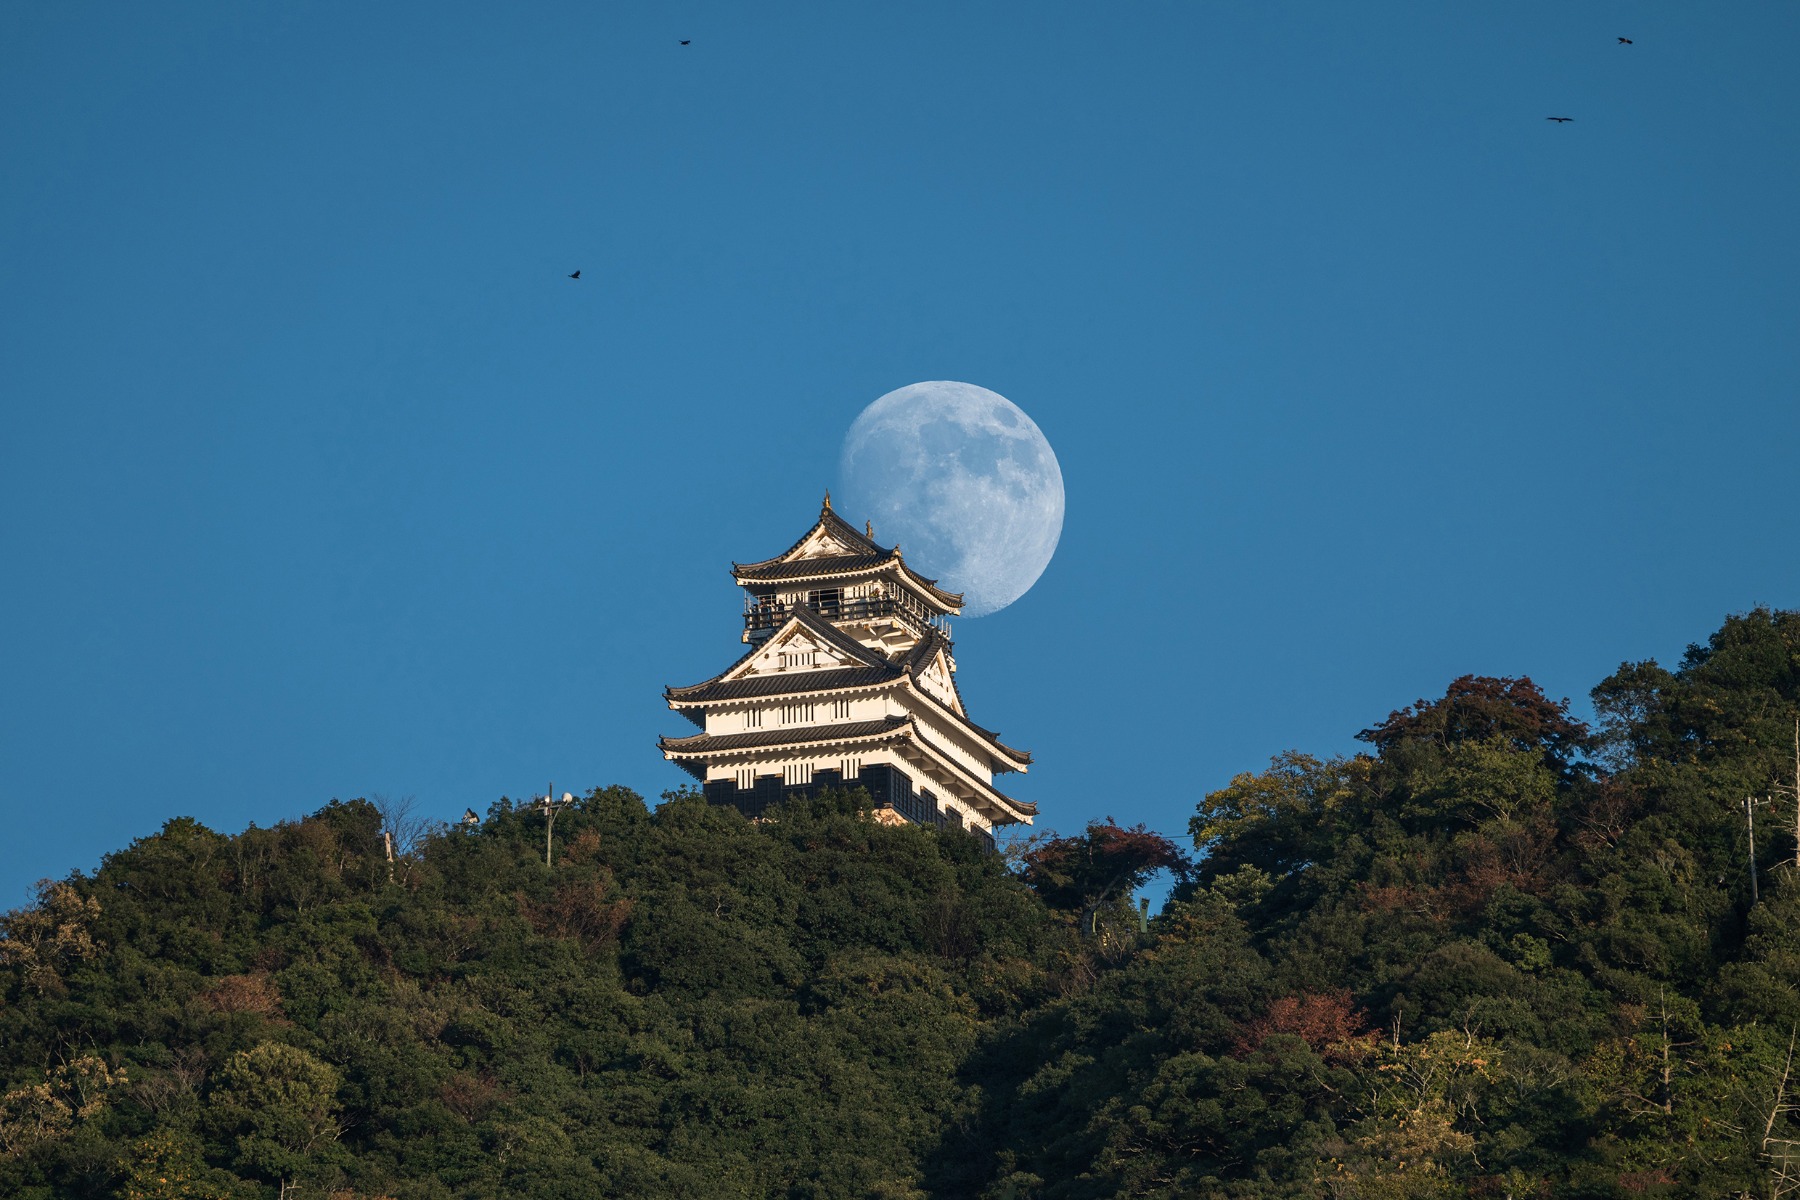
Pairing the moon with a striking foreground or background transforms a moon photograph into a storytelling image. In South Africa, the options are exceptional: the moon rising alongside the silhouette of Table Mountain viewed from the Bloubergstrand shoreline, the Johannesburg or Cape Town skyline glowing beneath a rising full moon, or the Pretoria city bowl framed by purple-flowering Jacaranda trees in October.
Because the moon is far brighter than most terrestrial subjects at night, balancing the exposure between the moon and its surroundings is the key challenge. The most effective solution is to shoot during moonrise or moonset, when the moon is close to the horizon and its light is softer and more diffused through the atmosphere. At this time, the brightness difference between the moon and the surrounding landscape is at its smallest, making it much easier to expose both elements well in a single frame.
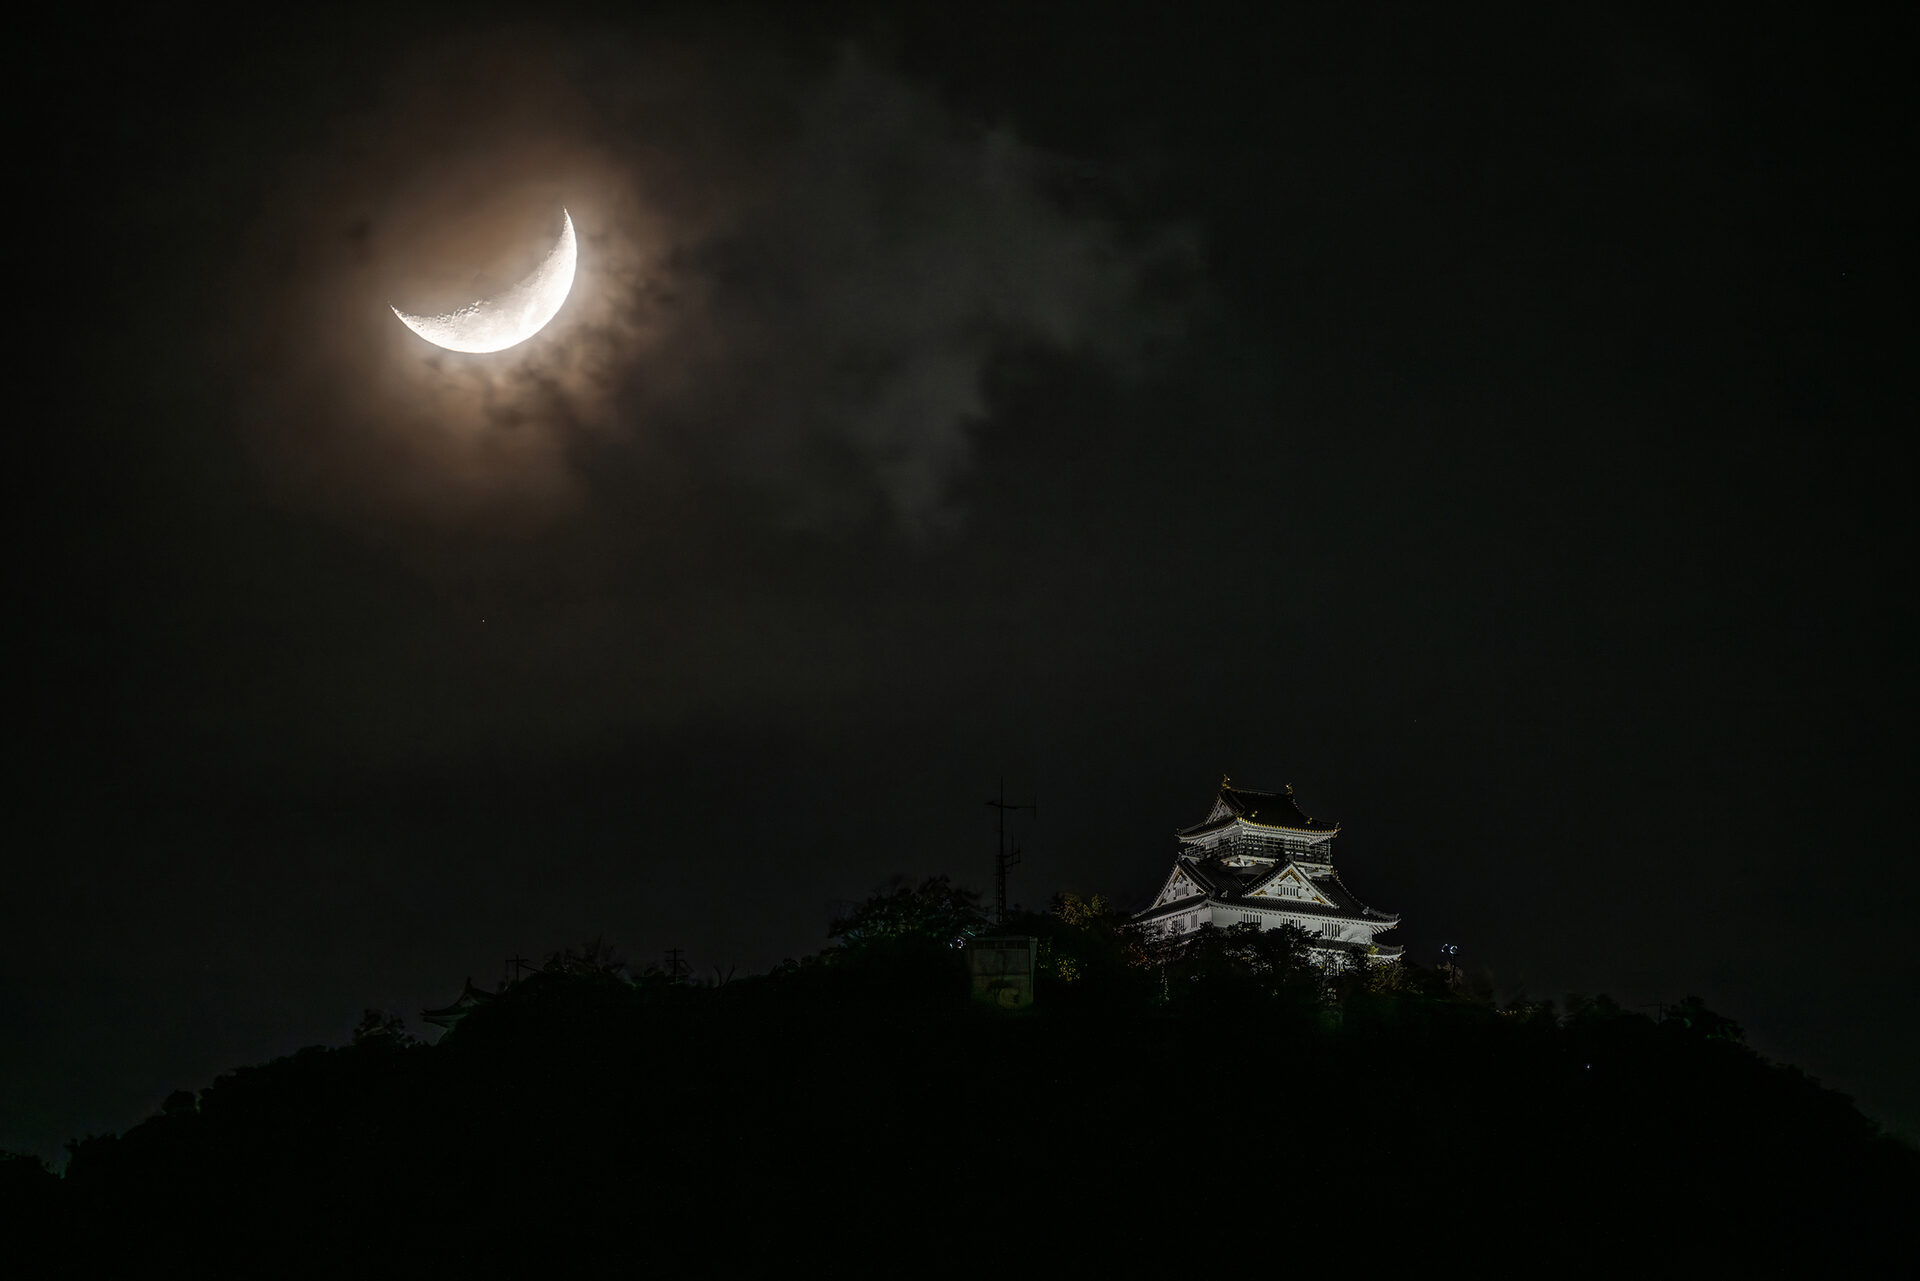
Some of the most atmospheric and painterly moon photographs are taken not on clear nights, but when thin cloud or mist partially veils the moon, scattering its light into a soft, diffused glow. In South Africa, this effect occurs naturally along the Garden Route, where coastal sea mist drifts in from the Indian Ocean on summer evenings, and in the Western Cape during berg wind conditions, when a haze of fine dust and warm air softens the sky.
To capture a misty or veiled moon effectively, set a slower shutter speed of around 1/1 to 1/100 of a second and adjust based on the density of the cloud cover and how much the moon is obscured. A slightly wider aperture adds to the dreamy, soft quality of the light. On nights when the cloud cover is thin and patchy, keep shooting as the clouds shift — you may find that the best frame comes in a brief gap or a moment when the moon is half-revealed.
South Africa is internationally recognised as one of the premier destinations for astrophotography, and combining the moon with a starry landscape is a natural extension of moon photography. The Northern Cape — home to the South African Astronomical Observatory in Sutherland and the Tankwa Karoo National Park — offers some of the darkest skies in the southern hemisphere, making it an extraordinary location for this type of image. The Cederberg Wilderness Area and parts of the Drakensberg range are also excellent options closer to major population centres.
A wide-angle lens is the right tool here, allowing you to capture both the moon and a sweeping arc of stars across a wide field of view. The main challenge is the brightness imbalance — the moon is far more luminous than the surrounding stars, which can cause it to overpower the frame. As with landscape moon photography, shooting during moonrise or moonset reduces the moon's intensity and brings it closer in brightness to the rest of the scene.
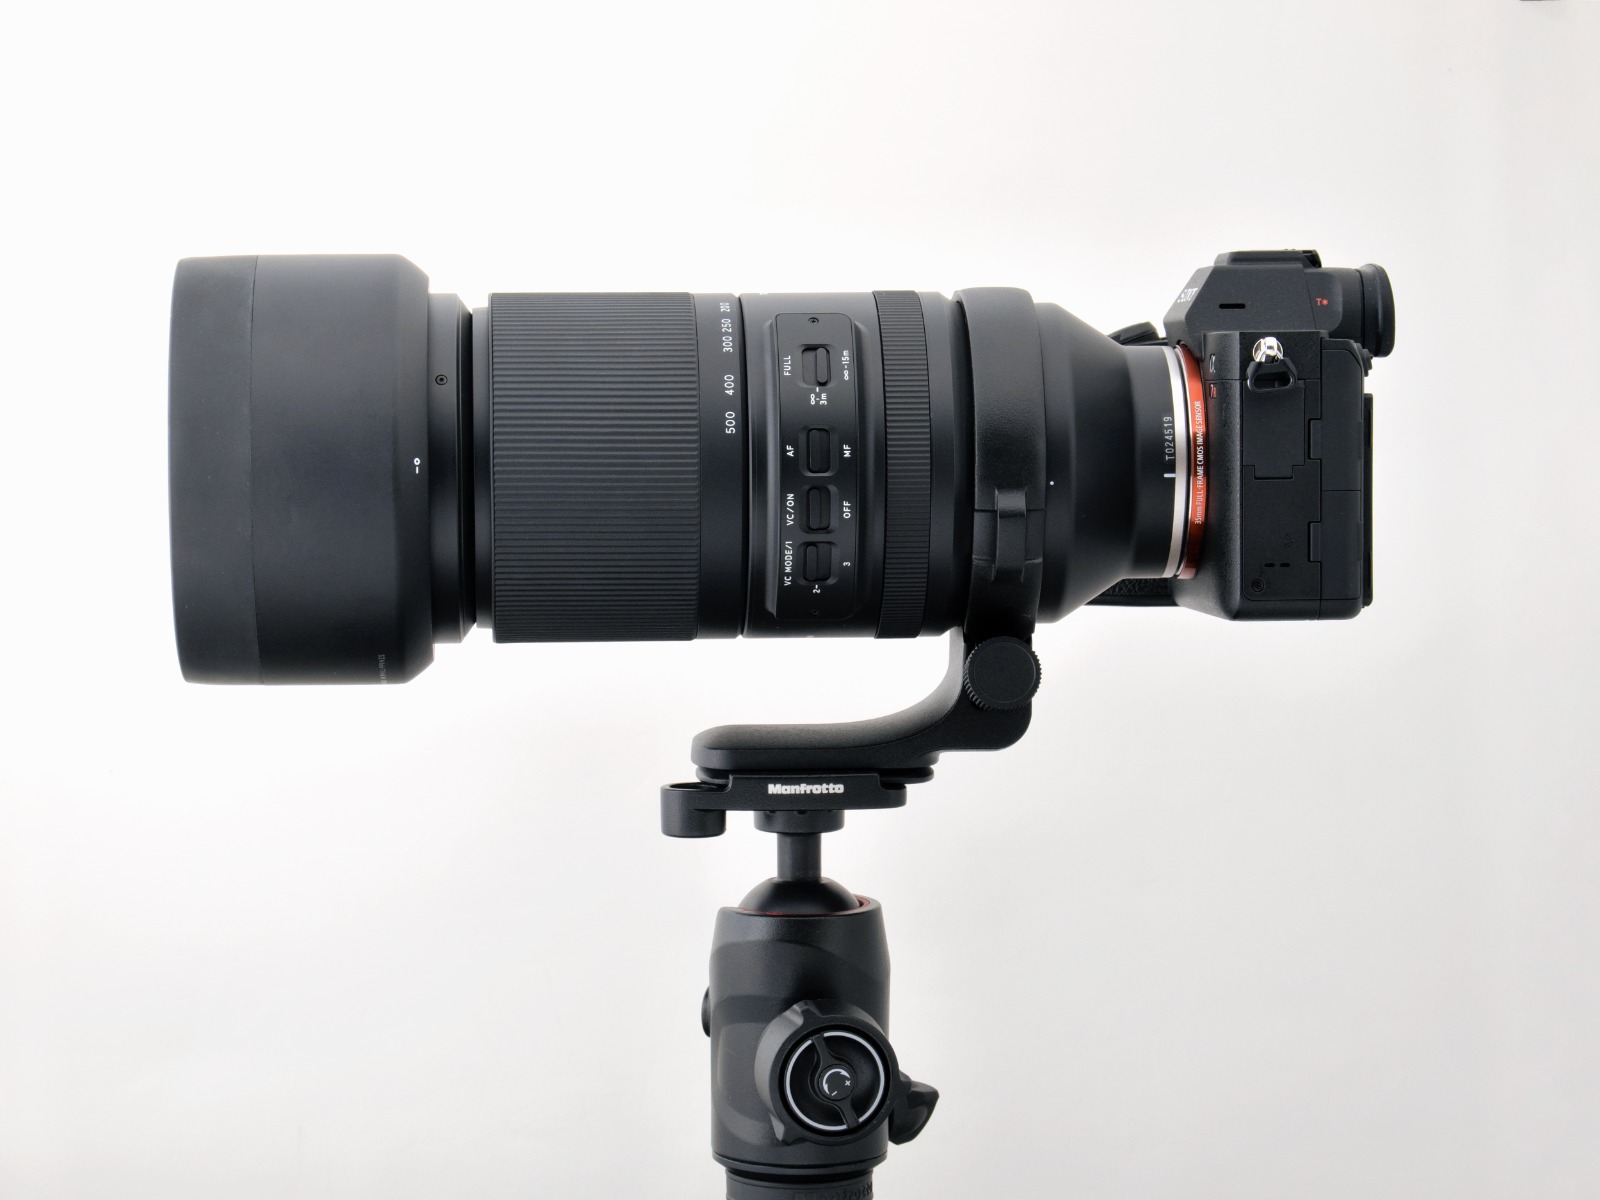
Choosing the right moon telephoto lens is one of the most impactful decisions you will make as a moon photographer. Here are the key factors to consider when selecting a DSLR lens for moon photography.
Focal length is the single most important specification for a moon telephoto lens. A focal length of 200mm to 300mm is a practical and accessible starting point — moon photography with a 300mm lens allows you to capture the major surface patterns and larger craters, and 300mm telephoto lenses are widely available from South African camera retailers without requiring a large budget. For finer lunar detail, an ultra-telephoto lens in the 400–500mm range offers noticeably more resolution.
The longer the focal length, the more susceptible the image is to camera shake and atmospheric distortion — both factors to bear in mind when shooting in South Africa's often windy coastal regions or heat-shimmering inland areas. At focal lengths of 300mm and beyond, a tripod becomes essential rather than optional.
A lens with a larger maximum aperture (smaller f-number, such as f/4 or f/5.6) allows more light to reach the sensor, which is particularly valuable when photographing crescent or half-moons where available light is limited. Lenses with wider maximum apertures also offer the pleasing ability to throw distracting backgrounds out of focus, making them versatile tools beyond moon photography alone. That said, for full moon photography, maximum aperture is less critical since the subject is genuinely bright.
Telephoto lenses grow heavier and more physically demanding to handle as focal length increases. For South African photographers who regularly shoot in the field — hiking in the Drakensberg, on game drives in Kruger, or travelling the Garden Route — pack weight is a genuine practical consideration. A compact, lightweight telephoto lens that balances well on a travel tripod and can be handheld for shorter sessions is far more likely to be taken out and used regularly than a cumbersome, heavy alternative. If possible, always handle a lens in-store before purchasing to assess how it feels in your hands.
Moon photography requires your lens to acquire focus in low-light conditions, sometimes very quickly as clouds move across the sky or as you reframe your shot. A lens with fast, accurate autofocus performance makes this process significantly smoother and reduces the number of missed or soft shots. Look for lenses with quiet, linear autofocus motors that can track moving subjects reliably.
If you plan to shoot handheld at any point — which is entirely practical with lighter telephoto lenses at moderate focal lengths — optical image stabilisation (often referred to as Vibration Compensation or VC in Tamron lenses) is a very worthwhile feature. South Africa's coastal photographers dealing with persistent wind, and Highveld or Lowveld photographers navigating heat shimmer, will find that effective image stabilisation makes a measurable difference to sharpness rates, especially in marginal conditions.
South Africa is a photographer's paradise, and that extends well beyond golden-hour wildlife shots and sweeping landscape panoramas. The country's exceptional dark skies, dramatic geography, and year-round shooting opportunities make it one of the best places in the world to pursue moon photography — and the skills you develop along the way will enrich every other genre of photography you pursue.
Start with the fundamental DSLR moon settings outlined in this guide, head out on the next clear night, and take as many frames as you can. Moon photography rewards patience, curiosity, and a willingness to experiment. Whether you are capturing the full moon rising over the Drakensberg, a slender crescent hanging above the Cape Town harbour, or the milky glow of a veiled moon over the Garden Route, the South African sky has something extraordinary to offer every single month of the year.
Choose the right lens, set your camera with confidence, and go shoot the moon.