| September 18, 2026
 South Africa's #1 Mobile Protection Brand

Baseball and softball ask more of a camera than almost any other sport played on a South African field. The action arrives in short, explosive bursts at unpredictable moments, the players are a long way from wherever you are standing, and the light is either brutally hard or draining away faster than it feels like it is. Get the settings right and you come away with photographs that carry real weight — a bat meeting the ball, a fielder stretched full length, a junior player's face in the second before a pitch arrives. This article covers how to photograph sports on the diamond: the exposure settings that freeze movement, a scene-by-scene approach that puts you in the right position, and how to choose a lens with the reach to get there.
Start with an ultra-telephoto lens when you photograph sports at distance
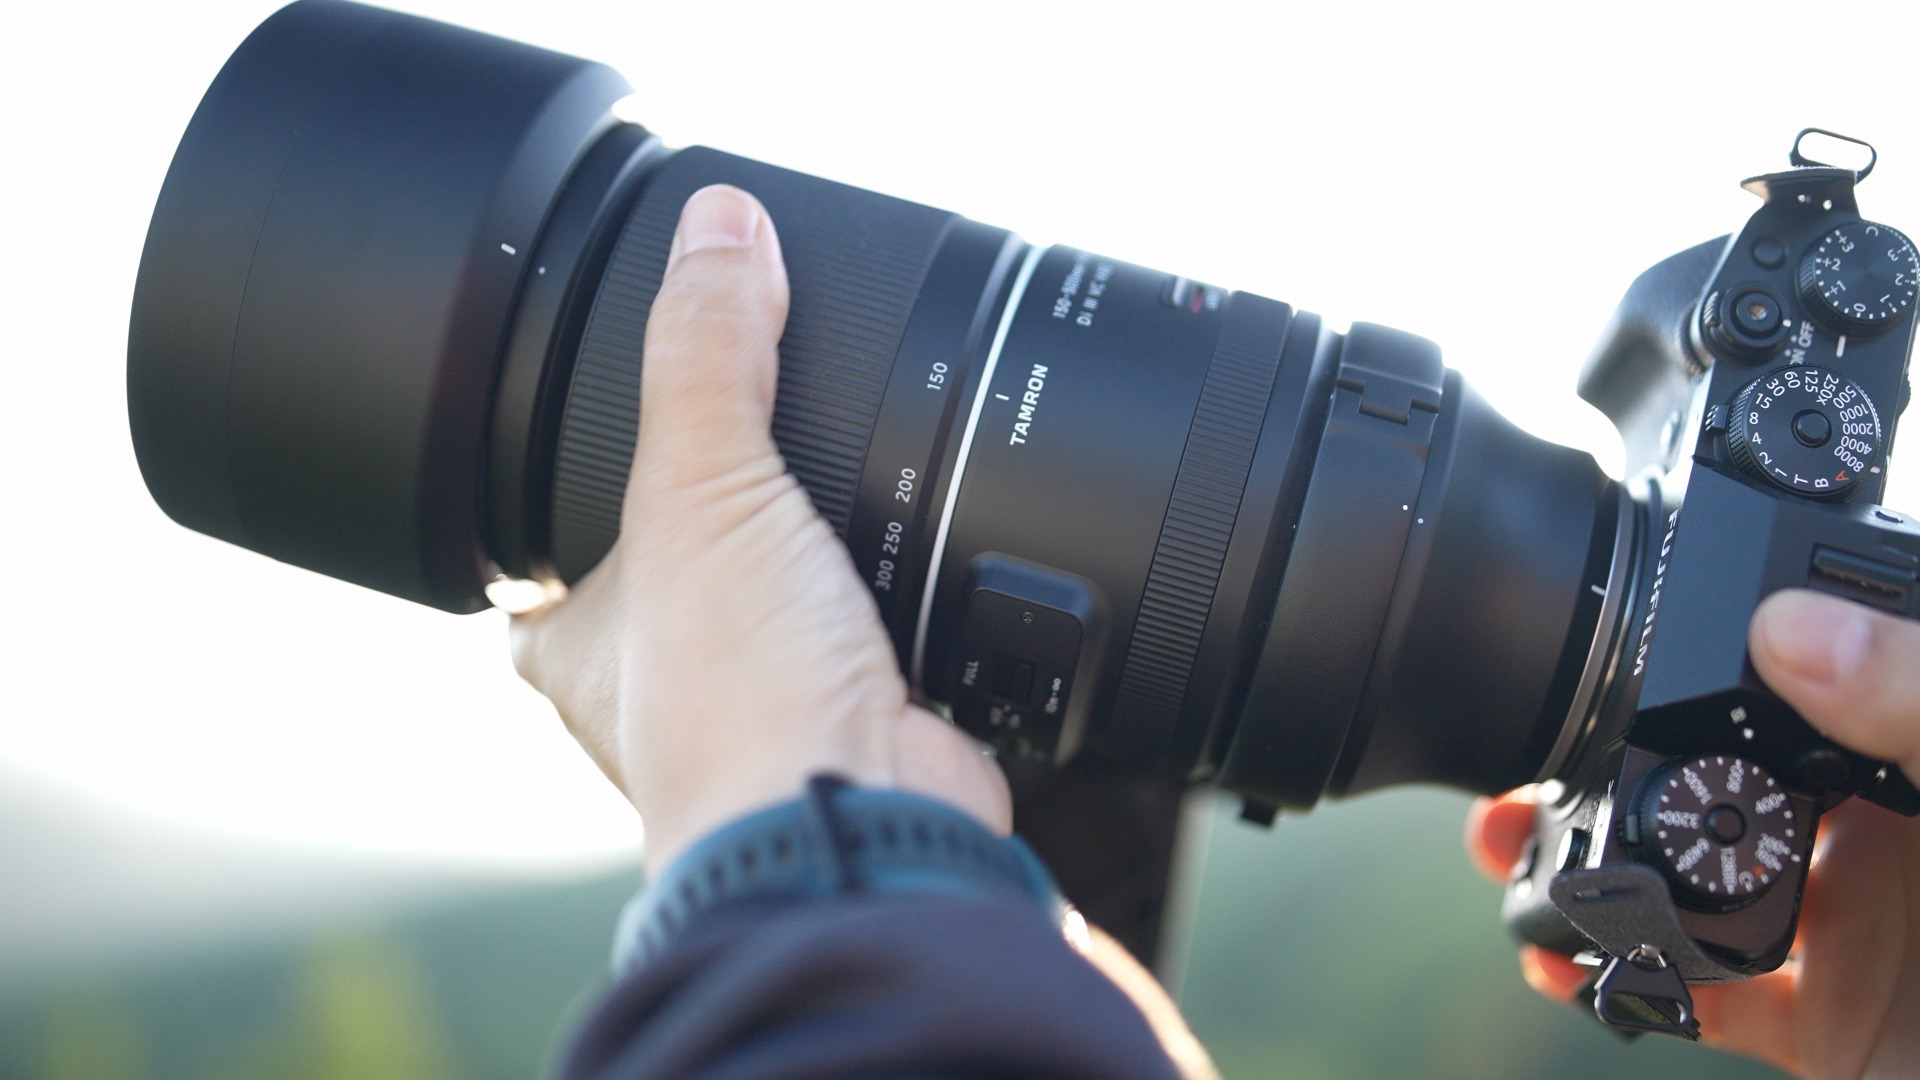
Distance is the defining problem. On a full-size diamond, the gap from a spectator position to the pitcher's mound or second base runs to fifty metres and beyond, and from behind the backstop to the outfield fence further still. A standard zoom leaves the player as a small figure in a large frame, and cropping in afterwards only throws away the detail you were trying to capture.
This is where an ultra-telephoto lens earns its place — roughly 300mm and upwards. At that reach you can fill the frame with a pitcher's delivery, a batter's swing or a fielder's throw, and you start capturing expression rather than just posture. A high-ratio zoom such as the TAMRON 50-400mm F4.5-6.3 (Model A067) gives you the reach at the long end while still covering standard focal lengths, which matters when you cannot change lenses between innings.
The trade-off is mass. Long lenses are heavy, and every millimetre of focal length magnifies hand movement as well as the subject. Tripods and monopods are restricted at many grounds, or there is simply nowhere sensible to put one, so a lens with Vibration Compensation is worth prioritising over one without.
Once you have the reach, the rest is settings and timing. Everything in this section transfers directly to cricket, hockey, rugby and school athletics — the diamond simply tests each principle harder than most sports do.
Freezing a player mid-movement is an exposure problem before it is anything else. Four controls decide whether you come home with a sharp frame or a smeared one: shooting mode, shutter speed, aperture and ISO sensitivity.
Shutter priority is the mode to use. You set the shutter speed, the camera works out the aperture, and the one variable you actually care about stays locked while the light shifts around you. It is the same choice you would make at a cricket fixture or a swimming gala.
In good light outdoors, work between 1/800 and 1/1600 sec. That range stops a swing, a pitch and a runner cleanly. Faster shutter speeds cost you light, so on an overcast Cape afternoon, or once the sun drops behind the pavilion, you will need to raise ISO or dial in positive exposure compensation to hold the exposure where you want it.
For most action frames, keep the aperture as close to maximum as the lens allows. It feeds the sensor the most light, which is what makes a fast shutter speed possible in the first place, and the shallow depth of field lifts a player clear of the usual club-ground background of fencing, kit bags and parked cars.
Stop down when the surroundings are part of the picture. A narrower aperture deepens the zone of sharp focus and holds the infield, the fielding positions and the ground itself together — useful for a frame that is about the game rather than about one player in it.
Outdoors in daylight, start somewhere between ISO 100 and ISO 800 and adjust from what you actually see on the back of the camera. As the light drops, push it upwards without agonising: a high-ISO frame that is sharp beats a clean one that is blurred.
There is a ceiling, though. Past a certain point, noise starts eating the fine detail that makes these photographs work — the stitching on the ball, the texture of a worn glove, the edge of a shadow across a face. Find where your camera stops looking acceptable to you and treat that as your limit rather than trusting a number from someone else.
Diamond sports reward anticipation far more than reflex. The decisive moment is over in a fraction of a second, and if you only start reacting once you have seen it, you have already missed it.
Half-press the shutter to acquire focus on the player, hold it there, and watch the play develop through the viewfinder. When the moment arrives, hold the button down through it and let the burst run. You are choosing the frame afterwards rather than timing it perfectly on the day.
Set autofocus to AF-C, or continuous AF, so the camera keeps adjusting as the subject moves towards or away from you. Combined with subject detection, it is the difference between a sequence that is usable throughout and one where only the first frame is sharp.
Where you stand shapes the photograph more than any setting does. The same play looks completely different from behind the backstop, from the first-base line, from third, and from the outfield fence.
Behind the backstop puts you square-on to both the pitcher and the batter's face. Down the baselines you get the body in profile and the full extension of a swing or a throw. From the outfield you can shoot back towards the infield and pick up the pavilion and spectators behind the play — at a Boland ground that might mean vines and mountains filling the background. Working a game from three or four positions gives you a set of images rather than twenty versions of one.
Move between innings and during breaks in play, never while a ball is live. Keep clear of sightlines, dugouts and anyone who is watching, coaching or waiting to bat. A photographer stepping into view at the wrong moment is remembered a good deal longer than any photograph.
Most grounds put a backstop net or a diamond-mesh fence between you and the action, and netting that lands in focus will ruin an otherwise good frame. The fix is proximity: get the front element as close to the netting as you can, almost touching it. At that distance the mesh falls so far outside the plane of focus that it dissolves completely.
Zooming towards the long end helps for the same reason — a narrower angle of view and shallower depth of field push the netting further out of focus. If your lens has a focus limiter, setting it to the far range stops the autofocus hunting onto the mesh instead of the player. The same technique works at cricket practice nets and along hockey perimeter fencing.
A close-up gains its impact from separation. When the background dissolves into soft colour, everything the eye has to work with is the player — the set of the shoulders, the grip on the bat, the expression under the helmet.
A long focal length combined with an aperture near maximum does this on its own. Choose what dissolves, though: a dugout, a bank of spectators, kit bags along the fence or trees behind the outfield each give a different colour and mood to the frame. Background blur is a compositional decision, not just a side effect of the settings.
High-ratio zooms that reach down to standard focal lengths let you tell the other half of the story without changing lenses. At the wide end you can take in the whole diamond, the spectator bank, the pavilion and the sky above it.
A set that contains nothing but tight action frames feels oddly airless. Mixing in wide establishing shots — the ground before the first pitch, a Cape Town field under afternoon cloud, the outfield spread out beneath a Highveld sky, the teams walking on — gives the sequence somewhere to breathe.
An innings is a sequence of repeating situations, which is good news: you can prepare for each one in advance. Here is how to approach the moments that recur in every game.
The batter's swing

TAMRON 50-400mm F4.5-6.3 (Model A067) Focal length: 400mm Exposure: F6.3 Shutter Speed: 1/1000sec ISO: 1000
Position yourself according to which side the batter hits from. For a left-handed batter, shoot from the third-base side; for a right-handed batter, from first base. Either way you end up looking at the front of the body as the swing comes through, rather than at a back.
Height matters as much as side. Getting the camera low — kneeling, or braced near the ground where the position allows it — makes a swing look powerful in a way that eye level never does. With junior players this is doubly true: shooting from slightly below a child's eye level gives them scale and presence in the frame.
The instant of contact is close to impossible to time deliberately. Focus on the batter with a half-press, watch the pitcher's arm as though you were standing in the box yourself, and run a burst through the whole swing. The frame you want is usually the one just before or just after contact, and you will find it in the sequence rather than catch it in the moment.
The moment the pitcher releases

TAMRON 50-400mm F4.5-6.3 (Model A067) Focal length: 400mm Exposure: F6.3 Shutter Speed: 1/1250sec ISO: 640
The pitcher's throwing arm determines your side again. For a right-handed pitcher, shoot from the third-base side; for a left-hander, from first, and the delivery opens up towards you rather than closing off. From behind the backstop you get something different altogether — the face, straight on, at the moment of maximum effort.
Watch a few deliveries before you start shooting. Pitchers work to a rhythm, and once you know the tempo you can begin the burst at the wind-up and let it run through the stride and the release. Where children are pitching, drop the camera low again; the low angle does the same work for a delivery that it does for a swing.
Fielding and defensive play
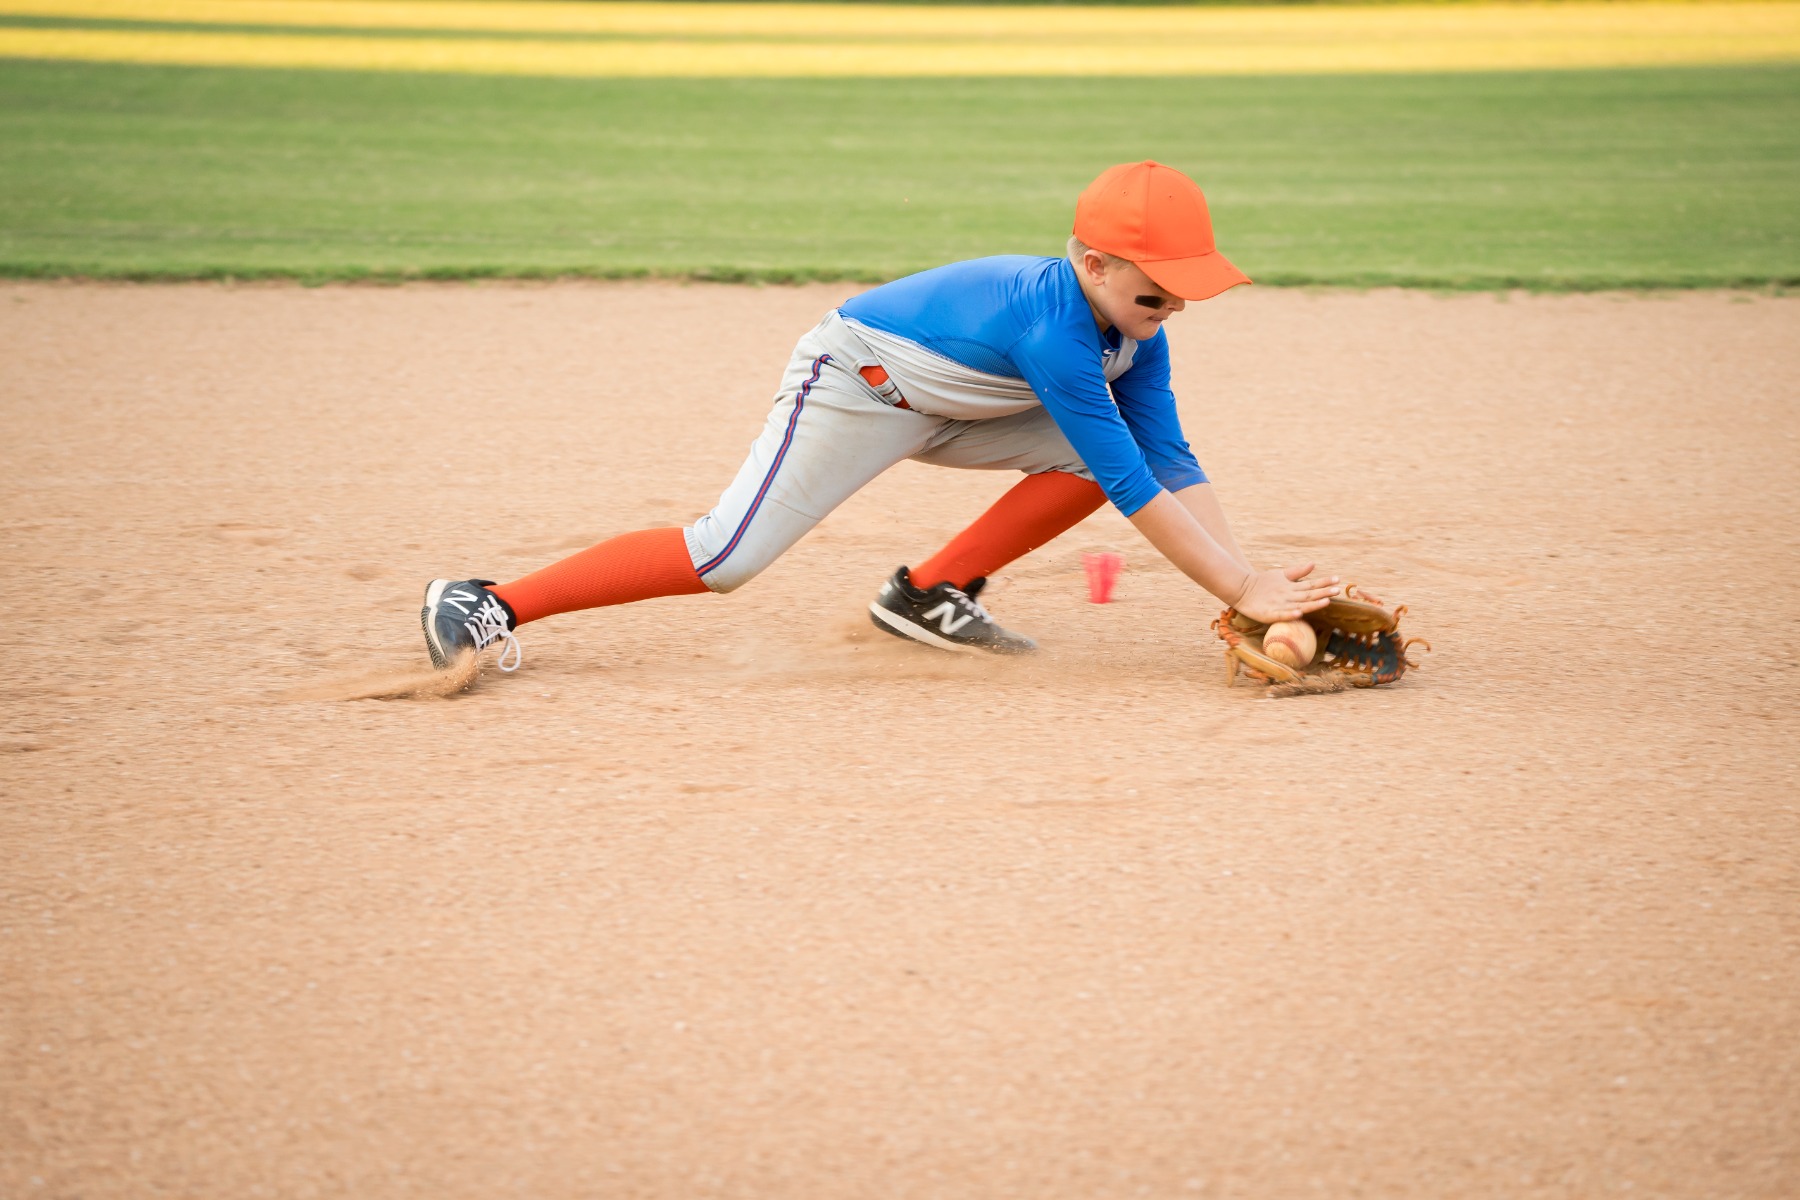
TAMRON 50-400mm F4.5-6.3 (Model A067) Focal length: 400mm Exposure: F6.3 Shutter Speed: 1/2000sec ISO: 1600
For a defensive play, pick your fielder and wait. Shortstop, second base and the catcher generate most of the action worth having, and you can work out where it is likely to happen from the count, the runners on base and how the field is set.
With a runner on first, for instance, hold the camera on the middle infield and be ready for a throw to second, a stolen base, a double play or a bunt. The waiting itself is a subject too — a fielder crouched and set, eyes tracking the batter, makes a photograph about concentration rather than about motion.
For a defensive play, pick your fielder and wait. Shortstop, second base and the catcher generate most of the action worth having, and you can work out where it is likely to happen from the count, the runners on base and how the field is set.
With a runner on first, for instance, hold the camera on the middle infield and be ready for a throw to second, a stolen base, a double play or a bunt. The waiting itself is a subject too — a fielder crouched and set, eyes tracking the batter, makes a photograph about concentration rather than about motion.
Faces are as much a subject at a game as the action is. The on-deck circle, the players waiting on the bench, the moment just after a play goes wrong — these carry the emotion that a wide action frame cannot.
Focus on the eyes and shoot from as low as you can manage, below the player's eye level where the position allows it. With the background thrown well out of focus, an expression fills the frame and the photograph stops being about the sport at all.
Making juniors look their best at school and club games
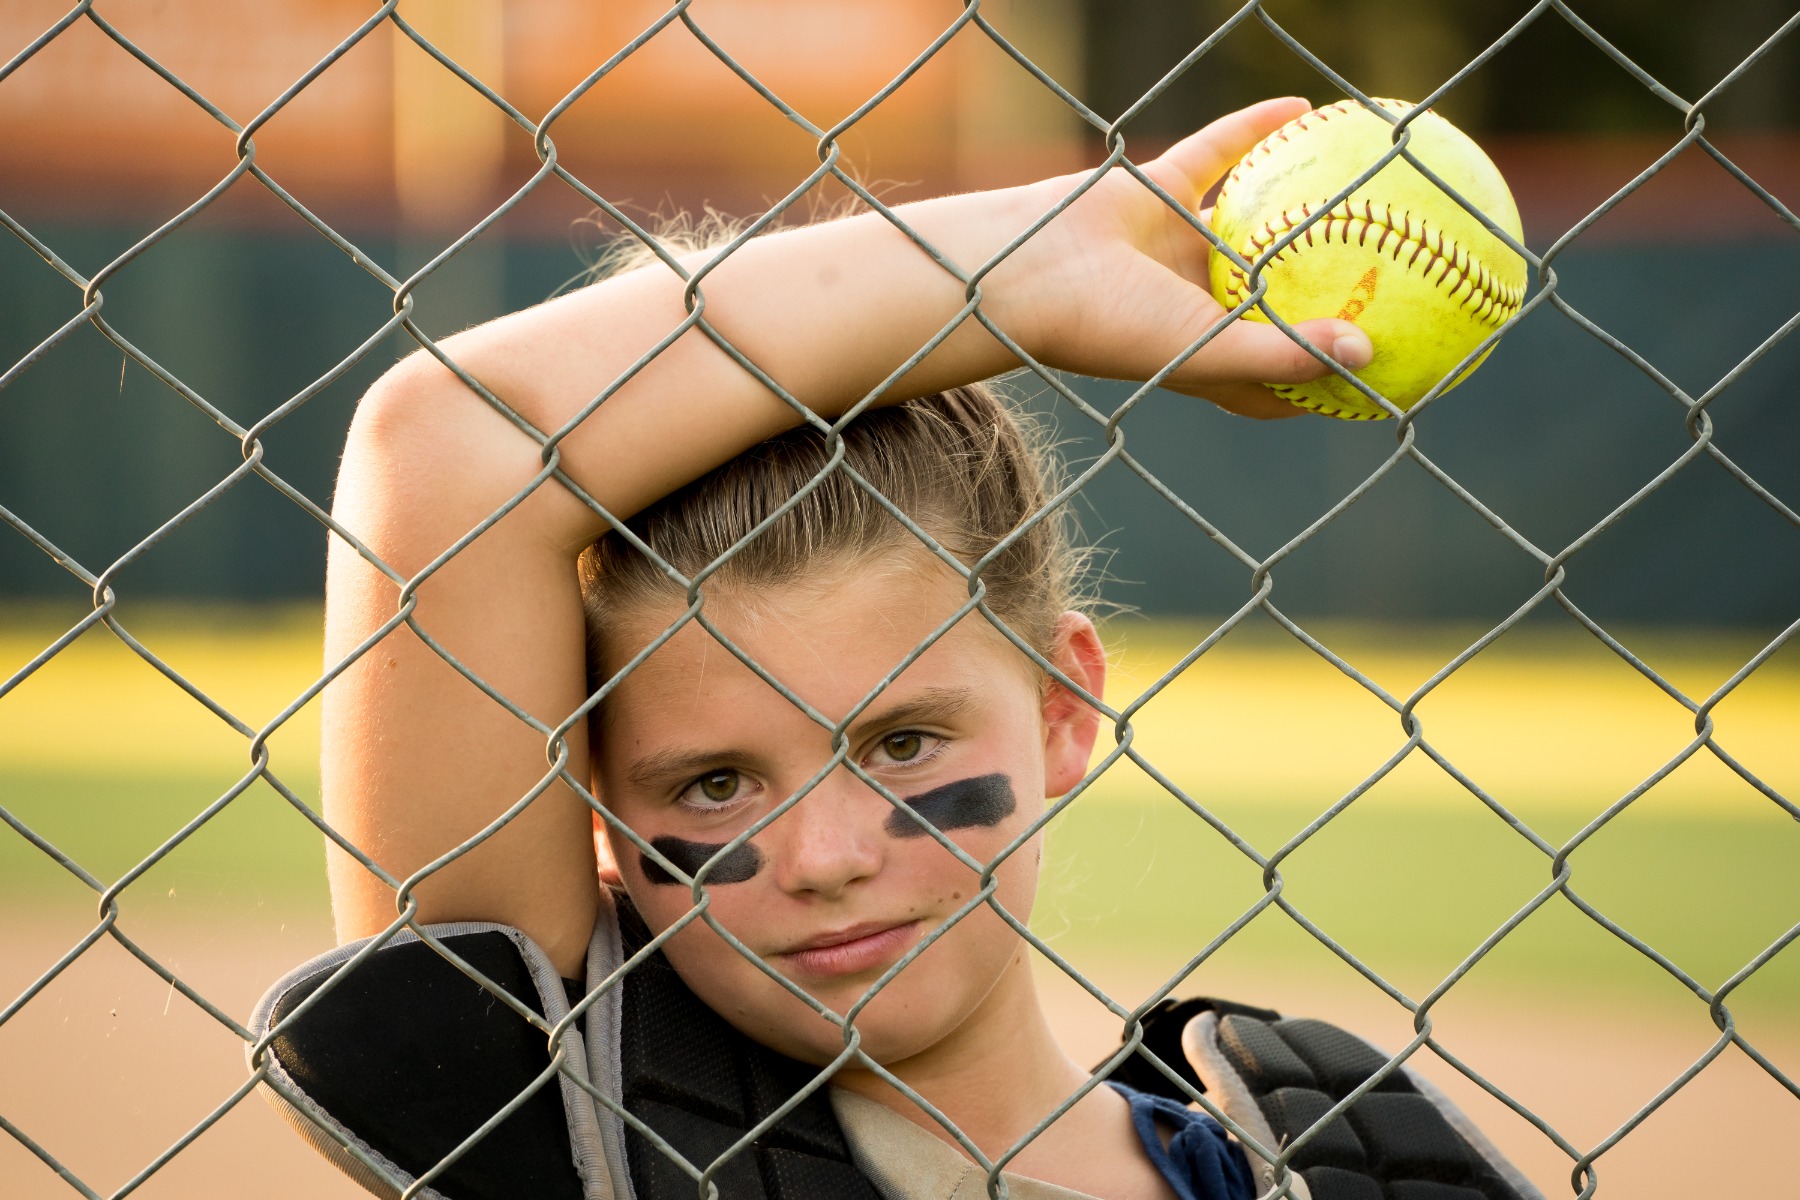
TAMRON 50-400mm F4.5-6.3 (Model A067) Focal length: 400mm Exposure: F6.3 Shutter Speed: 1/1250sec ISO: 1600
At a junior fixture or a practice session, get the camera low — slightly below the child's eye level — and the resulting frames carry a scale and seriousness that a shot taken from adult standing height never will.
Focus on the eyes, and keep shooting between the plays as well as during them. The concentration before a pitch, the frustration after a dropped catch, the grin walking back to the dugout: those are the frames parents keep. One practical note — check the club or school's photography policy before posting images that include other people's children.
The bench conveys the temperature of a game better than the field does. Look for the huddle before the first pitch, the cheering through a good innings, the line-up afterwards. Club or provincial colours in the background tie the frame to the team without needing a caption. Ease the aperture down a little here so that everyone across the width of the frame stays sharp, much as you would for a landscape.
The handshakes at the end are worth waiting for. Sportsmanship photographs well, and a zoom lens lets you stay far enough back that the moment stays natural — two players who have just spent two hours competing, shaking hands or pulling each other into a hug.
Equipment carries the evidence of everything that happened before the game started. Bats with worn grip tape, a glove creased into shape across several seasons, a ball scuffed from the infield dirt — shot close and tight, these details say more about the work behind a team than an action frame does. Look for texture: dust, sweat marks, tape, and the places where things have been repaired rather than replaced.
Few club grounds here are floodlit, so the more common problem is not a night game but a fixture that starts at four and finishes with the sun behind the trees. The light drops faster than it feels like it is dropping, and the shutter speed you need has not changed at all.
Raise ISO further than you would normally accept and add positive exposure compensation to hold the brightness. Where there are lights, watch white balance carefully — many sports floodlights produce a strong colour cast that auto white balance handles inconsistently, and shooting raw gives you room to correct it afterwards rather than fighting it on the night.
Lens choice for the diamond comes down to six things, and several of them pull against each other. Here is how to weigh them up.
Reach is the first requirement. The longer the focal length, the larger a distant player sits in the frame, and 300mm is better treated as a floor than a target. A high-ratio zoom such as the TAMRON 50-400mm F4.5-6.3 (Model A067) suits this particularly well, because a game moves between a batter fifteen metres away and an outfielder at seventy, and you cannot swap lenses in between.
Reach costs size and mass, though. A lens you can hold up through a three-hour fixture is worth more than one that outreaches it but leaves your arms shaking by the fourth innings. Handle it before you buy it.
A large maximum aperture — a small f-number — lets in more light, which is what makes 1/1250 sec possible once the sun has gone behind the pavilion. It also gives you the shallow depth of field that separates a player cleanly from a busy background.
On the diamond, light is nearly always the constraint. Fast shutter speeds and long focal lengths both consume it, and the maximum aperture decides how much room you have left to work with when they have taken their share.
You will be moving between positions, shooting from a crouch, and holding the camera up for long stretches while you wait for a play to develop. A lighter, more compact lens makes all of that sustainable rather than something you endure.
Balance matters as much as raw weight. A lens that sits well in the hand and does not pull the camera forward is easier to hold steady, so try the combination on your own body rather than judging from a specification sheet.
Most of this article is about shooting from a distance, but the close-up frames need the opposite. A short minimum object distance lets the same lens that reached the outfield also fill the frame with a glove, a grip or a scuffed ball.
It saves you carrying a second lens purely for the detail shots, which on a humid afternoon in Durban with a full bag over your shoulder is not a small consideration.
Everything on a diamond happens quickly and unpredictably, so autofocus has to acquire fast, track without hunting and stay locked as a player accelerates. Look for a lens with a linear motor drive rather than an older mechanical design, and check that it supports your camera's subject-detection modes. Quiet operation is a bonus at smaller grounds, where a loudly focusing lens carries further than you would like.
Handheld shooting at 400mm magnifies every tremor in your hands, and most grounds either restrict tripods and monopods or simply have nowhere to set one up. Vibration Compensation steadies the frame enough to make handheld long-lens work practical, and it is the single feature that most changes what you can bring home from a fixture.
The core of it is straightforward. Set a fast shutter speed, use continuous autofocus and burst shooting, and anticipate the play rather than reacting to it. Then move — the difference between a competent set of photographs and a memorable one is usually that the photographer worked the ground from several angles instead of settling into one seat for the afternoon.
The techniques here transfer wholesale. A cricket fixture at a school ground in Stellenbosch, a hockey match in Pretoria, an athletics meeting on a Saturday morning in Pietermaritzburg — the sport changes and the approach does not. Take what works on the diamond and use it wherever you find fast movement and a long way to shoot across.