| September 30, 2026
 South Africa's #1 Mobile Protection Brand

Run your hand over the bark of an old yellowwood and you can feel every ridge and fissure. Capturing that same sense of touch in a photograph is what texture is all about. Every subject has its own surface character, from rough and weathered to smooth and glossy, and when you record it well, your images feel more real and immediate. This guide explains what texture in photography means, the main types and the subjects that show it off, and the shooting and lens choices that help you capture it.
Texture in photography describes how the surface of a subject looks as though it would feel: the cracks and moss on a fallen branch, the velvety softness of a flower petal, the cool gloss of polished metal. Closely related is surface quality, sometimes discussed as photo surface quality, which refers to the overall impression of what a subject is made of, whether stone, glass, fabric or skin. When both are rendered well, a photograph conveys a tactile sense of reality and gains depth and three-dimensionality.
Capturing texture depends on technique, including light, angle and lens choice, but it starts with observation. Rather than simply pointing your camera at a subject, take time to study its material and surface, and look for the details that make it interesting.
Textures can be broadly described as soft or hard. Soft textures suggest gentleness and calm, while hard textures convey firmness and strength. Recognising which kind of photo texture you are working with helps you decide how to light and frame it. Here are the two main families.
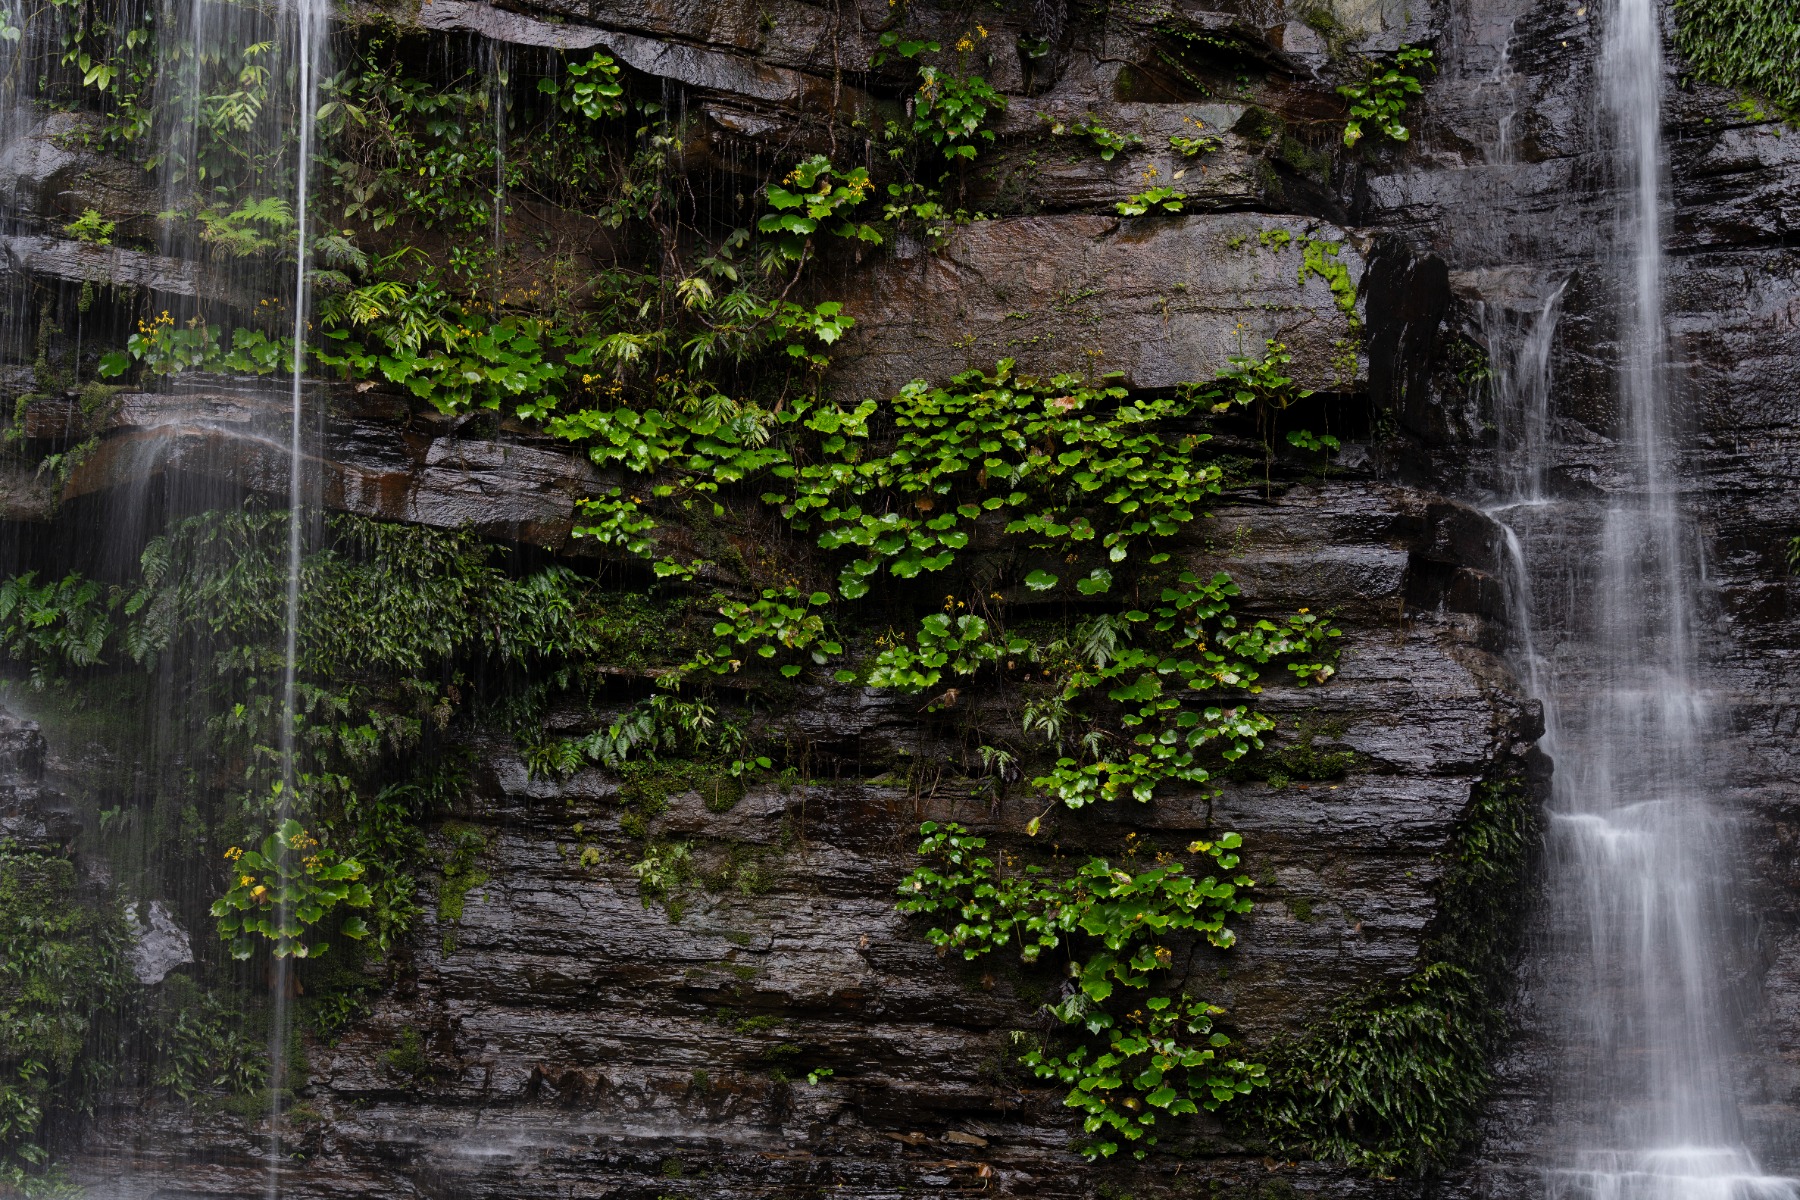
TAMRON 50-300mm F4.5-6.3 (Model A069) Focal length: 50mm Exposure: F4.5 Shutter Speed: 1/10sec ISO: 100
Nature is full of rich, varied textures. The deep ridges of bark and the flowing lines of wood grain are shaped over many years, and the fissured trunks of old yellowwoods in the Garden Route forests, weathered by decades or even centuries of wind and rain, carry a powerful sense of time. This example was shot at 50mm (around 75mm equivalent on APS-C) with a 1/10sec shutter speed, so a tripod or other steady support is essential at speeds this slow.
Water offers a different kind of texture. Ripples and reflections can suggest stillness or movement, and soft light makes them especially appealing. A Drakensberg stream wrapped in morning mist looks entirely different from the Vaal River catching the last light of sunset.
Rock is another rewarding subject. The layered sandstone of the Cederberg, eroded into ridges and folds, feels ancient when you capture its fine surface detail. Look for the moment when low sun rakes across the rock face, as the shadows in every crack double the sense of depth.
Natural subjects reveal different qualities depending on your viewpoint and how you choose to render their texture, so it pays to look at them from several angles.

TAMRON 28-200mm F2.8-5.6 (Model A071) Focal length: 52mm Exposure: F5.6 Shutter Speed: 1/30sec ISO: 6400
Objects made by people offer a huge range of textures, shaped by their materials and the way they were made. Placing contrasting materials side by side, such as rough wood beside smooth glass, makes each texture stronger.
With fabrics, emphasising the weave and fibres reveals the character of each material: the smooth sheen of silk, the soft warmth of Karoo mohair or wool, the slightly coarse feel of linen.
Metal surfaces respond strongly to the direction and intensity of light. Adjusting the position and size of your light source brings out the cool gleam of stainless steel, the warm glow of brass or the soft matt finish of aluminium. This example was shot at 52mm (around 78mm equivalent on APS-C) at ISO 6400, showing how a dim interior can push sensitivity high.
The walls and floors of older buildings carry their own character. Weathered facebrick, old sash windows and layers of paint in Pretoria’s older suburbs make appealing subjects that speak of the history of a place.
Some subjects lend themselves naturally to photo texture. Here are the most popular, with tips for each.
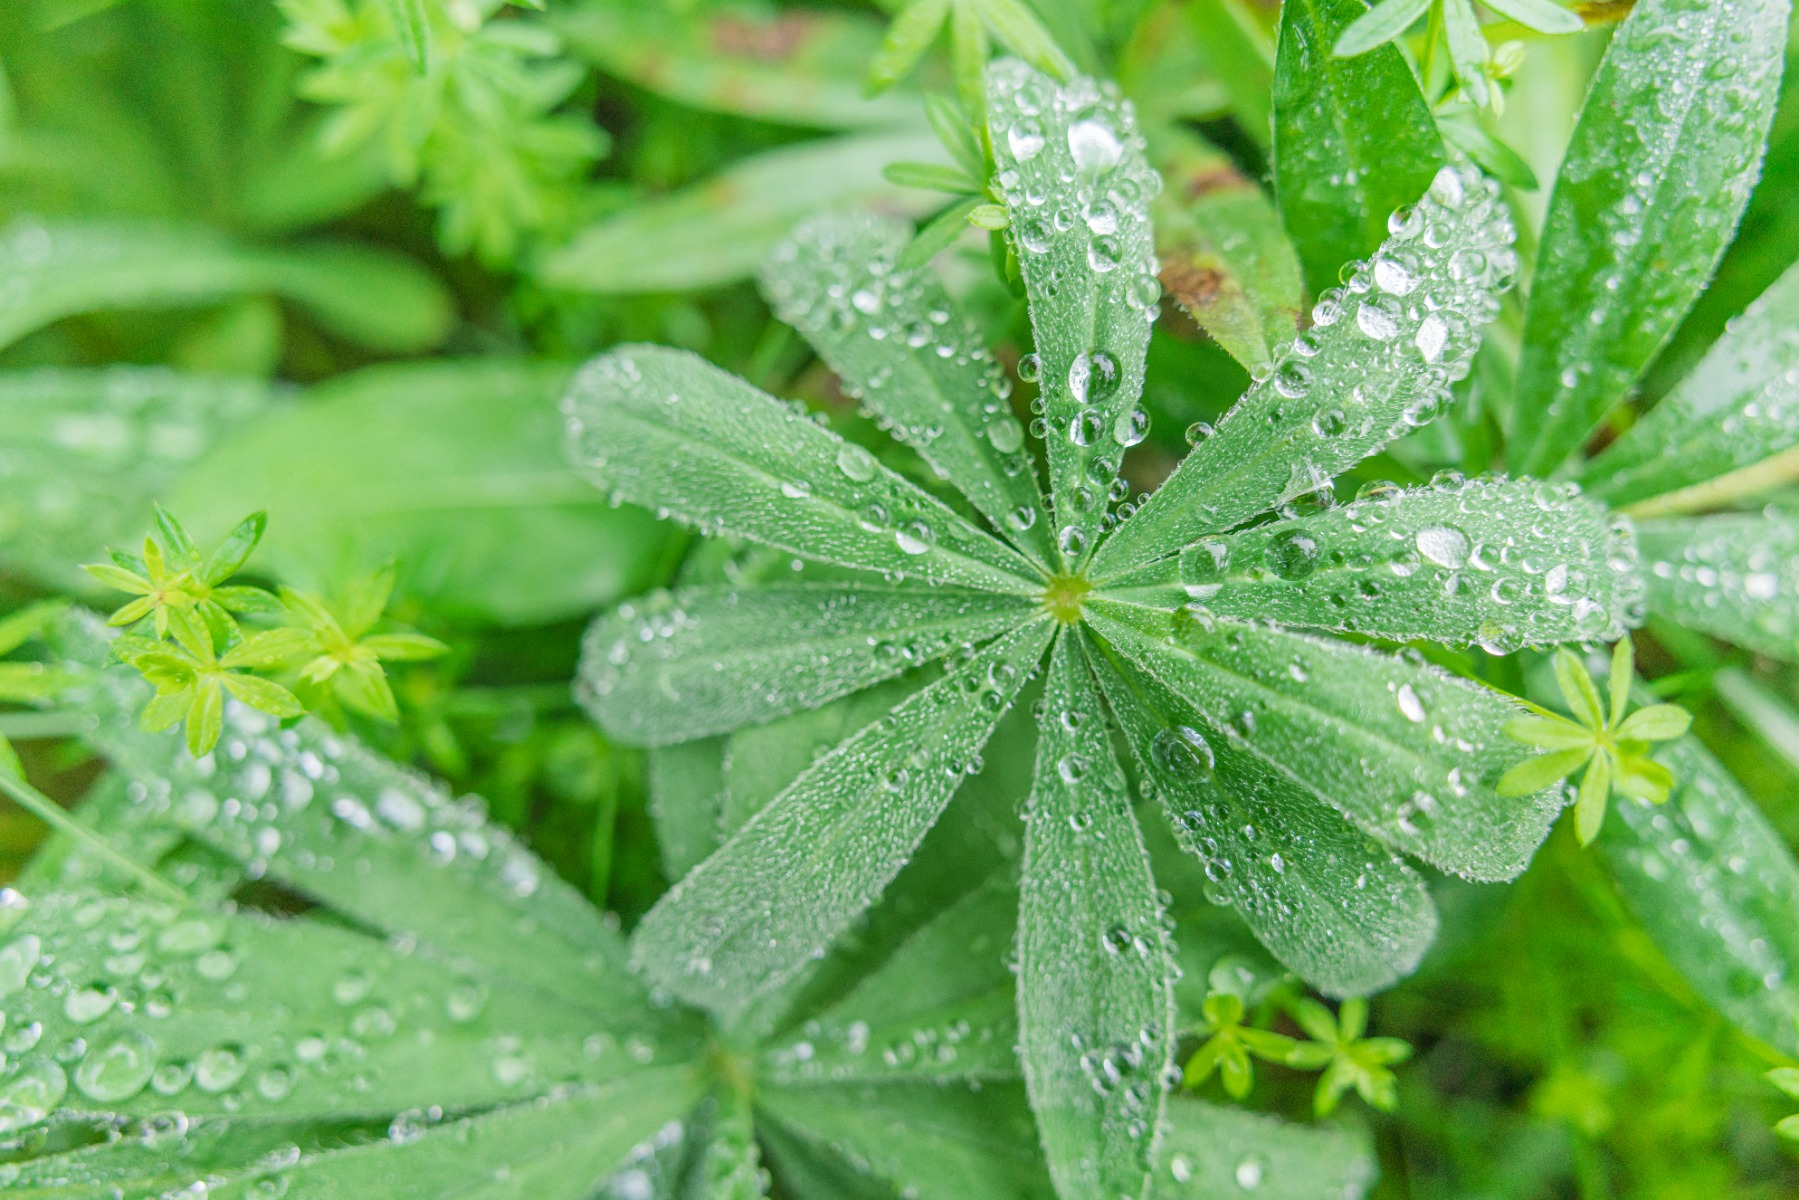
TAMRON 20mm F2.8 (Model F050) Focal length: 20mm Exposure: F2.8 Shutter Speed: 1/160sec ISO: 640
A macro lens or a lens with strong close-focus ability lets you capture the delicate texture of petals, including their translucency and fine patterns. This example was taken with a 20mm prime capable of 1:2 magnification (around 30mm equivalent on APS-C), showing that a wide lens can also work close. The softer light of early morning and late afternoon, rather than harsh midday sun, renders these patterns most beautifully. Proteas and fynbos, with their dense florets and fine hairs, are ideal, and petals dotted with water droplets make especially attractive images.
Backlight is another powerful option. Light shining through leaves makes their veins glow, while fine hairs on stems and petals catch a bright rim of light. Look closely, too, at details such as stamens and pistils.

TAMRON 90mm F2.8 MACRO (Model F072) Focal length: 90mm Exposure: F3.5 Shutter Speed: 1/160sec ISO: 640
With a macro lens, you can record the fine structure of wings and antennae in sharp detail. Look for the metallic sheen of a beetle in a KwaZulu-Natal garden and the geometric patterns on its shell, or move in close to reveal compound eyes and fine hairs. Slightly stronger light makes these features easier to capture. The example here was shot at F3.5 and 90mm (around 135mm equivalent on APS-C) for a soft background; when you need more of the insect sharp, stop down to around F8 to F11.
With small objects, focus on the texture of the material and the changes that time brings to things made by hand. For glass and ceramics, such as pieces from a Cape Town craft market, use the way light passes through or reflects from the surface to show the unevenness, gloss and translucency of the glaze. For wood and leather, the low, warm light of late afternoon creates an emotional mood. For antiques, side light emphasises form and brings out the patina that comes with age.

TAMRON 70-180mm F2.8 G2 (Model A065) Focal length: 70mm Exposure: F4.5 Shutter Speed: 1/8sec ISO: 100
Everyday tools reflect the lives of the people who use them. Metal items such as a well-used knife or a pair of braai tongs look striking up close, with their scratches, wear and dulled shine. Handles and grips gain realism when you capture their polish, fingerprints and small dents. Sports equipment has its own character too, from the grain of a cricket bat to the pebbled grip of a rugby ball, and photographing it with the person who uses it adds a narrative element. This example was taken at 70mm (around 105mm equivalent on APS-C) with a 1/8sec exposure, so steady support was needed.
When photographing a car, soft light brings out the curves and body lines far better than harsh sun. At a classic car show in Gauteng, for example, look for bodywork where gentle reflections trace the shape of each panel. For engines and mechanical parts, a telephoto or macro lens isolates details and highlights the precision of their design, and the gloss of oil and wear adds character. Inside the vehicle, natural light reveals the contrast between materials such as leather seats and wooden trim. A polarising filter helps control reflections on paintwork and glass, revealing the surface beneath.
Side light brings out the three-dimensional texture of walls, and the whitewashed walls of Cape Dutch buildings, raked by low sun, show every irregularity in the plaster. For older buildings, a wide-angle lens lets you capture the whole space and suggest the relationship between past and present. Modern buildings call for a different approach: emphasise materials such as glass and concrete and the lines of their design, as with Johannesburg’s towers, for a clean, contemporary mood. When the texture of an entire façade matters, keep the camera level so that vertical lines stay straight.
In portraits, texture includes the fine detail of skin and the lines of the face. Soft light, such as open shade or late-afternoon sun, renders skin naturally and flatteringly. Where you want more character, gently emphasising the contrast of lines and creases adds depth. Hands are a particularly expressive subject: the clay-covered hands of a potter in the KwaZulu-Natal Midlands, photographed up close, tell a story about craft and individuality. Keep the light soft and the approach respectful, as the aim is to capture character rather than exaggerate every line.
These texture shooting tips cover the core techniques for capturing texture in photography with clarity and depth.
Getting close lets you capture details that are hard to see with the naked eye. When shooting close-ups, decide exactly which area you want to highlight and use bokeh to make it stand out. Depth of field is very shallow at close range, especially with a macro lens, so choose your point of focus carefully. You do not need a macro lens to work close, either: any lens with a short minimum object distance can produce strong close-ups. Our guide to close-up photography covers these techniques in more depth.
Correct exposure is essential for clear, detailed texture, so avoid both overexposure and underexposure. The histogram is your best guide: check it after each test shot to make sure neither end is clipping.
Stopping down from the widest aperture, which means raising the F-number slightly, makes it easier to capture fine detail. A higher F-number deepens depth of field and extends the zone of sharpness, helping to record three-dimensional texture clearly. Around F8 to F11 is a good starting point, adjusted to suit the scene. If you want a softer look with more background blur, open the aperture instead.
In aperture-priority mode, you set the aperture and the camera chooses the shutter speed to match the light. If images come out too dark indoors, mounting the camera on a tripod lets you use a slower shutter speed while still recording fine detail.
With moving subjects, you will need a shutter speed of at least 1/125sec, and faster for flowers swaying in the wind or insects on the move.
Start at ISO 100 to 400 and raise the setting only when the light requires it, such as when you need a fast shutter speed in a dim location. Higher ISO values introduce noise that can mask fine detail, so aim to stay at or below around ISO 3200 to 6400. The ISO 6400 example above shows how dim interiors can push you to that limit.
Shiny subjects are prone to blown-out highlights because of reflections, so negative exposure compensation helps preserve highlight detail. For shadow areas within a scene, positive compensation lifts them and prevents crushed shadows. A dark subject filling the frame is the exception: the meter tends to render it too bright, so slight negative compensation keeps it rich and deep. Review each result and adjust as needed.
Close-ups are easily spoiled by slight focus errors, so pin down exactly which detail you want sharp. Decide before you shoot which part of the texture matters most: the delicate pattern of a petal, perhaps, or the most beautiful stretch of wood grain on an old oak. Keeping the camera’s sensor parallel to the textured surface also helps, as it places more of that surface within the plane of focus. For subjects deeper than your depth of field, focus stacking can combine several frames into one image that is sharp throughout.
Side light is the most effective way to reveal texture. As it skims across a surface, every bump and hollow casts a small shadow, creating a strong three-dimensional effect. In natural light, the low sun of early morning and late afternoon is ideal; in midwinter, for example, the sun sets between about 17:00 and 17:45 SAST, depending on where you are in the country.
For translucent subjects such as petals and leaves, and for fine hairs on plants, backlight brings out their delicate beauty. Exposure can be tricky in backlight, so use spot metering or exposure compensation to get it right.
Front light reproduces colour and pattern faithfully, which suits colourful textures and fine designs. It creates little depth, however, so add a reflector or a secondary light if you need more shape.
Build your composition so that the texture itself becomes the star. Experiment with different angles and distances until you find a view that shows off the subject’s depth and detail most effectively. Moving around the subject, dropping to a low position or looking straight down from above can all reveal something new. Even everyday subjects become striking when shown in an unusual way, such as the dimpled peel of a naartjie, the vein pattern of a leaf or the weave of a fabric photographed in extreme close-up.
Framing matters too. Filling the frame with texture creates an immersive image, while placing the texture in just part of the frame sets up contrast with other elements. Balancing these approaches, and thinking about contrast and emphasis, gives your texture images more impact. Pairing smooth with rough, as covered in our guide to contrast in photography, makes both textures more striking.
The right lens makes it much easier to capture detail and texture. These are the main features to consider.
Lenses with a wide maximum aperture, meaning a small F-number, make it easier to shoot in dim conditions. Bright lenses such as F2.8 and F4 designs render texture clearly even indoors or in low light, and they also produce strong background blur, which helps the texture stand out as the subject.
A medium telephoto macro lens is easy to use for close-up work, capturing texture in fine detail while keeping a comfortable distance from the subject.
A telephoto lens can fill the frame with the texture of a distant subject, and its greater magnification produces stronger background blur, which isolates the texture. It is also ideal for wary subjects such as birds, which you can photograph without getting too close.
A wide-angle lens takes in a broad scene, making it suitable for conveying the overall form and texture of large subjects such as landscapes and buildings. Because it lets you work close to the foreground, it makes perspective more pronounced, which is particularly effective for building interiors and distinctive textures in a landscape.
The shorter a lens’s minimum object distance, the closer you can get to the subject and the larger its texture appears in the frame. It is worth checking this specification when choosing a lens, as a short minimum object distance can deliver macro-like results without a dedicated macro lens. Start by checking the specification of the lens you already own and make the most of its capabilities.
Check that the lens focuses smoothly and reliably. Tracking performance matters for moving subjects such as insects and birds, and a quiet AF motor is valuable when photographing creatures that are sensitive to sound. Manual focus remains useful for precise work such as macro photography, so look for lenses that switch easily between AF and MF and offer a smooth, easy-to-adjust focus ring.
If a lens has VC (Vibration Compensation), TAMRON’s image stabilisation system, it becomes much easier to capture sharp, stable images when shooting handheld. Image stabilisation is particularly effective in macro and telephoto photography, where the slightest hand movement can show up as blur. Some lenses also allow the stabilisation behaviour to be adjusted, making it easier to adapt to different shooting styles.
Texture in photography adds depth and realism to an image. By adjusting the strength, direction and angle of light, you can draw out entirely different qualities from the same subject. Technique matters, but an eye for careful observation matters even more. Try a simple exercise: photograph one surface at midday and again in side light at golden hour, then compare the results. Paying attention to the details of everyday things you usually overlook is the best way to find subjects with real texture.