| September 25, 2026
 South Africa's #1 Mobile Protection Brand
After a Cape winter front passes, every fynbos leaf can hold a row of raindrops, each one reflecting the sky like a tiny lens. Moments like these are easy to walk past, yet they reveal an entire world when you move in close. Flowers, insects, jewellery and everyday objects are all rewarding subjects for close-up photography. This guide explains what close-up and macro shooting mean, the subjects that suit them, the gear that helps, the techniques that make the difference and what to look for in a lens.
What is close-up photography?
TAMRON 18-300mm F3.5-6.3 (Model B061) Focal length: 18mm Exposure: F3.5 Shutter Speed: 1/500sec ISO: 100
Close-up photography means photographing a subject from very near so that it appears larger in the frame than you would normally see it. When you work within a few centimetres of a subject, the result is commonly described as close-up or macro shooting. Strictly speaking, macro shooting refers to capturing a subject at life size or larger, a magnification of 1:1, but in everyday use the two terms are largely interchangeable.
The key is a lens with a short minimum object distance, which lets you move close enough to reveal details the naked eye easily misses. You do not always need a specialist lens: this example was captured at 18mm with an APS-C zoom, around 27mm in full-frame terms, placing a wildflower against the landscape behind it, a shot that suits a Drakensberg meadow below the escarpment. Much of the appeal of close-up work lies in discovering unexpected shapes and seeing familiar subjects in a completely new way.
Almost anything can become a close-up subject, but some reward the approach especially well, and each calls for a slightly different technique.
Flowers and plants
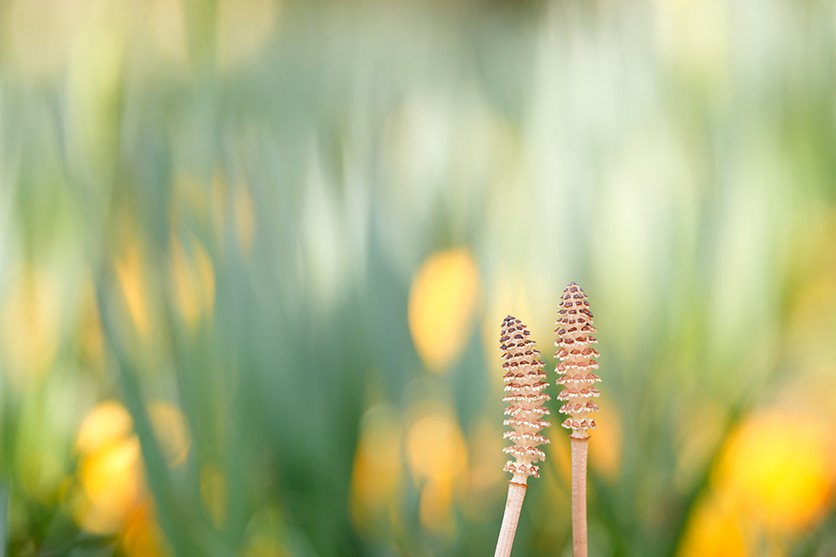
TAMRON 90mm F2.8 MACRO (Model F072) Focal length: 90mm Exposure: F2.8 Shutter Speed: 1/320sec ISO: 160
Flowers and plants are full of intricate structure, which makes them ideal for close-up photography. Proteas and pincushions reward a close approach, with their dense florets and fine textures. Soft light shows these details best: side light or backlight in the early morning or late afternoon brings out the texture of petals and the translucency of leaves. Shooting at or near the widest aperture, as in this 90mm example at F2.8 (around 135mm equivalent on APS-C), softens the foreground and background for a dreamlike result.
Macro photography of water drops is a rewarding extension. Raindrops on fynbos after a winter front, or dew on spider webs on a Highveld summer morning, act as tiny lenses, each holding a miniature image of its surroundings. Focus precisely on the drop itself and let everything else fall away into blur. Photograph plants where they grow rather than picking them, as many fynbos species are protected.
Small objects and handcrafted details
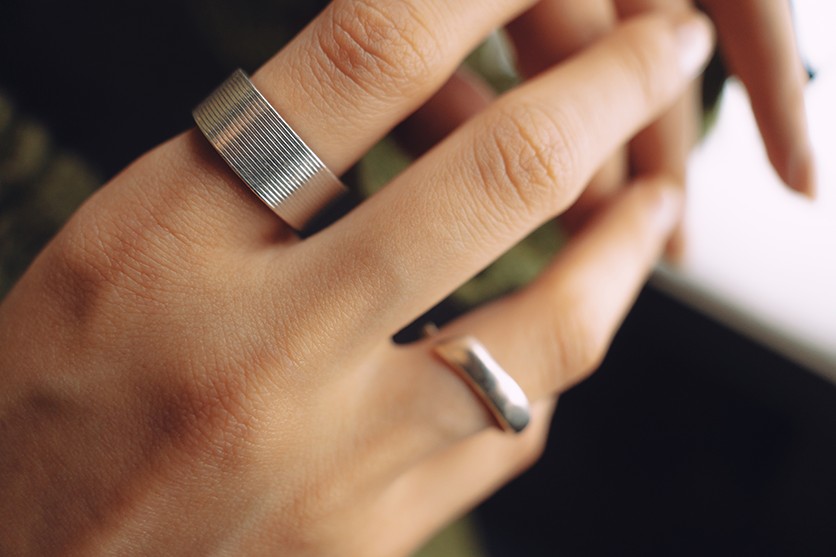
TAMRON 17-70mm F2.8 (Model B070) Focal length: 17mm Exposure: F3.2 Shutter Speed: 1/400sec ISO: 400
Jewellery, ceramics and handcrafted items also make excellent subjects, revealing craftsmanship, textures and small details that are easy to overlook. A piece of handmade jewellery from a Johannesburg craft market, for example, looks entirely different when its surface fills the frame.
Side light creates shadows that give small objects depth and a three-dimensional feel, while background blur makes the subject stand out. This example was taken at 17mm on an APS-C lens, equivalent to around 25.5mm in full-frame terms, showing that a standard zoom with good close-focus ability can handle this kind of work.
Insects
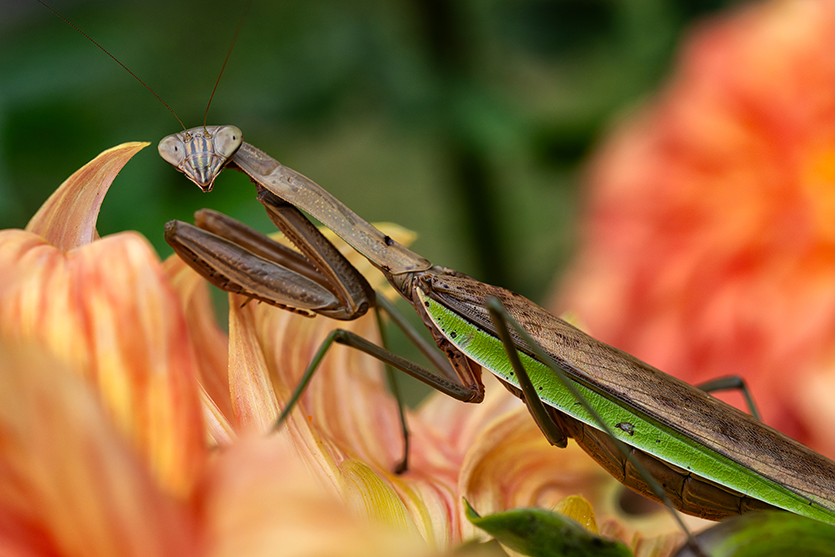
TAMRON 90mm F2.8 MACRO (Model F072) Focal length: 90mm Exposure: F8 Shutter Speed: 1/1000sec ISO: 2000
With insects, aim for details such as compound eyes or the patterns on wings. Honey bees working fynbos flowers, dragonflies resting at a KwaZulu-Natal wetland and praying mantises in Gauteng gardens are all rewarding subjects. Including a flower or plant in the background helps show where the insect lives. This example was shot at 90mm and F8 (around 135mm equivalent on APS-C) to hold more of the insect in focus.
Many insects are easily disturbed, so watch their behaviour and wait for the right moment rather than chasing them. Working distance, the gap between the front of the lens and the subject, matters more here than anywhere else. Telephoto macro photography, using a medium telephoto macro lens or a telephoto zoom with good close-focus ability, lets you stay further back and avoid startling your subject. Never handle or move insects for a photograph.
Maximum magnification and minimum object distance
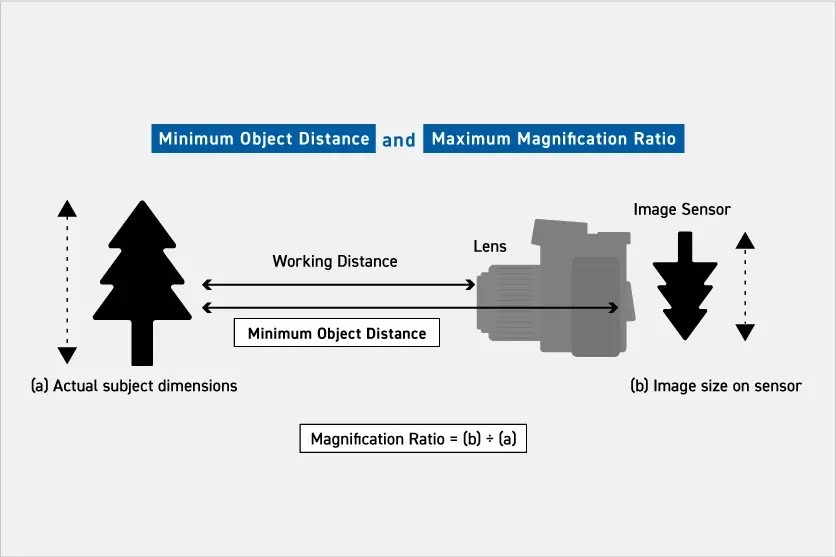
Two specifications explain a lens’s close-up ability: maximum magnification and minimum object distance.
Maximum magnification is the ratio between the size of the subject’s image on the sensor and the subject’s real size, measured at the closest focusing distance. If a 1cm subject appears 1cm across on the sensor, the magnification is life size, written as 1:1. Lenses capable of 1:1 are generally classed as macro lenses.
Minimum object distance is the closest distance at which the lens can focus, measured from the subject to the sensor plane, which is usually marked on the camera body. It is not the same as working distance, which is measured from the front of the lens, so a lens with a short minimum object distance may leave only a few centimetres between the glass and the subject.
When comparing lenses, check both figures together to understand how close you can get and how large the subject will appear.
Because the word macro is so closely linked to macro lenses, it is easy to assume you cannot do close-up photography without one. Macro lenses are certainly the specialist tool, designed to reach 1:1 magnification and deliver excellent sharpness at close distances.
They are not the only option, though. Many zoom and prime lenses offer a short minimum object distance and respectable magnification, as the 18mm and 17mm examples in this article show. Before choosing a lens specifically for close-up work, check the maximum magnification and minimum object distance of the lenses you already own or are considering.
Close-up photography demands precise focusing and exposure, and the right macro gear makes both easier to achieve.
At close range, the slightest movement shows up as blur, so a tripod adds valuable stability and helps you hold focus exactly where you want it. Tripods do limit how quickly you can change position, however, and many botanical gardens and reserves restrict their use. Macro photography with a monopod is a practical middle ground, providing extra support while leaving you free to move between subjects.
Indoors or in dim conditions, natural light may not be enough. Macro photography lighting in the form of a flash or small LED panel can bring out textures such as the shine of metal or the translucency of a leaf.
A light placed in front of the subject also works as fill for backlit scenes, lifting detail in the shadows. For even coverage, a ring flash surrounds the lens and lights the subject from all sides, reducing hard shadows.
The following macro shooting techniques will help you get consistently better results, whatever your subject.
Choose your point of focus
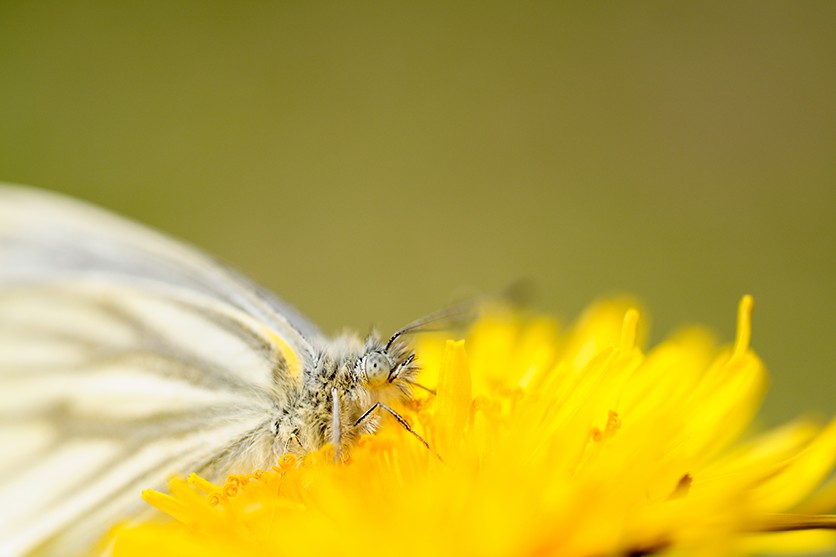
TAMRON 90mm F2.8 MACRO (Model F072) Focal length: 90mm Exposure: F2.8 Shutter Speed: 1/1600sec ISO: 640
Depth of field, the zone of acceptable sharpness, becomes extremely shallow at close range, so decide in advance exactly which part of the subject should be sharp. This example was captured at F2.8 and 90mm (around 135mm equivalent on APS-C), where the in-focus zone is only a few millimetres deep.
With a praying mantis, for example, choose between the eyes, the antennae or the forelegs before you shoot; the eyes are usually the strongest choice. Autofocus can struggle to land on such a precise point, so switch to manual focus when needed. For subjects that stay still, focus stacking, which combines several frames focused at different depths, can extend sharpness beyond what a single shot allows.
Correct exposure is the foundation of a strong close-up, and these settings offer a reliable starting point.
Background blur shapes the look of a close-up, so aperture-priority mode is usually the best choice, letting you set the aperture while the camera handles shutter speed. If autofocus struggles, switch to manual focus rather than changing the exposure mode.
A wide aperture such as F2.8 blurs the background strongly and isolates the subject for real impact. Stopping down to F8 or F11 increases depth of field, bringing more of the subject into focus and recording fine detail. Beyond about F16, diffraction begins to soften fine detail slightly, so reserve the smallest apertures for when you need the extra depth.
Camera shake is magnified at close range, so handheld macro shooting needs a faster shutter speed than you might expect. Aim for at least 1/250sec, and faster with longer focal lengths or moving subjects. If the image comes out too dark, raise ISO or add light rather than slowing the shutter. Lenses with VC (Vibration Compensation), TAMRON’s image stabilisation system, help reduce shake, though image stabilisation is less effective against the small forward and backward movements that shift focus at high magnification. On a tripod, slower shutter speeds become practical, allowing lower ISO settings in dim conditions.
Close-ups are all about fine detail, so clean, low-noise images are the goal. In bright outdoor conditions, ISO 100 to 400 is ideal. In lower light you may need to go higher, and test shots at ISO 1600 to 3200 can help you find the right balance for darker scenes.
In backlit scenes, where the subject can look too dark, add positive compensation to reveal detail. Pale subjects such as white petals often fool the camera’s meter into underexposing, so they may also need a little positive compensation; check the highlights to make sure they are not clipping. Dark subjects, such as many insects, tend to be overexposed by the meter, so slight negative compensation keeps them rich and deep.
Use the direction of light
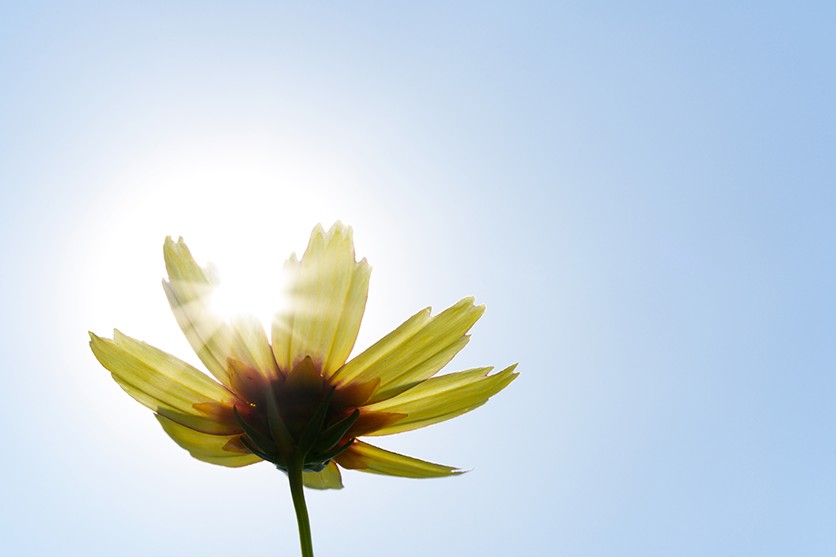
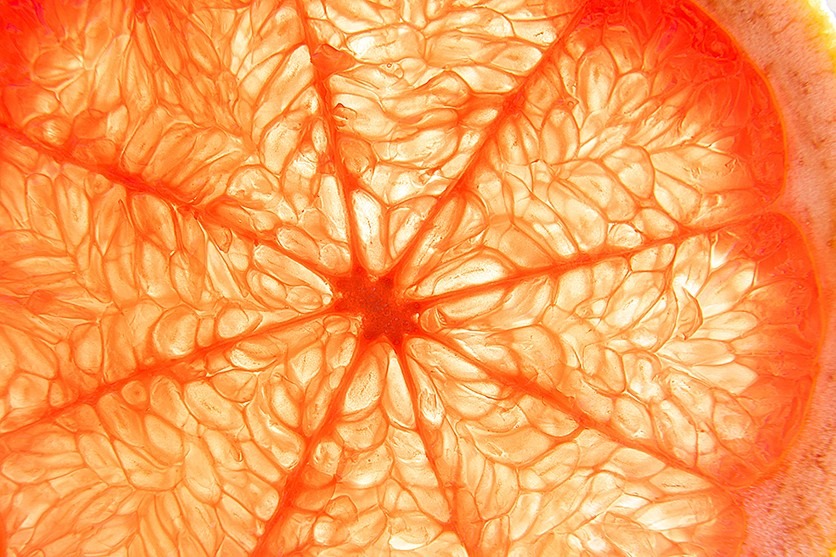
TAMRON 90mm F2.8 MACRO (Model F072) Focal length: 90mm Exposure: F16 Shutter Speed: 1/1000sec ISO: 800
Light direction has a big influence on how much detail you reveal. Backlight emphasises outlines and surface gloss, while side light creates shadows that add depth and texture, making both especially effective for insects. Butterflies in a KwaZulu-Natal coastal garden, backlit by the morning sun, show how translucent wings can glow. This example was shot at F16 and 90mm (around 135mm equivalent on APS-C) for maximum depth of field.
Strengthen the subject with composition
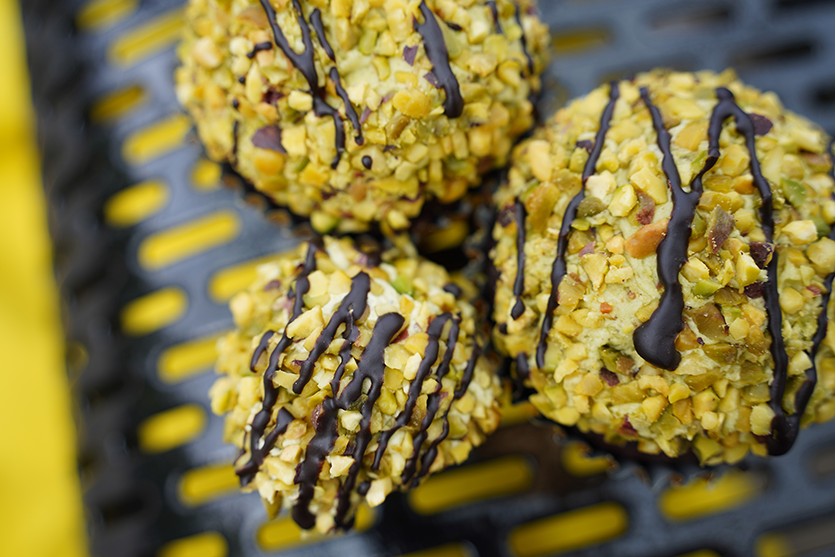
TAMRON 20-40mm F2.8 (Model A062) Focal length: 33mm Exposure: F4 Shutter Speed: 1/250sec ISO: 100
Composition helps bring out a subject’s character. Symmetrical patterns, such as the radiating petals of West Coast vygies, look striking with central composition. Diagonal composition adds energy to small objects, and the rule of thirds suits images that rely on balance and negative space. Changing your camera angle and position, such as dropping to a low position level with a flower, opens up further options.
Using these classic layouts as a starting point helps you create images with strong visual impact. This example was taken at 33mm (around 50mm equivalent on APS-C).
In close-up photography, the background occupies only a small area, so every element in it counts. Decide deliberately what to include and what to leave out. A contrasting colour behind the subject can intensify its own colour, such as the violet of Pretoria’s jacarandas behind a yellow flower, or the soft greens of Winelands vineyards behind a red one. Alternatively, blurring the background into smooth bokeh makes the subject appear larger and more prominent.
The right lens makes close-up photography easier and more rewarding. These are the main points to consider; our dedicated guides to macro lenses and half macro lenses cover each in more depth.
A shorter minimum object distance lets you move closer to your subject, opening up bolder compositions. Even if close-ups are not your main interest, a lens that focuses closely is useful whenever a small subject catches your eye.
Higher maximum magnification makes the subject larger in the frame. A macro lens with 1:1 magnification reproduces the subject at life size on the sensor, capturing the finest detail. A half macro lens with 1:2 magnification shows subjects at half life size, with a wider view that can include more of the surroundings.
A wide maximum aperture offers two separate benefits. It lets in more light, which helps in dim conditions, and it produces a shallower depth of field for stronger background blur and a softer, more dreamlike look.
Focal length determines both the field of view and how far you can stand from the subject. A wide-angle lens includes the surroundings, such as a flower set against the landscape, while a standard lens balances subject and background for natural compositions. For telephoto macro photography, a longer focal length gives you more working distance, so you can magnify small subjects without moving close enough to disturb them.
Alongside image quality, consider how heavy and portable a lens is. A lighter lens is less tiring to hold during long sessions, which in turn helps you keep the camera steady. A compact lens is also easier to position in tight spaces close to the ground or among foliage.
Check how quickly and accurately the lens focuses at close range. For moving subjects such as insects, tracking performance matters as well.
Close-up photography turns the small subjects around you into something extraordinary. By controlling depth of field, focus and light, you can reveal detail and texture that usually go unnoticed. Start simply: after the next rain, take your camera into the garden and photograph a single leaf holding a drop of water. Choose a lens with strong close-up ability and good rendering, and you will soon find subjects everywhere.